This tutorial is for people who may be new to photography and want to capture beautiful HDR photos. It’s actually quite easy after you figure out the process. You’ll be creating amazing photos of exotic vacations or just your local city in no time.
If you’re already shooting HDR photos, check out some of my tips.
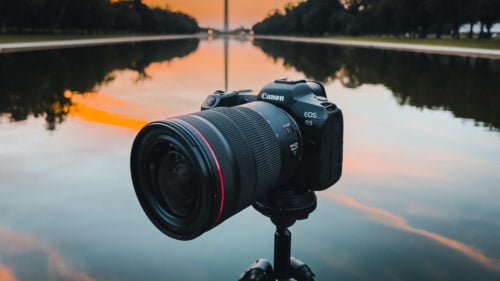
All you need is a basic DSLR, some software, a tripod, and an eye for breathtaking locations. I’ve found in my travels the toughest thing is just finding what to photograph.
What is HDR? I’ll give a quick run down. HDR stands for High Dynamic Range, which is fancy speak for a photo that has everything exposed properly. In this tutorial we’ll be taking multiple photos and merging the best parts into one piece of artwork.
What I’ll be using in this tutorial
- Canon T1i (You can get this used for about ~$249)
- Dolica Proline Tripod (Great tripod for the money ~$49)
- Photomatix ($99 – use promo code “HitTheButton” and save 15%)
- An eye for detail
- My sample files
I’m using my older gear to show you don’t need top-of-the-line gear to produce excellent results, but if interested you can view my camera gear.
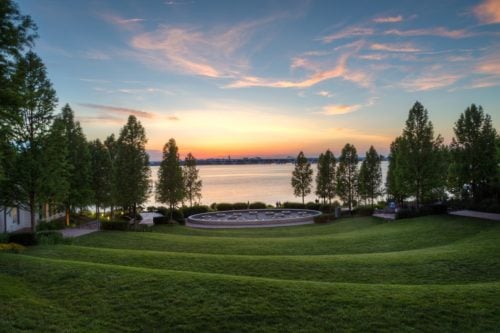
Our Final Result

Explore
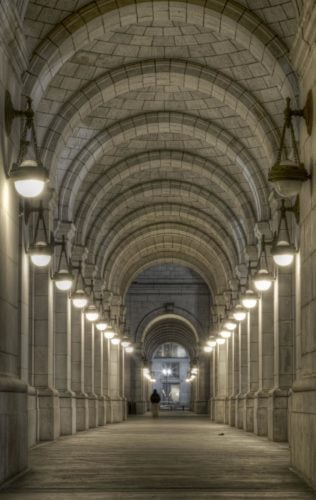
As I mentioned earlier, finding interesting scenes to shoot is one of the most challenging and most rewarding parts of HDR photography. I like to think that if a subject isn’t interesting when it’s unedited it won’t be interesting when you modify the photo, so make sure you’re capturing something you find interesting.
Ideally you’ll photograph something with a lot of contrast to take advantage of the HDR effect. Taking a picture of a sunny day through a window while in a dark room is a good example of this. You’ll notice in your photo either the outside area will be extremely bright (or overexposed) while the inside of the room will be properly exposed or vice versa. When applying HDR algorithms to a photo it takes the best parts of each photos to make every aspect of the photo properly exposed.
I recommend sunrise/sunset, buildings/interiors, or lit up night scenes. Taking photos around noon usually produces lackluster results but I’m sure you can be creative.
Set Up Your Camera
Taking photos with the proper settings is very important for HDR photos. The software we’ll be using (Photomatix) works better when it has a few photos to capture data from. So you’ll need a steady shot and multiple exposures to achieve proper effects, which is why you should be using a tripod. Most DSLR’s have an option to auto bracket multiple exposures which will do most of the work for you.
Most importantly your camera should be shooting RAW, not jpeg. RAW photos allow you to properly edit your photos. If you’re not used to shooting RAW you’ll notice you won’t be able to upload them right to the internet like jpegs. Using software like Adobe Lightroom can help you manage all of your RAW photos along with editing them but that’s a tutorial for another day. We’ll be producing a jpeg out of RAW files so no need to fear.
Feel free to get creative with your options but I normally put my camera on aperture priority mode (usually “AV” on the dial). This will lock your aperture while taking multiple photos so you won’t have a different depth of field in each photo (learn more about this in a basic photography tutorial). If you’re shooting a sunset try using f/16 or f/22, this will create the standard rays of light coming out of the sun.
Next you’ll have to make your camera auto bracket, which will take multiple photos of different exposures automatically. I’m using a Canon in this tutorial (Here’s a T2i Guide for auto bracketing) but if you have a Nikon consult your manual or YouTube. I normally have mine set to capture -2,0,+2. It’ll give you a good range of photos to work with.
After having all of those set I normally use the 2 second timer built into the camera. This allows me to hit the button then the camera will delay 2 seconds and snap all of my auto bracketed shots. Using a self timer is a great alternative to using a remote because you don’t have to carry extra equipment. The main reason to use a remote or timer is to reduce shake because when you’re holding down the button you produce a slight shake.
Just to review: have your camera on a tripod, have your camera on RAW mode, have your dial on AV mode with f/16, turn on auto bracketing with 2 step gaps (-2,0,+2) and a 2 second self timer on. These are the settings I’ll be using but feel free to get creative, all that’s left to do is hitting the button.
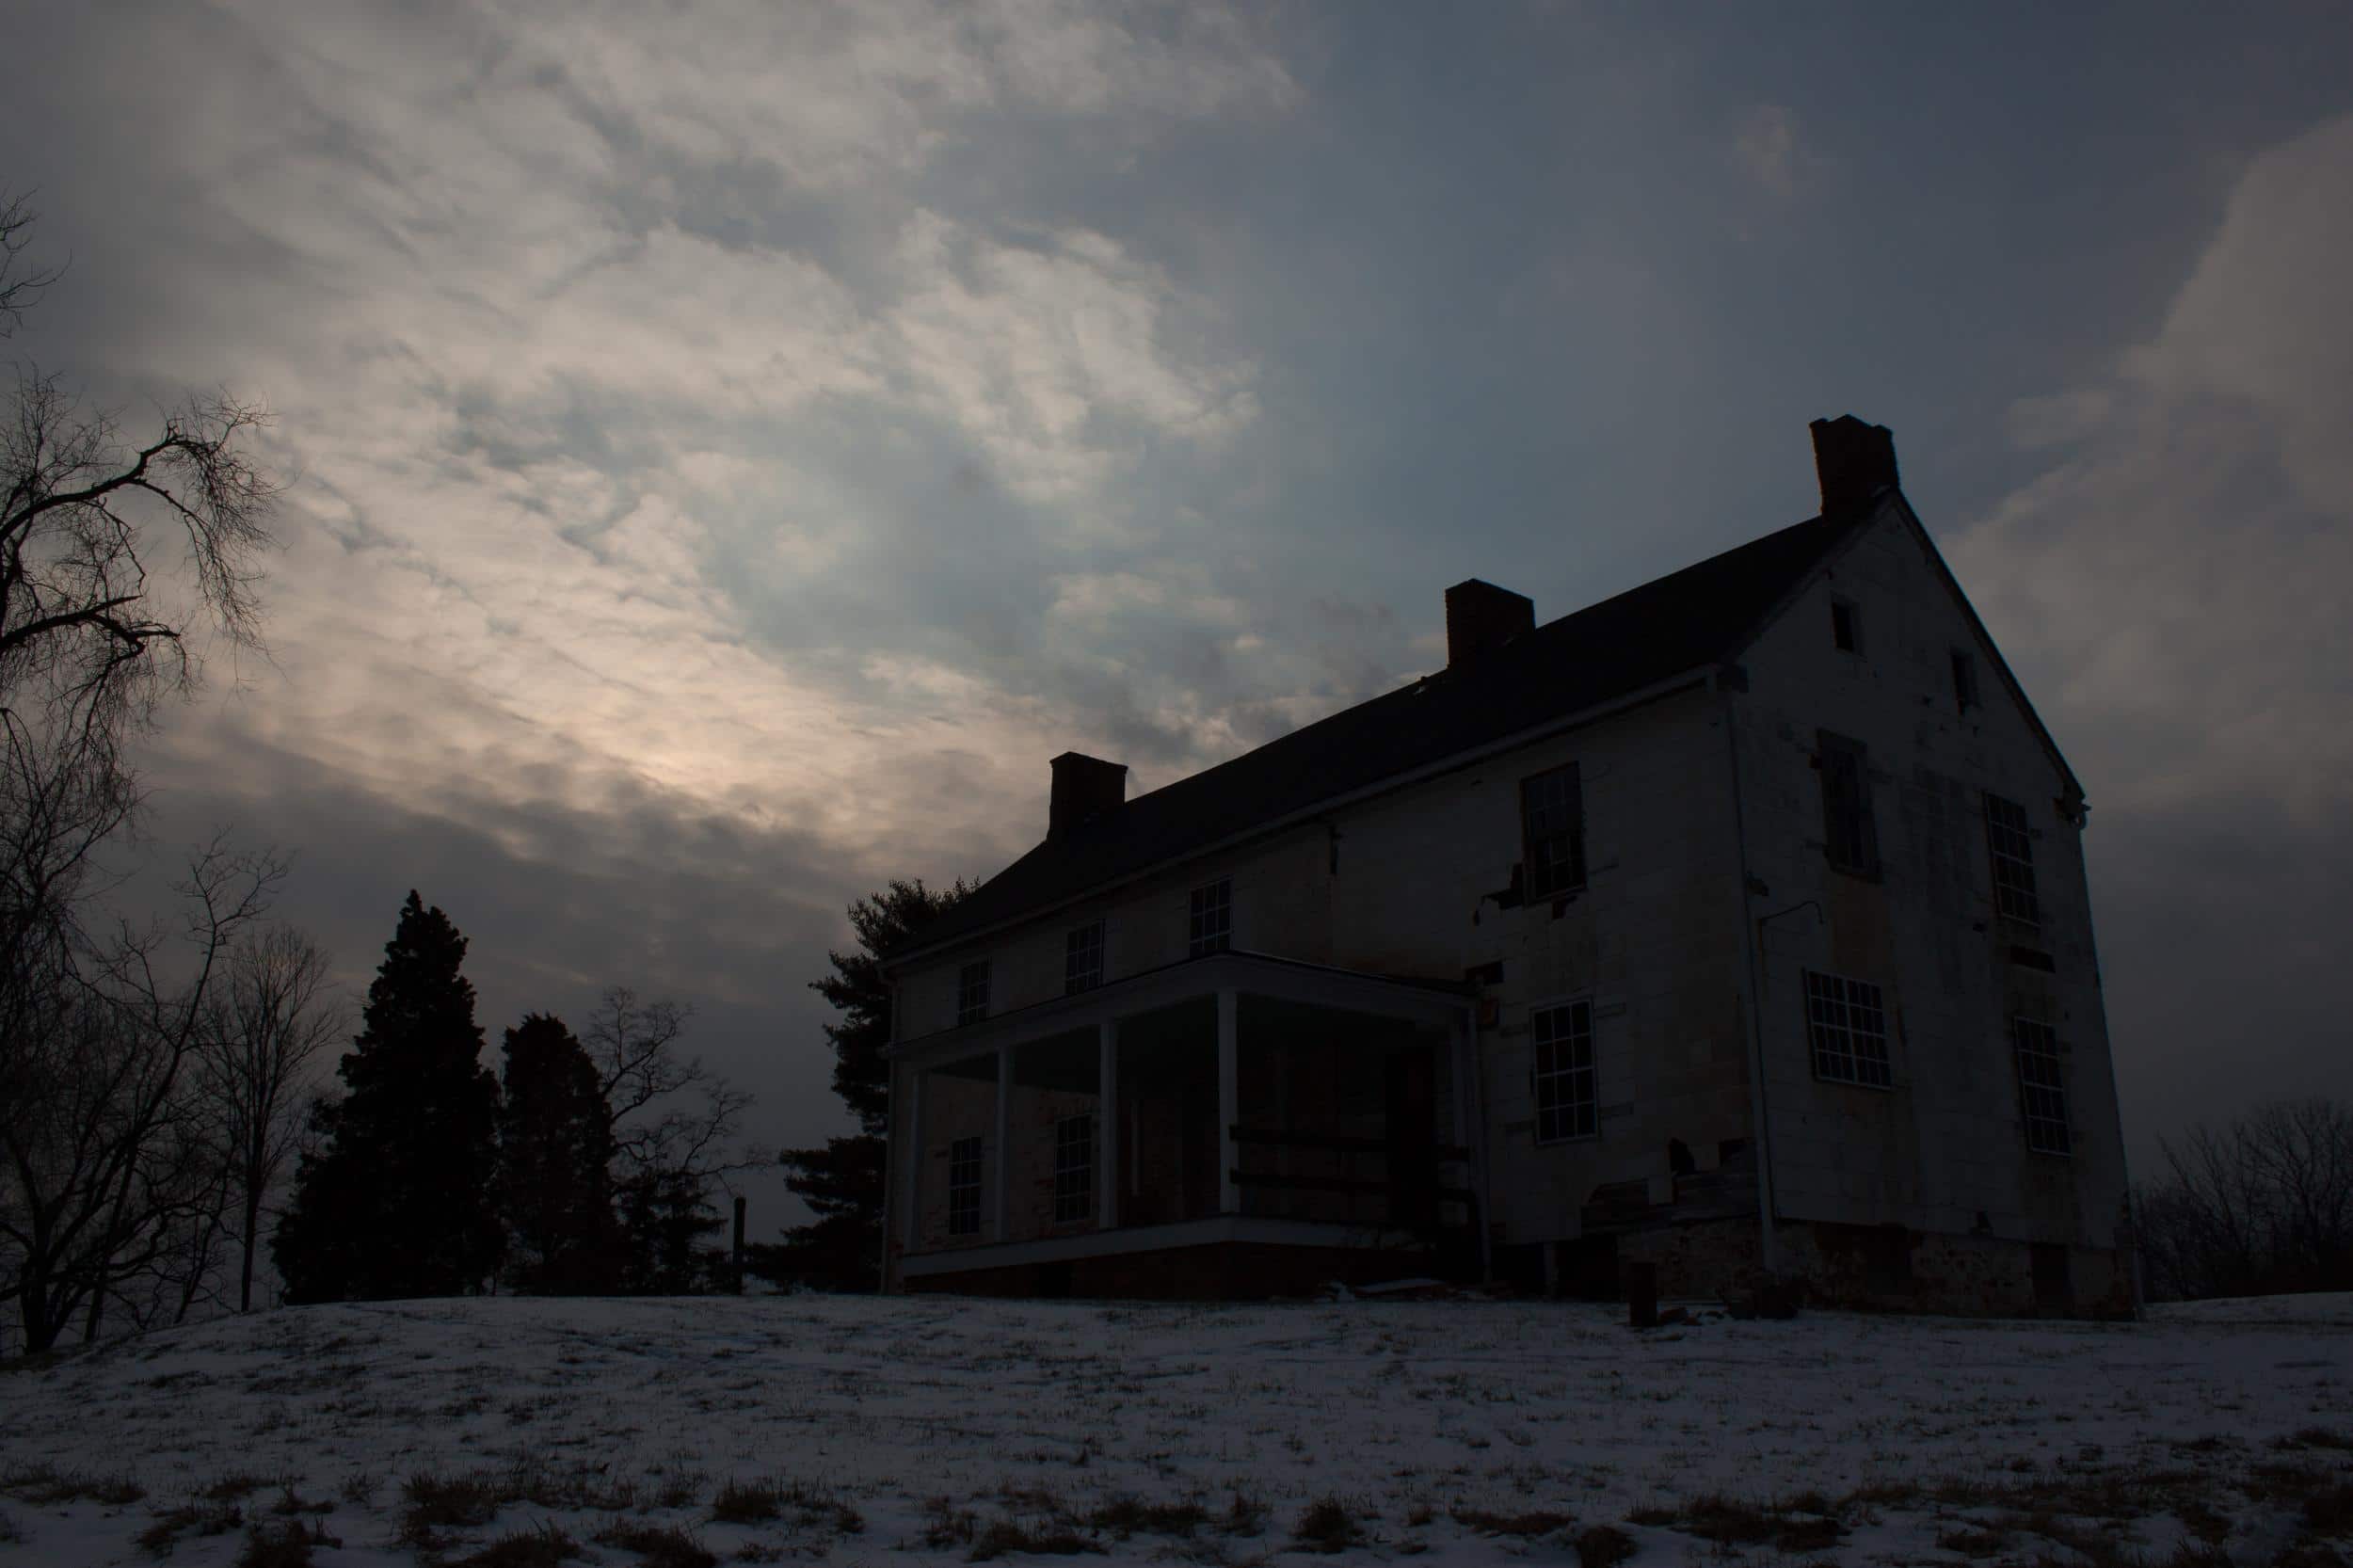
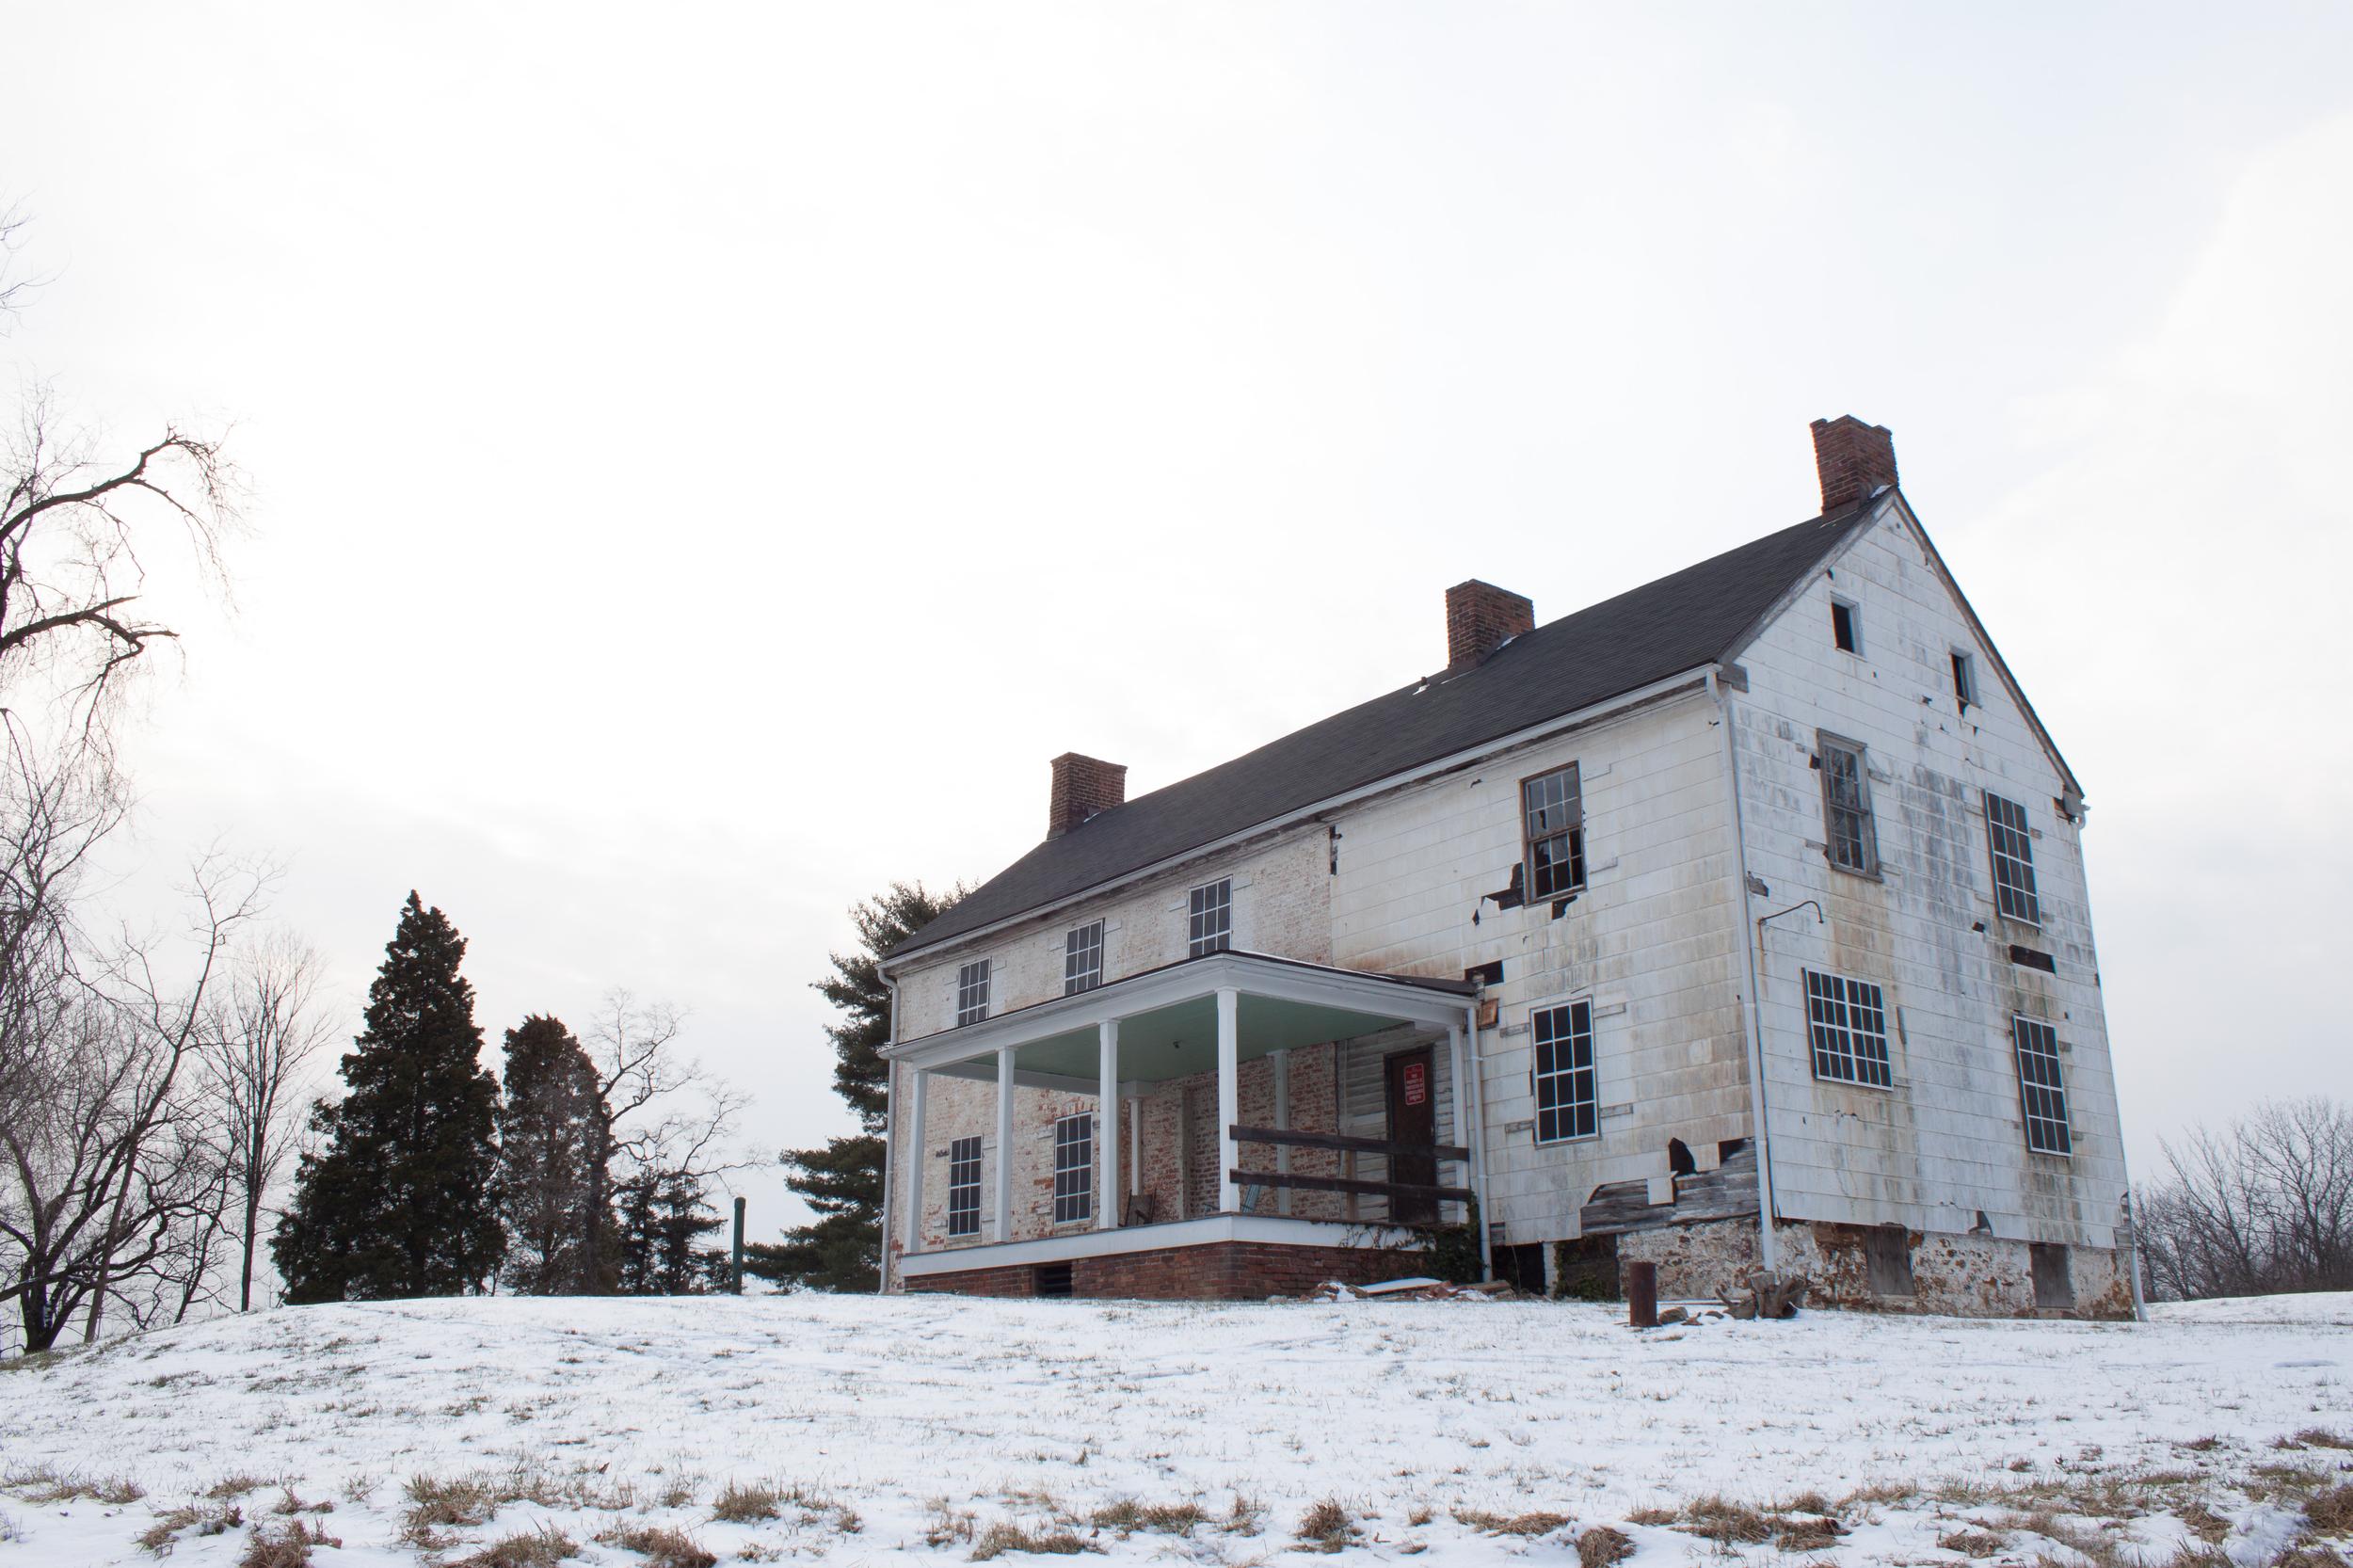
Here are the 3 photos I’ll be using in this tutorial.

 Edit in Photomatix
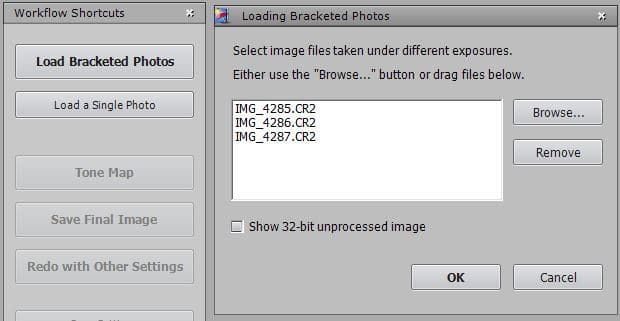
After you’ve imported your camera’s raw files to your computer you’re going to put them in Photomatix. This is very simple. Click ‘Load Bracketed Photos’ then browse for the photos you want to use. I’m going to use my 3 RAW files from my shoot of this eerie house on a hill.
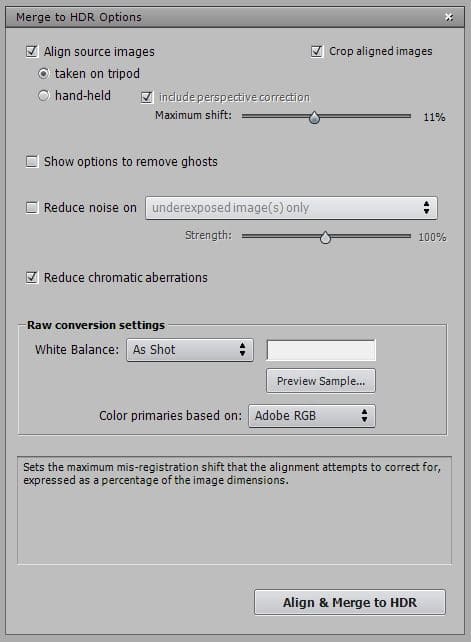
Now that the files have been selected and about to be processed you’ll have to fill out a few options. These are the options for the majority of my photos, I take the photos on a tripod and check “reduce chromatic aberrations” which are purplish streaks that can appear in some photos.
Now that the photo is aligned and in the Photomatix you’ll have a lot of sliders to adjust. I’ll go through the presets on the right just on the off chance that something looks good to start but most of the time I end up using the default and adjusting from there.
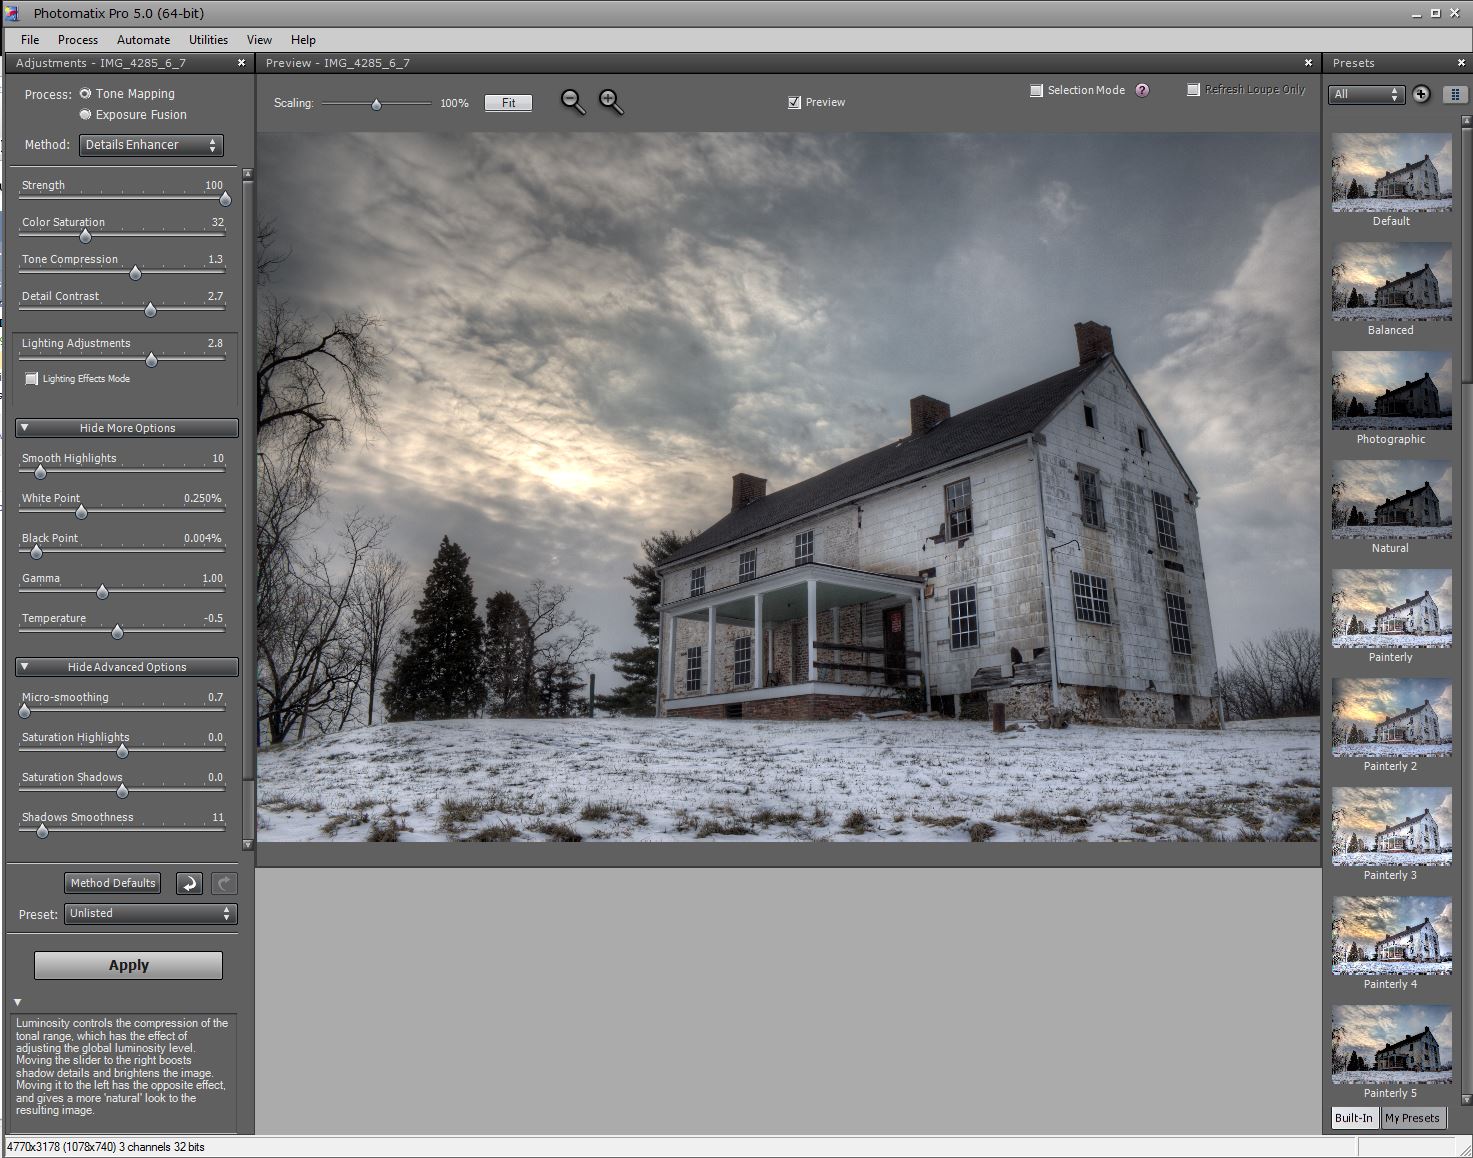
Here’s a little breakdown on the sliders I actually use. I highly recommend you toy with all the options and learn your own style because you can produce a lot of different results with this software.
I always choose “Details Enhancer” as my method, but using a different method will result in different sliders.
Strength – I set this to 100% most of the time since it intensifies the effect.
Color Saturation – This varies from photo to photo, but I want the house in this photo to feel cold so I put the saturation down quite a bit. In a more colorful scene you may want to bump it up (I prefer never to go too extreme see /r/ShittyHDR on reddit).
Tone Compression – This mostly affects how bright the photo is. Since it started out dim I’m bumping it slightly for this photo.
Detail Contrast – Basically the contrast in the photo. I usually never do a negative value for this option.
Lighting Adjustments – This is probably the most important slider. It basically affects how “HDRy” the photo looks. For this photo I want a mild effect with the sky and building so I’m using a positive value (negative values make photos look more HDR and can sometime cause them to look like they are under plastic wrap).
Smooth Highlights – Under some circumstances the sky can look dark during the day. In these cases I will change this option, but with this particular photo I wanted to keep the sky dark since it was overcast outside.
Black Point – I almost always bump this slightly since it affects how much black is in the photo and the default setting is none, which I dislike.
Micro-smoothing – This can affect how sharp the photo appears. Usually I’ll put it between 0 and 2 since I like to have my photos appear very sharp & crisp.
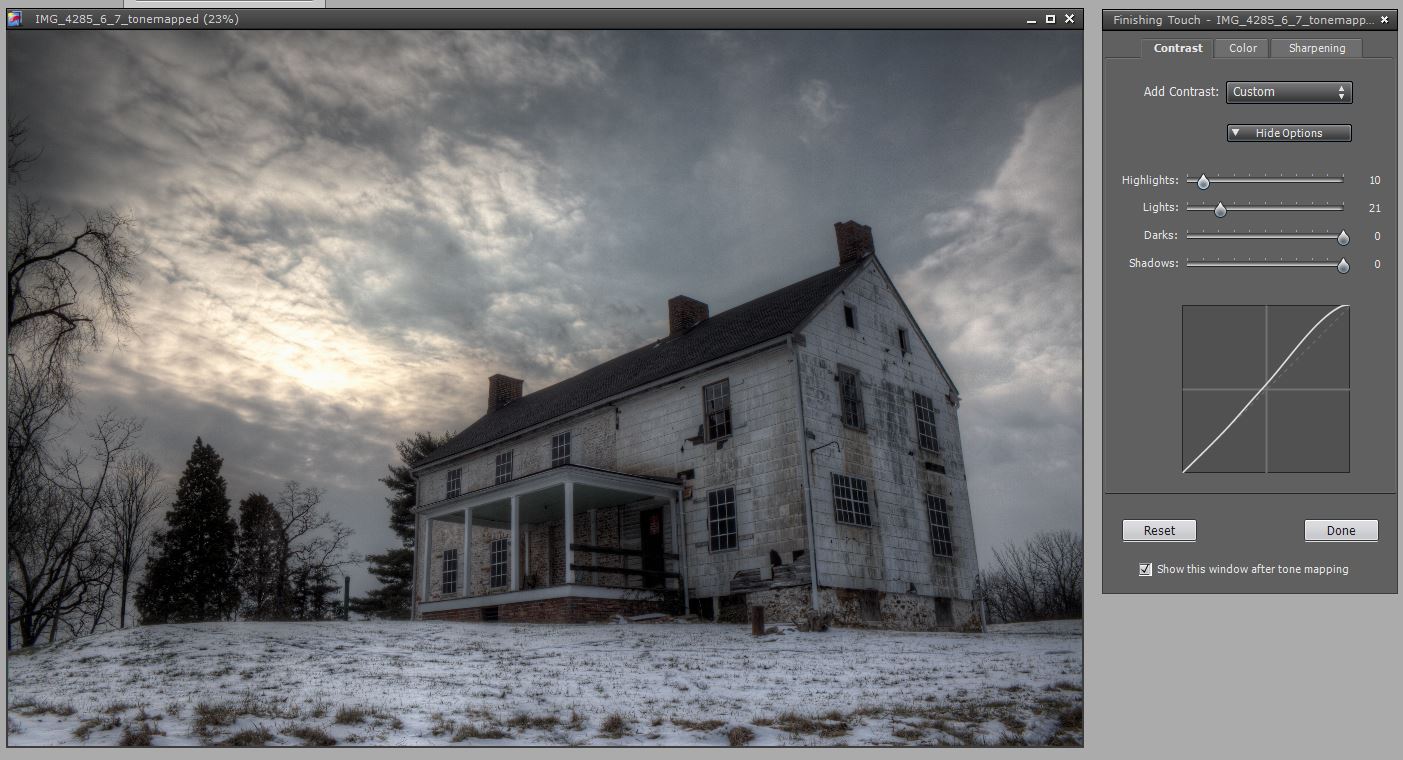
After clicking done you’ll be given some finishing touch options. I slightly bumped the contrast for this photo. When done click “Save final image” in the workflow shortcuts panel.
Once you’re all done you’ll have an image merged together using the best parts of all 3 of your photos. In my normal workflow I go much deeper than this, but this simple tutorial will help you start making great HDR photos.
Wow. So helpful. Just ordered Canon Powershot Sx 60 can shoot in raw. Newbie photographer. Such a helpful post. Thank you ☆☆☆☆