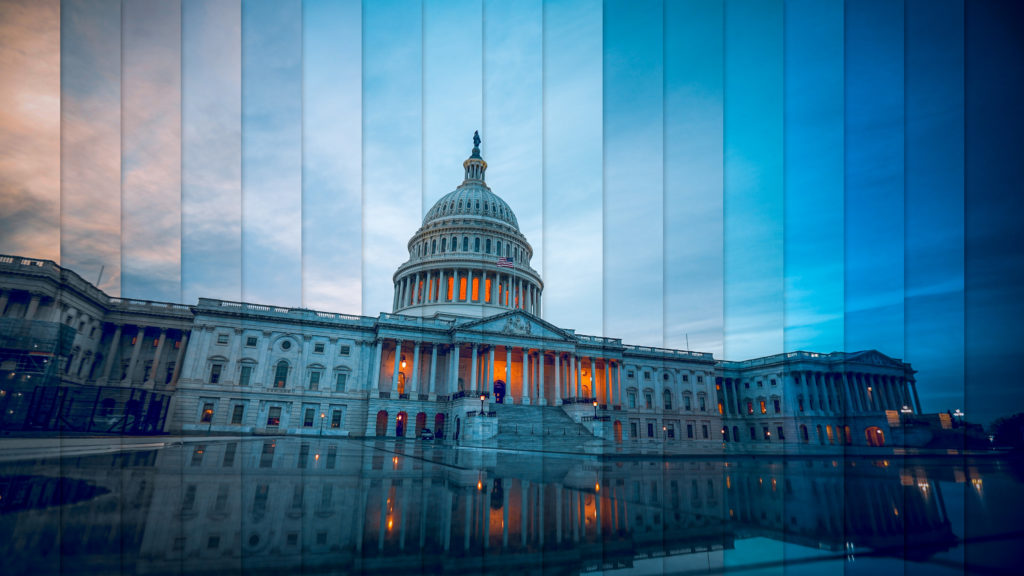
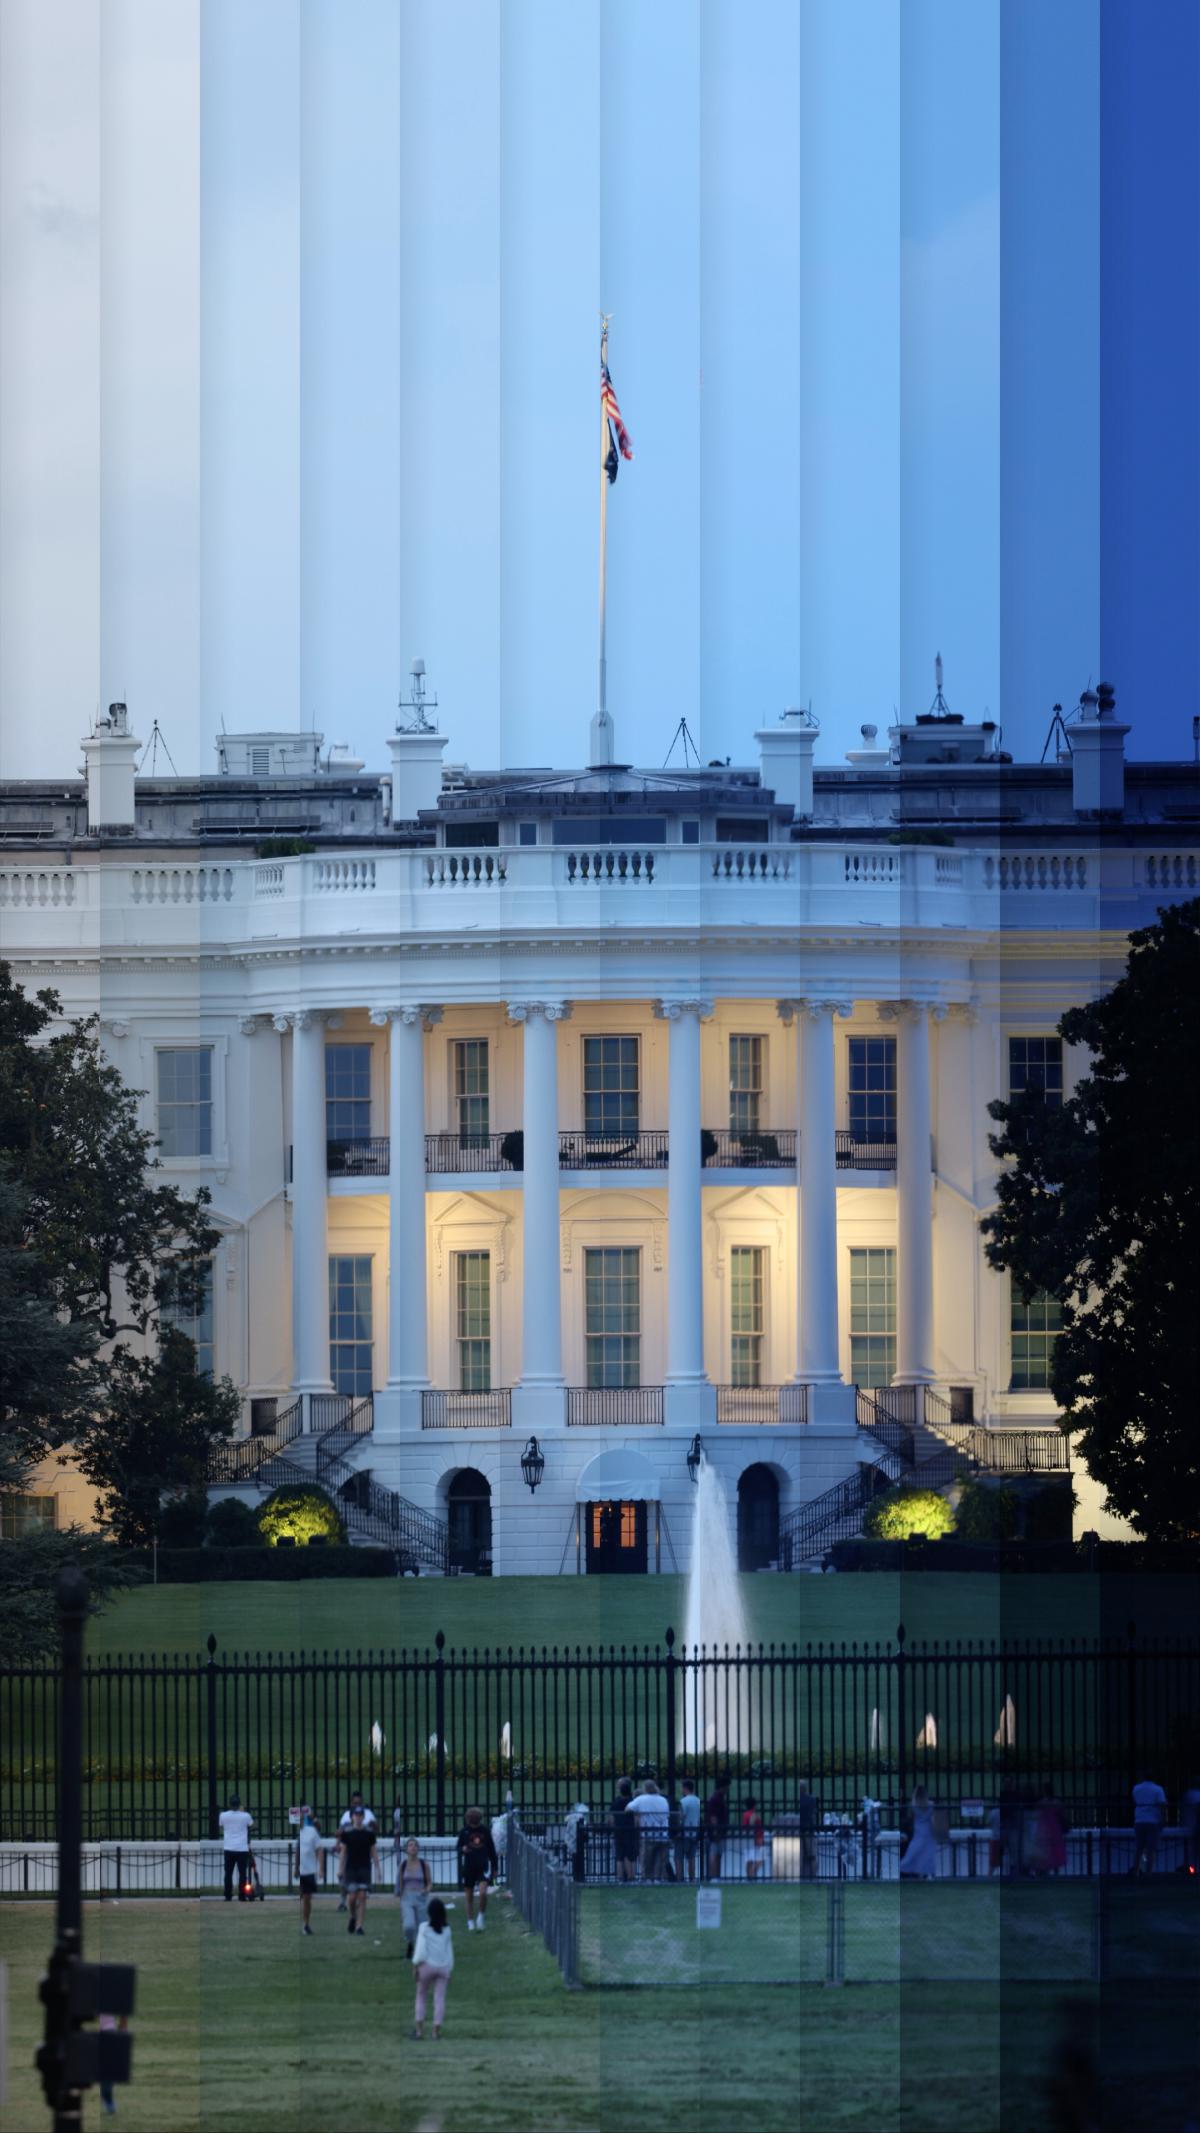
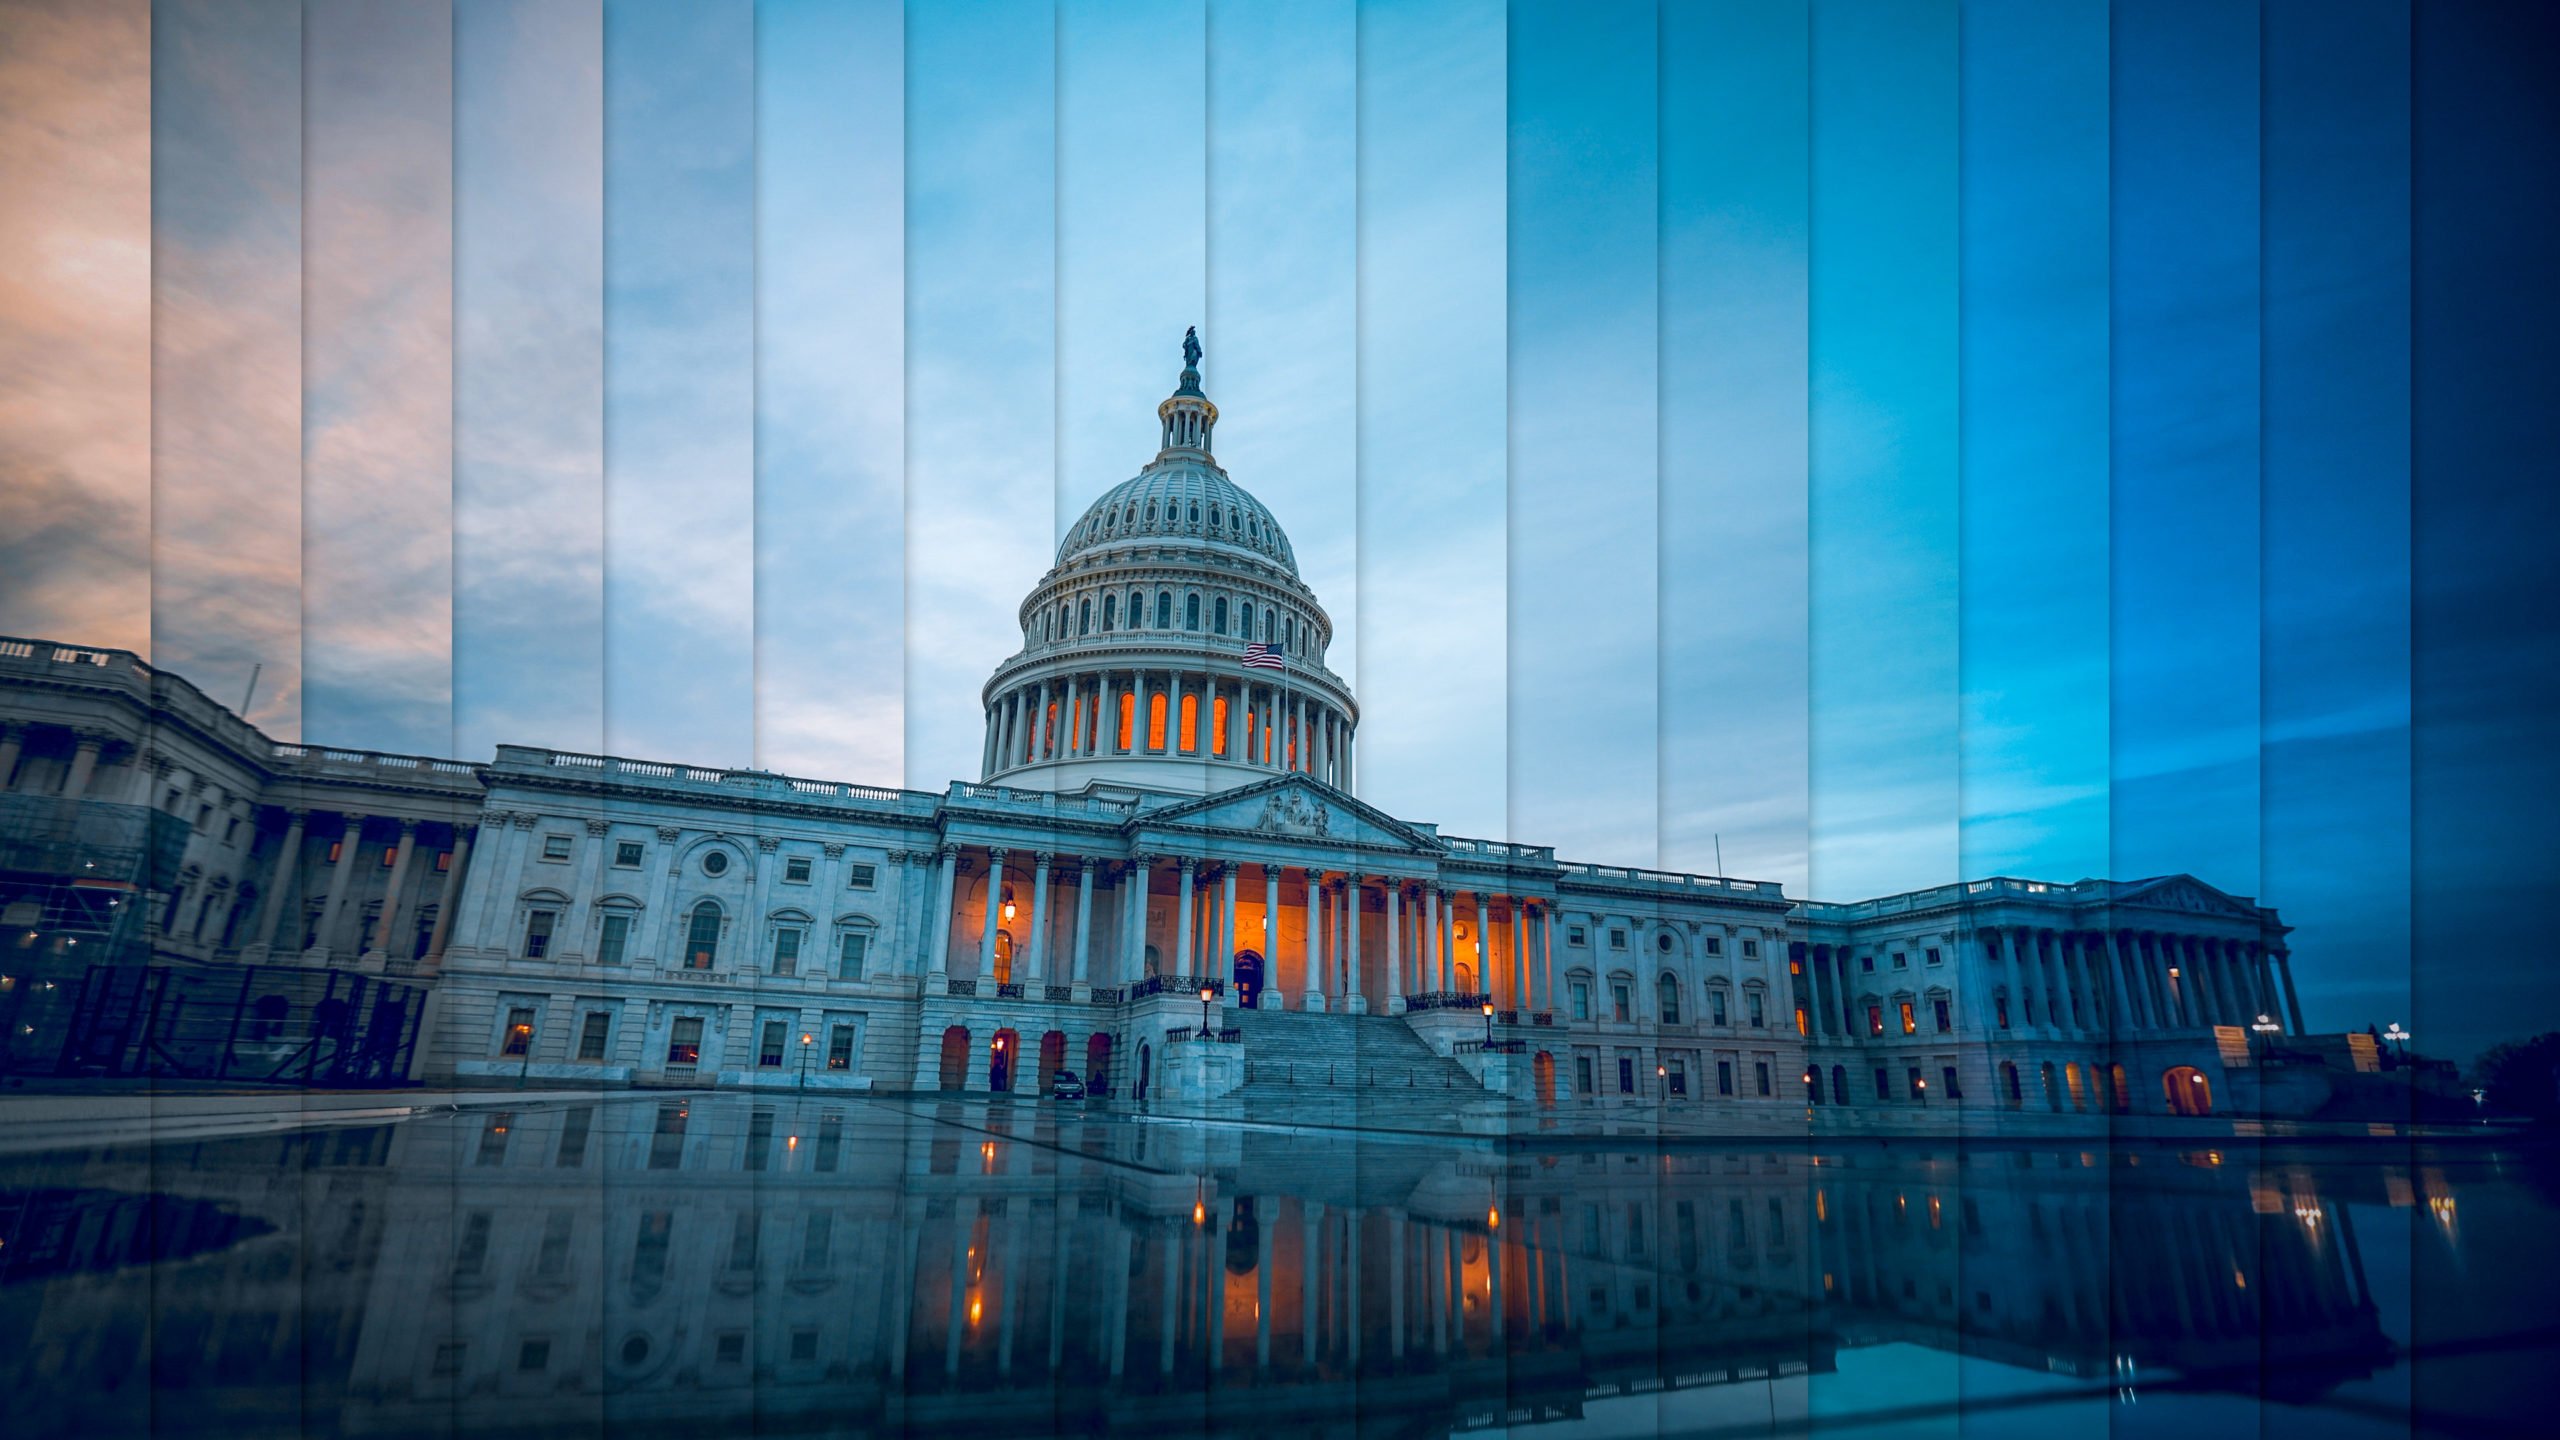
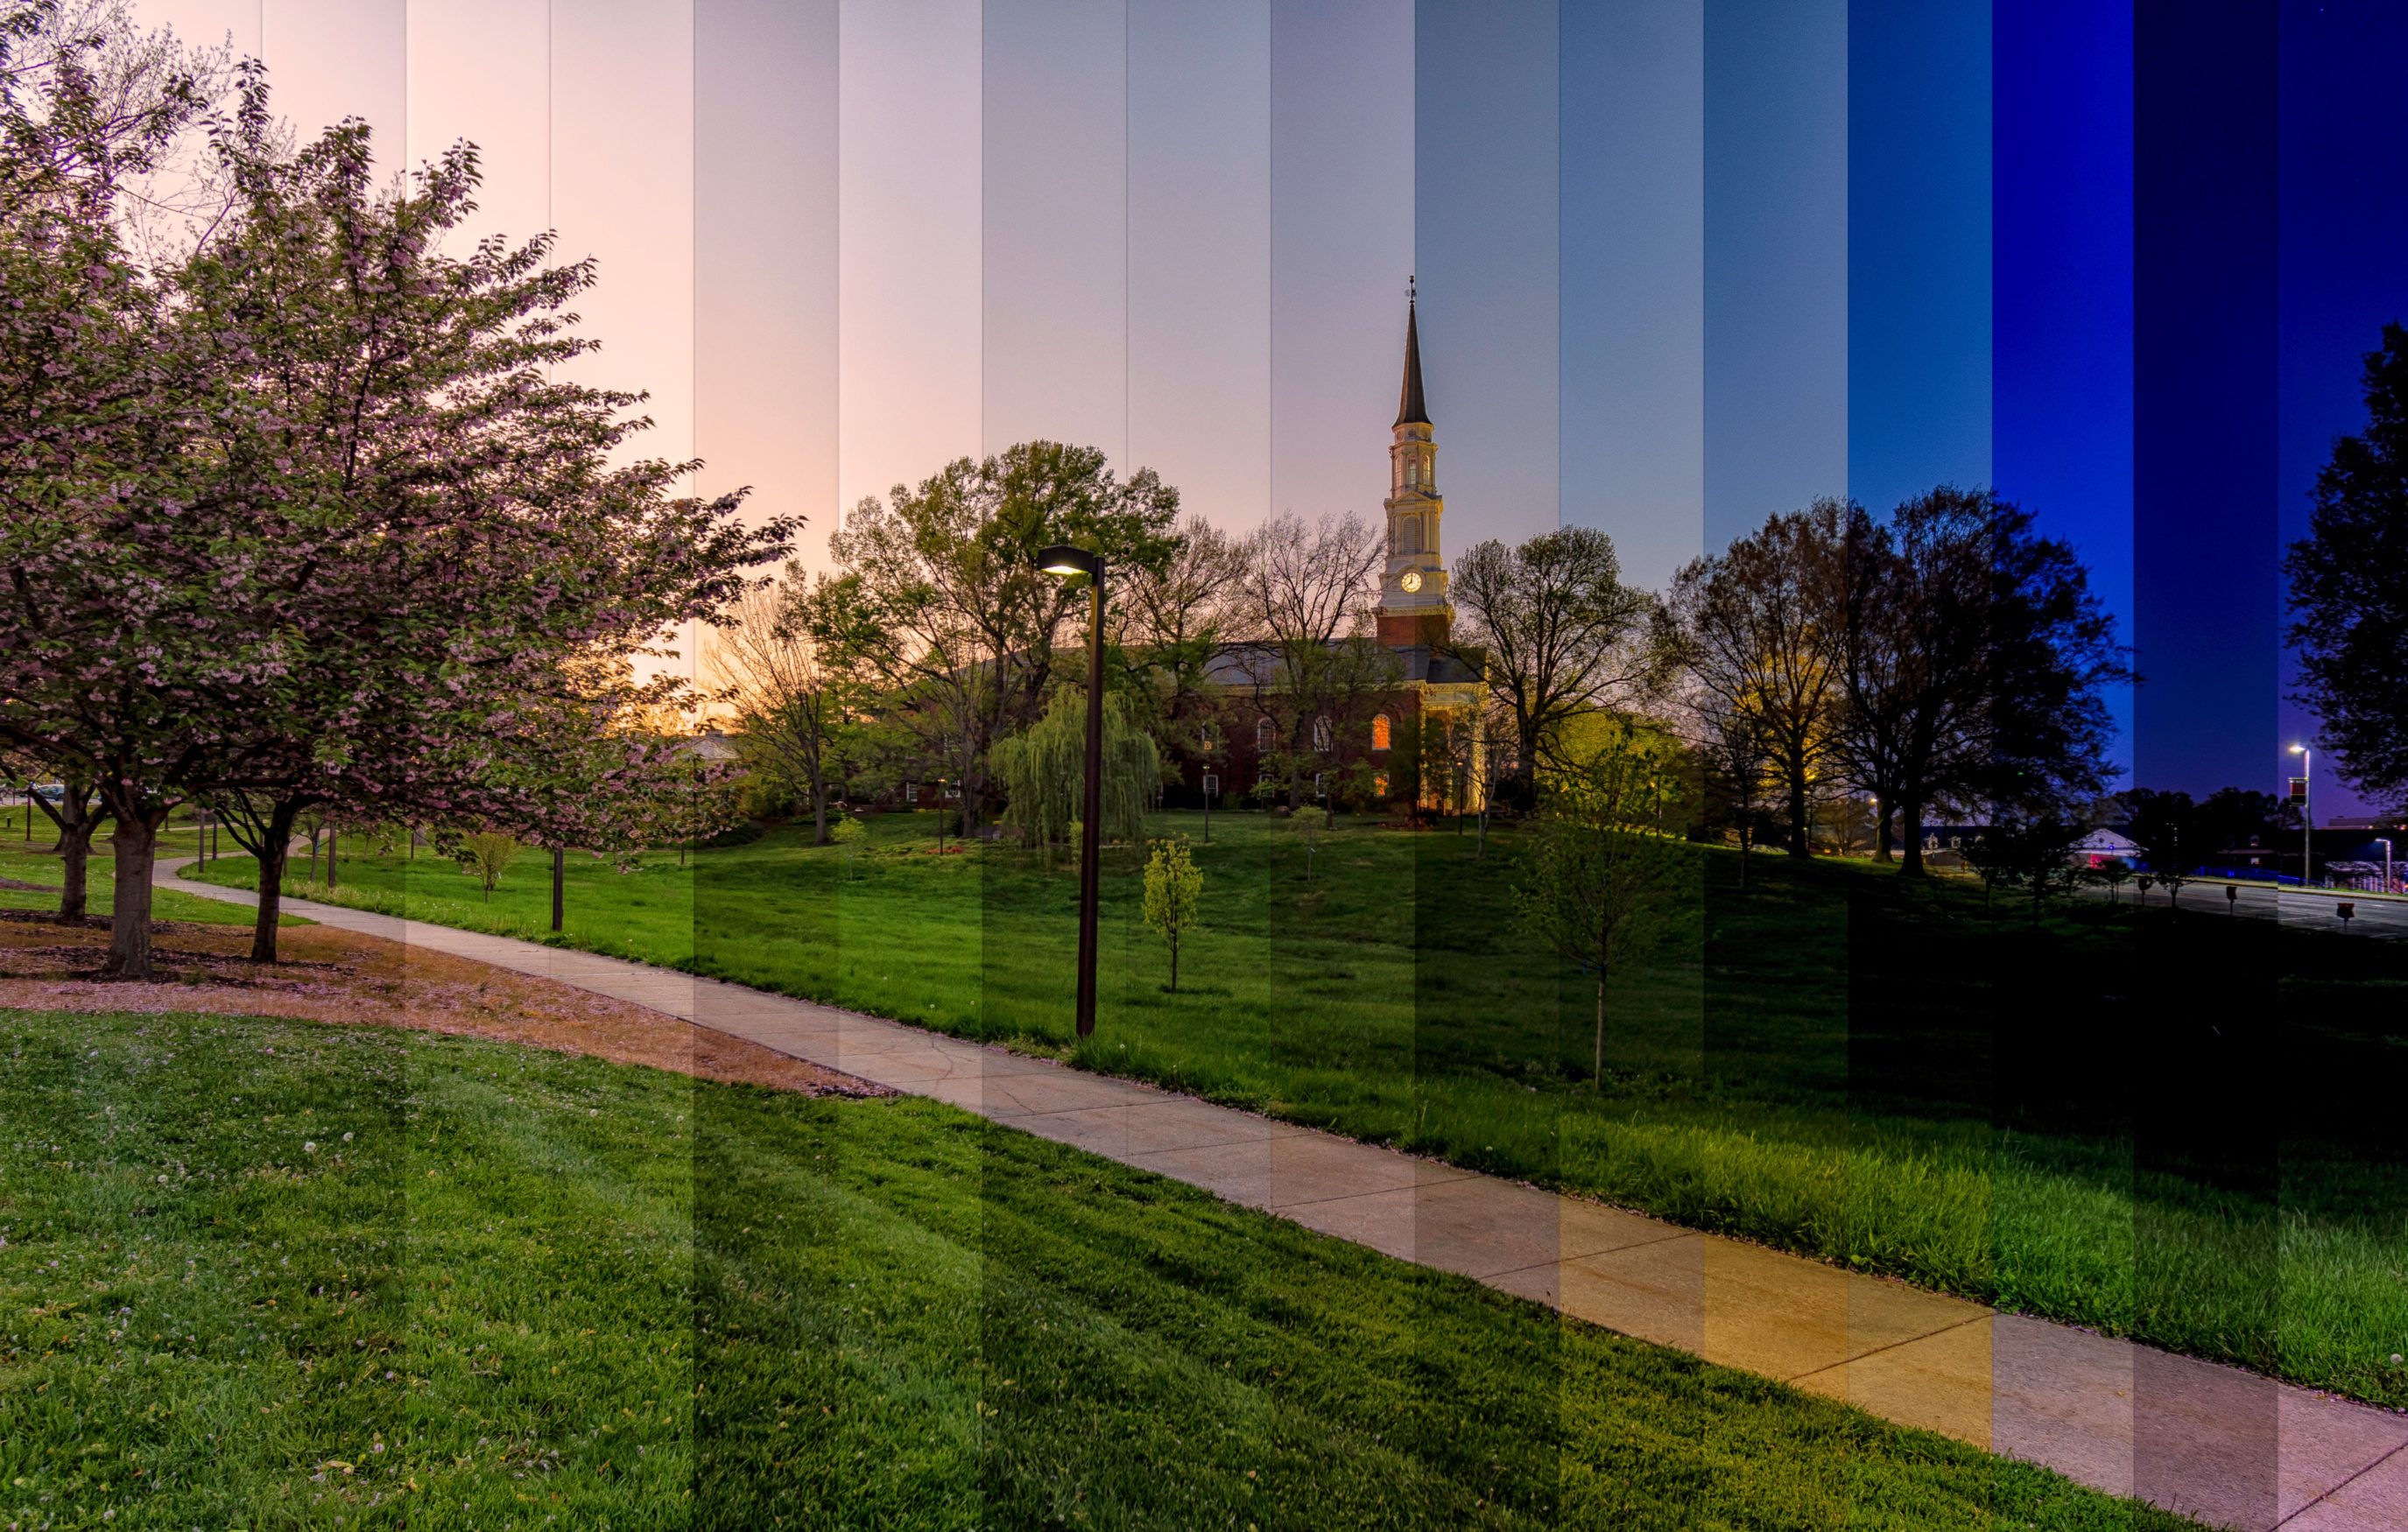
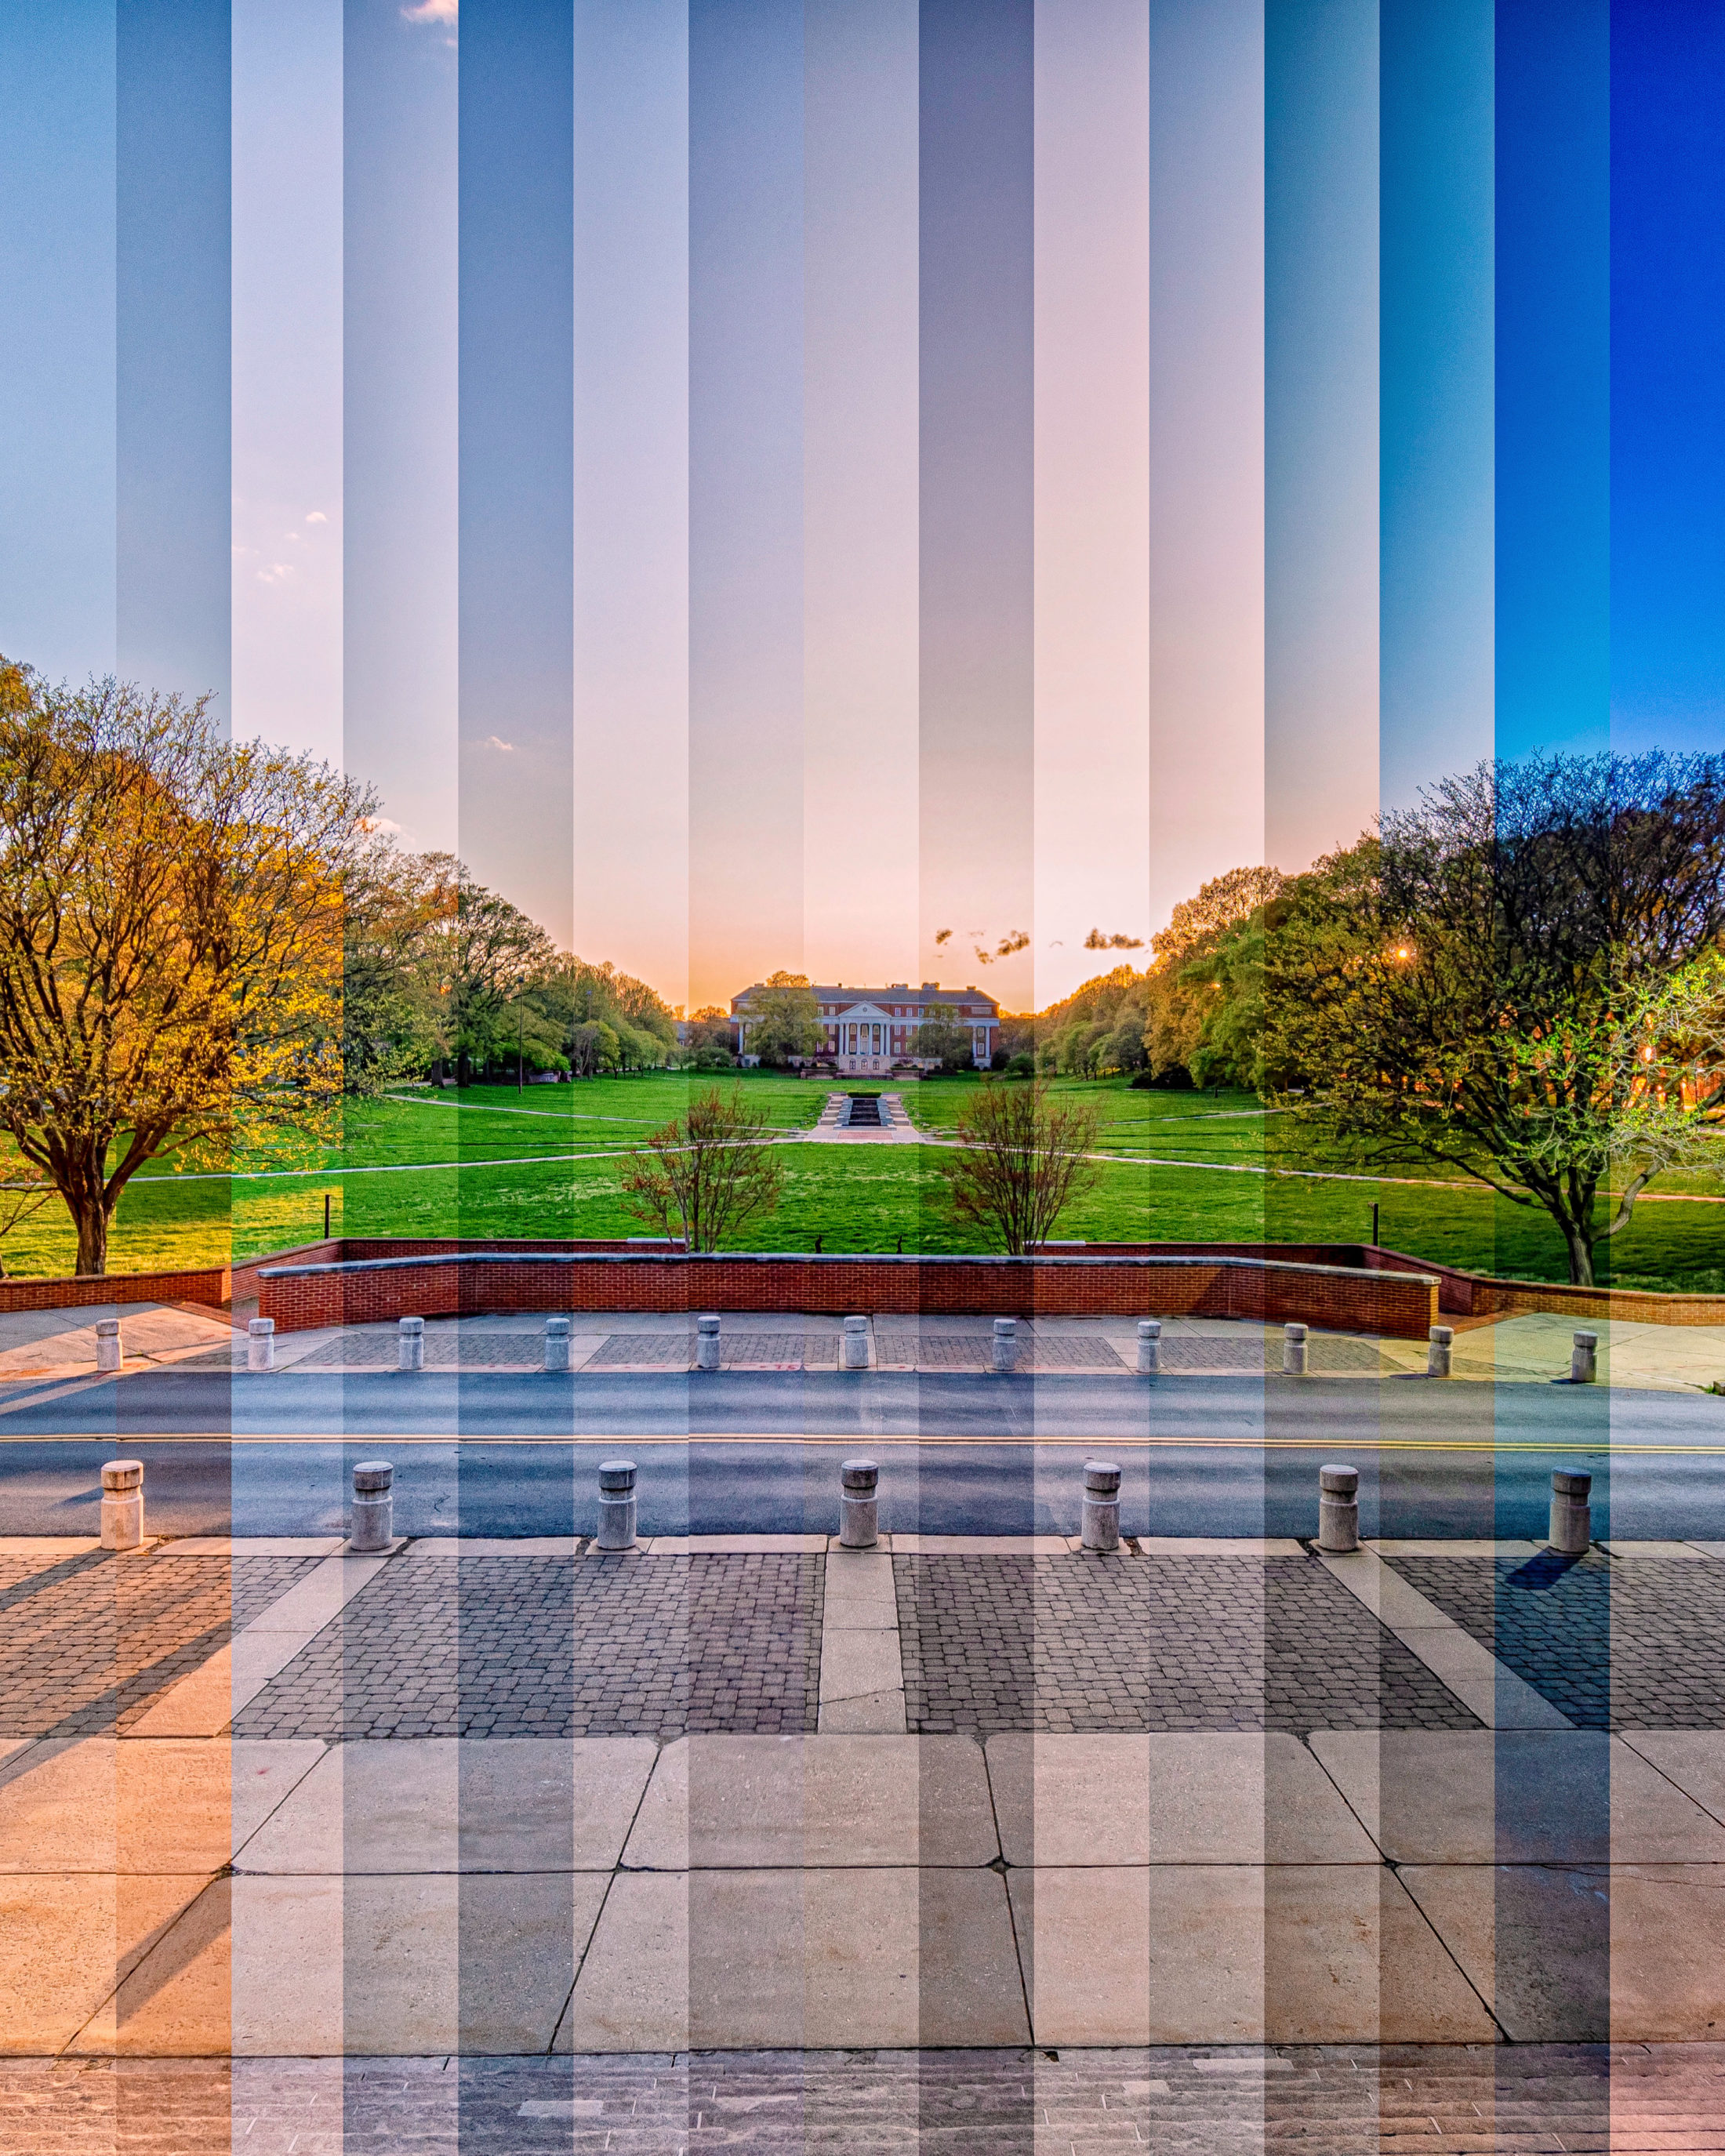
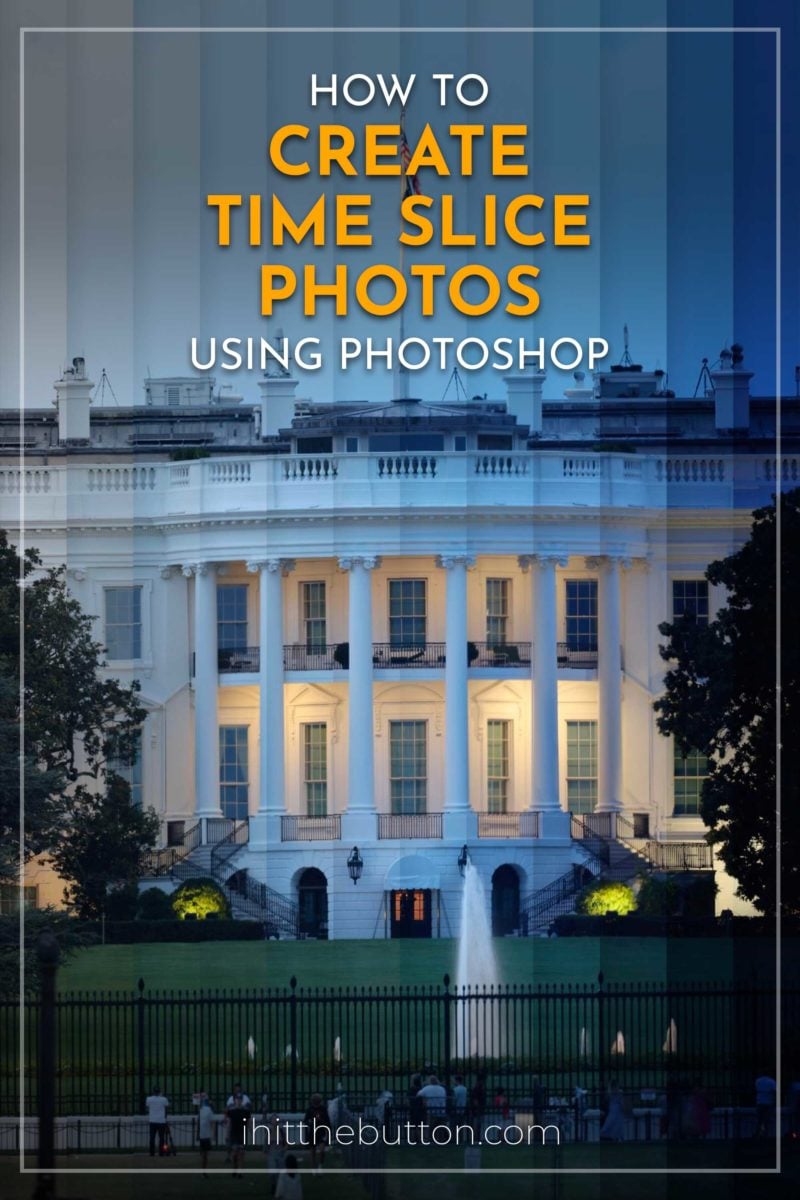
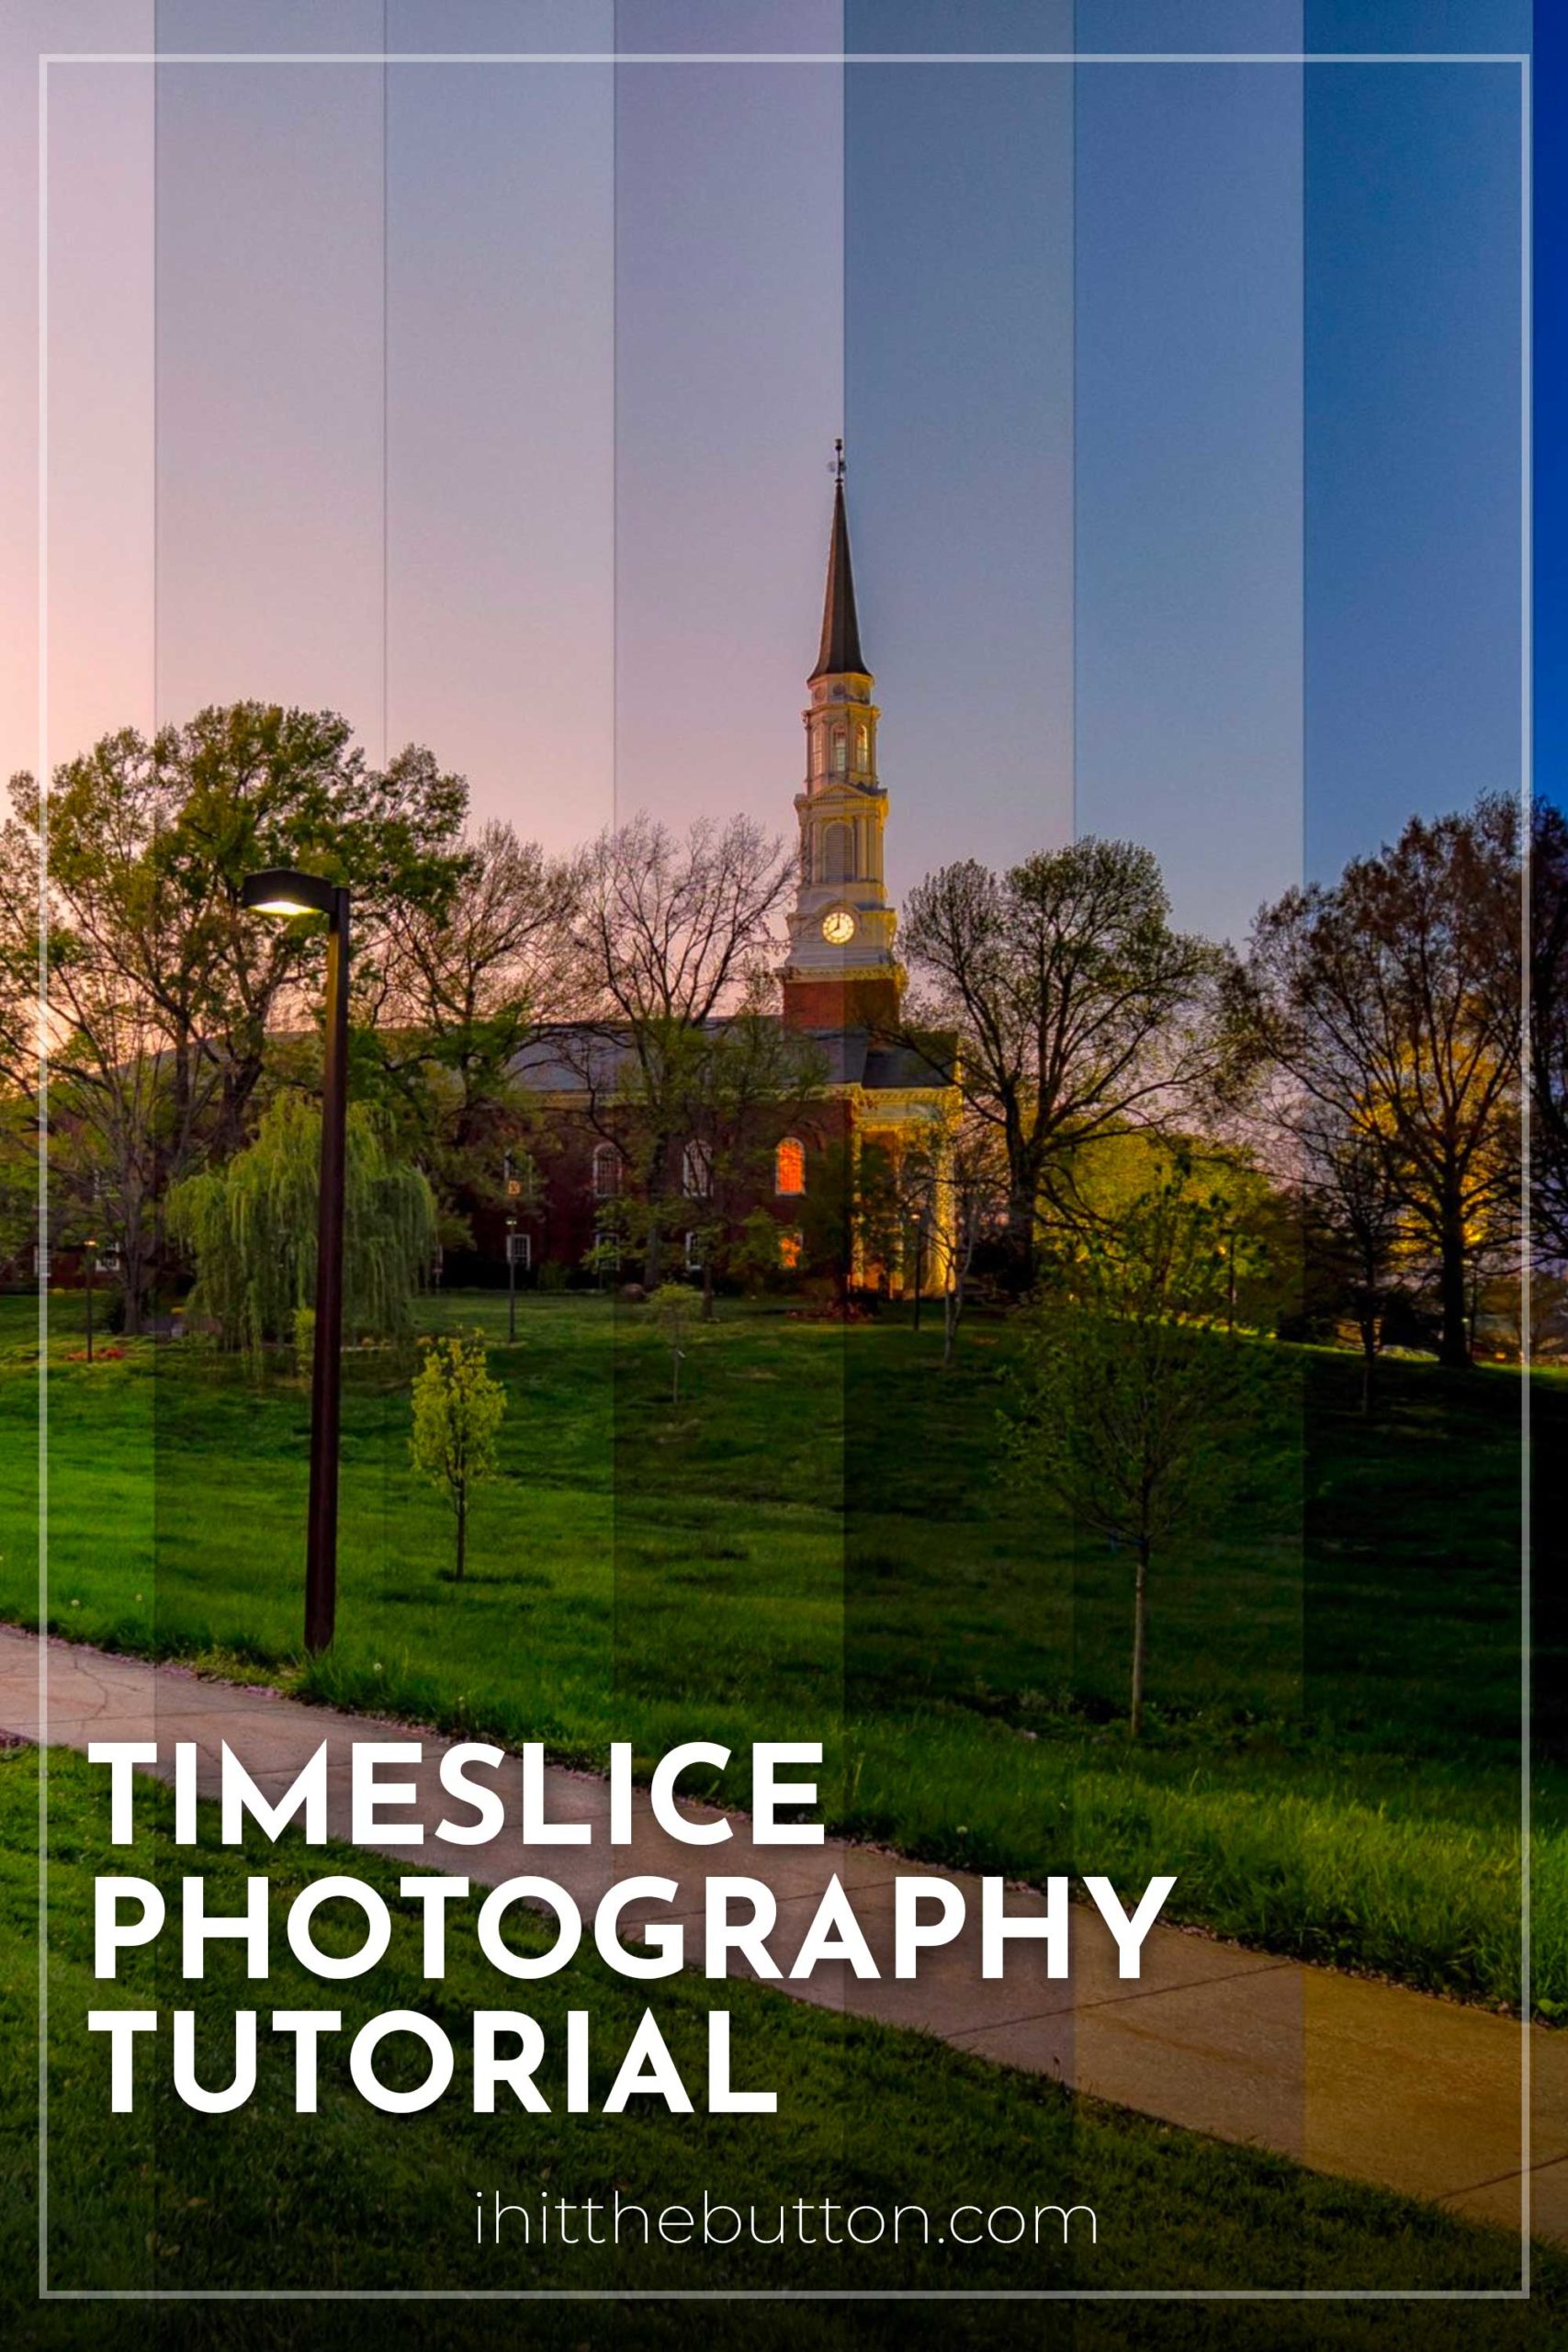
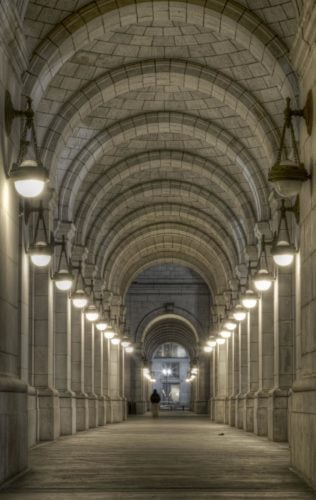
Time slice photography compresses an hour or two of changing light into a single image by combining multiple photos taken from the same spot over time. Sunset shots are the classic example: each vertical strip shows a different point in the transition from day to night.
This tutorial walks through the full process: how to shoot the source frames, how to align and edit them in Lightroom, and how to combine them in Photoshop using layer masks. There’s a video version of the tutorial just below, plus a section at the end with variations and answers to common questions.
What You Will Need for Time Slice Photos
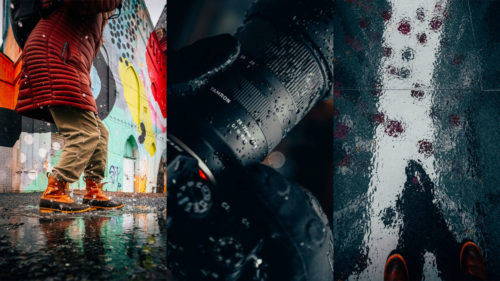
There are many ways to create a time slice image but at a minimum, you’ll need a camera, somewhere to place your camera so it doesn’t move (like a tripod), and photo editing software like Photoshop.
- Camera (I will be using the Canon EOS R)
- Tripod
- Adobe Photoshop
- Adobe Lightroom (recommended but not required)
Video Tutorial
If you don’t feel like reading further here is my video tutorial of the timeslice editing process.
Basically you’ll take multiple photos and stack them up to create a “slice” effect.
You’ll need at least 5 photos taken from a single angle but let’s dive into how to capture photos for the timeslice.
How to Capture Photos for your Time Slice Image
With your timeslice photo, you’re trying to show the passage of time. So capturing images over the course of an hour at sunset is the best way to achieve this.
This effect works best with city skylines at sunrise or sunset. This way it’s more obvious to see that time is changing, things like street lights and a shifting sky help. You can do this effect with a landscape of course but I think it works best with a cityscape.
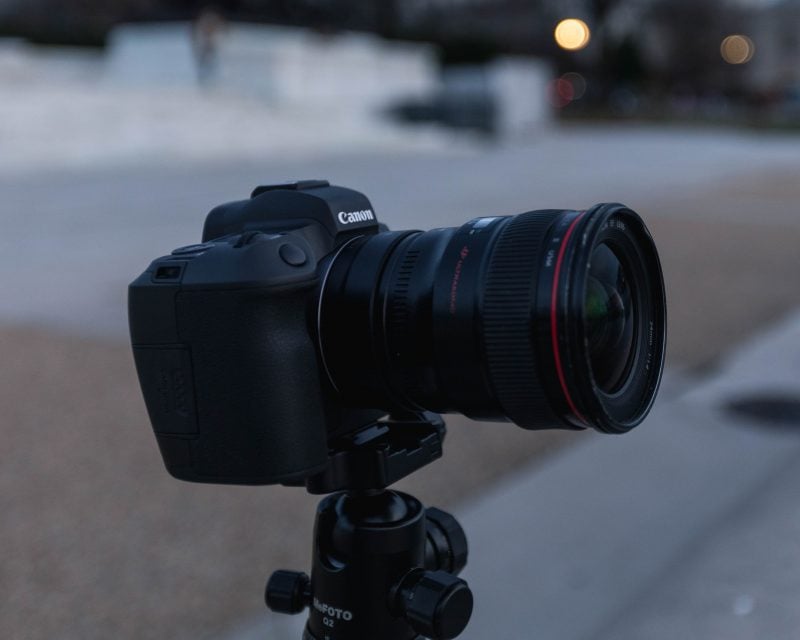
You can use a tripod you just place your camera somewhere where it won’t move over the time period you take your photos. This is important since you want the timeslice photos to perfectly line up when editing them.
Depending on what camera you have you could use an interval timer but just setting a timer on your phone will work also. Most cameras will also allow you to connect an interval timer remote to take photos at specific intervals.
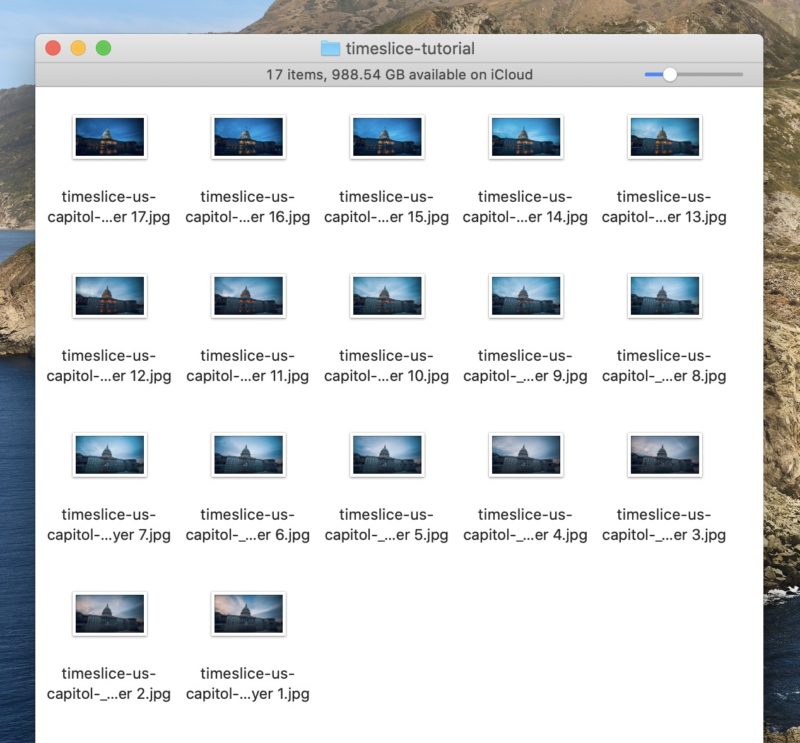
About every 5 minutes, take a new photo. Over the course of an hour you’ll have around 12 images. I recommend stretching the session to 90 minutes or 2 hours so you capture more of the actual transition from day to night.
Tip for consistent exposure: The brightness of the scene will change dramatically over a sunset. Shooting in Aperture Priority (Av) mode and letting the camera handle the shutter speed is the easiest way to keep the exposure looking natural across all the frames. If you shoot manual, plan to bump the ISO or open the shutter as the light drops. Either way, lock white balance to a fixed value (Daylight or a specific Kelvin number) instead of Auto so the colors don’t shift unevenly between frames.
Edit your Photos in Lightroom (Optional)
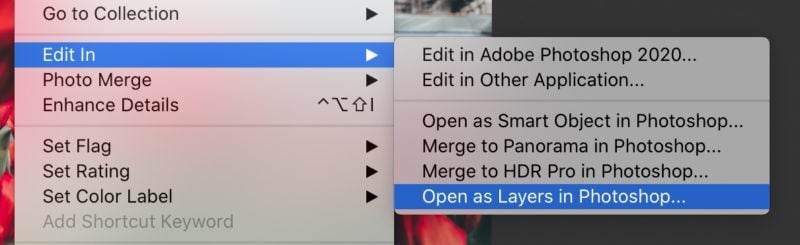
Once you have all of your images, edit them in Lightroom and apply any adjustments. Remember you can copy your edits to all photos at once (right-click the first photo, Develop Settings > Copy Settings, then paste onto the others) so the whole sequence stays consistent.
Once this is done, select all of the images, right-click, and choose “Edit In > Open as Layers in Photoshop…”
This will bring all of your photos into Photoshop as layers so you can easily slice them up.
Creating Time Slices in Photoshop
Now here is where the fun begins, actually creating our time slice photo.
Before you start you’ll want to verify that the time slice photos are in chronological order. Depending on how you imported them it’s good to double-check that they are in order.
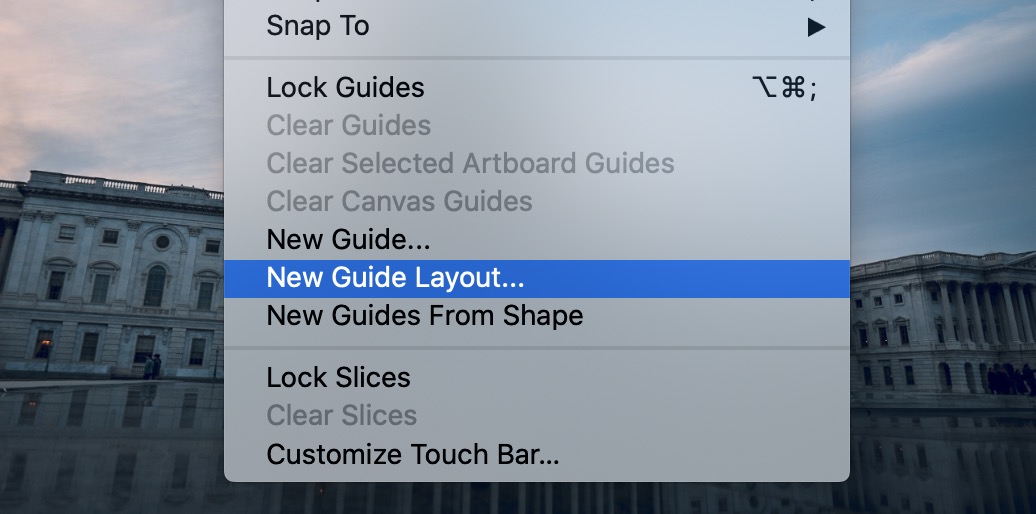
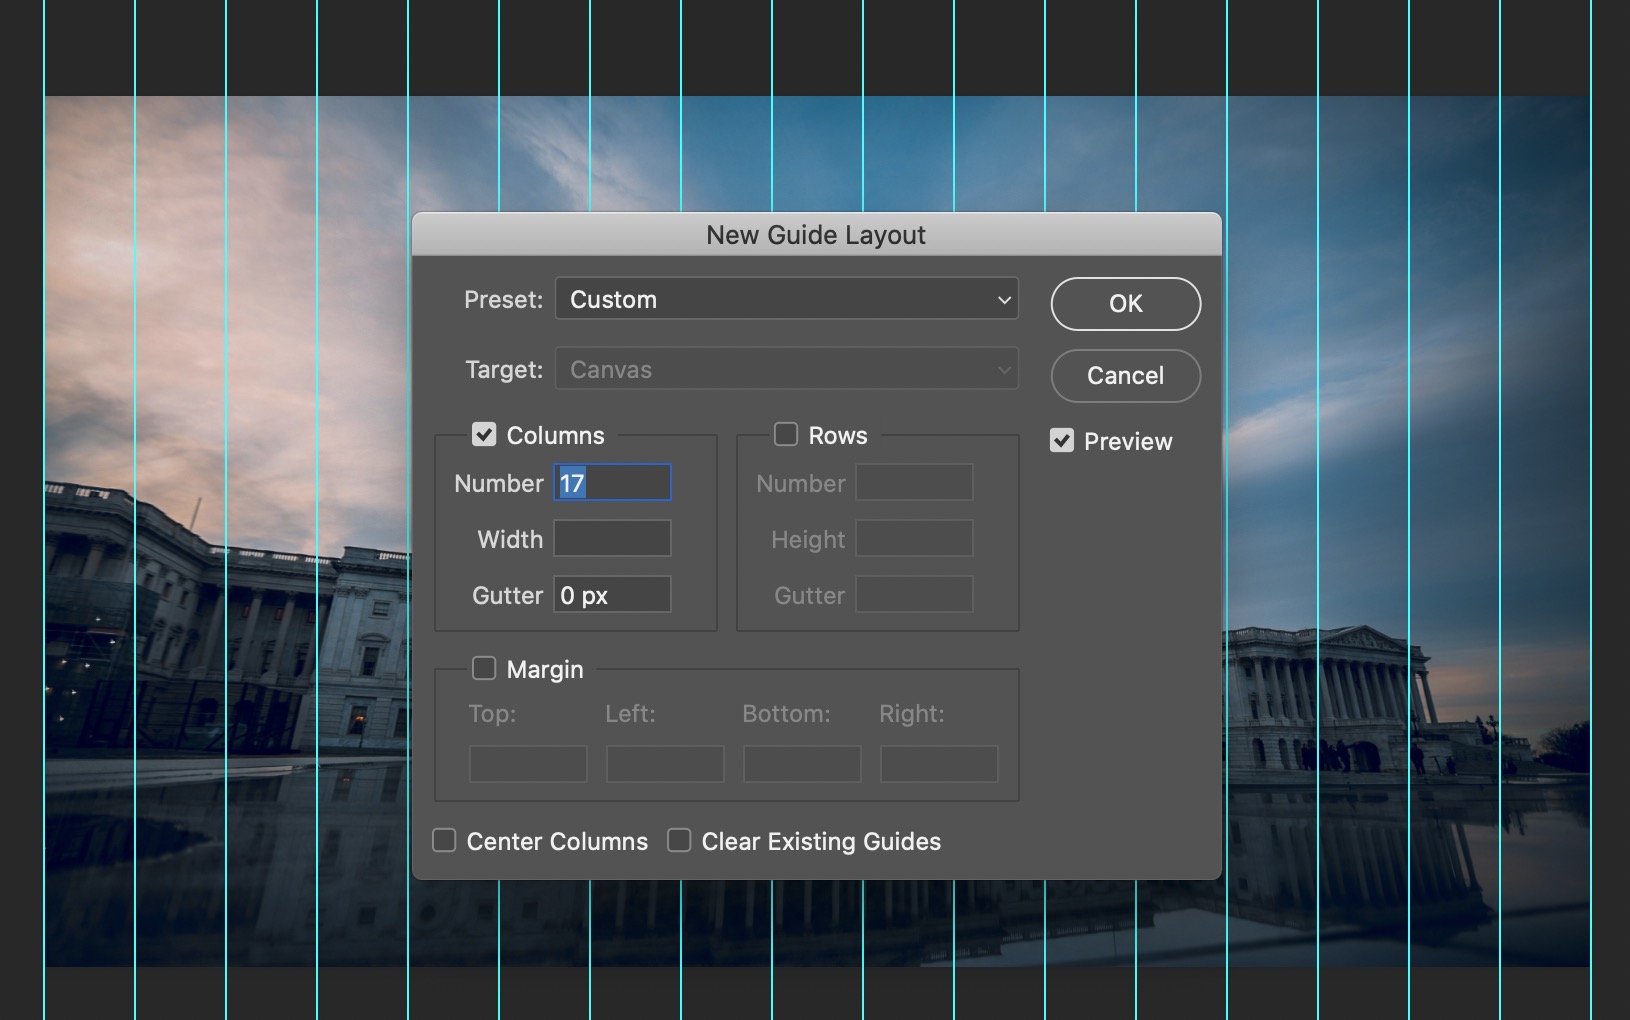
First, we’ll need to create “guides” for our time slices. This can be done by using the “New Guide Layout…” option in the “View” menu of Photoshop.
This will allow you to make guides we’ll use for our time slices, In our example, we have 17 photos so we will be making 17 columns with a 0 gutter size.
So just put the number of photos you have as the columns and Photoshop will equally create guides for your image.
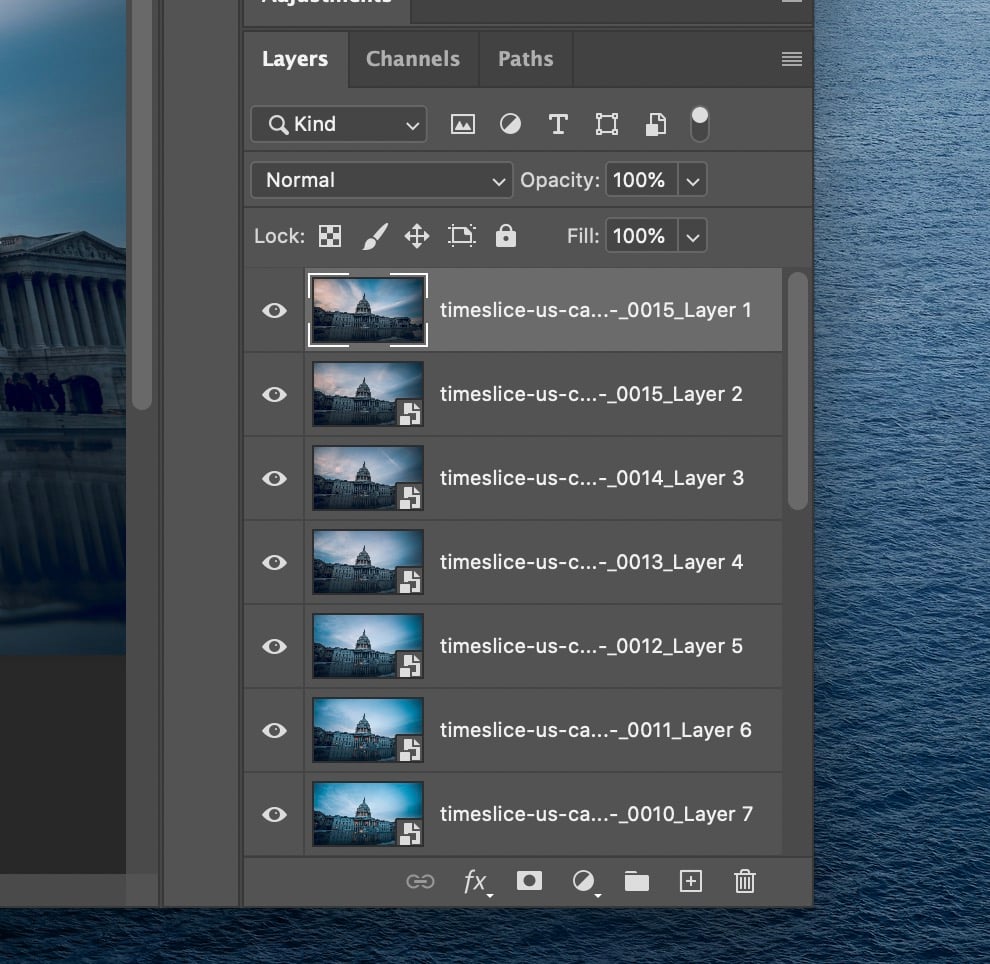
Once the guides are on the images we’ll create masks on each image.
This can be done by selecting the first slice using the select marquee tool.
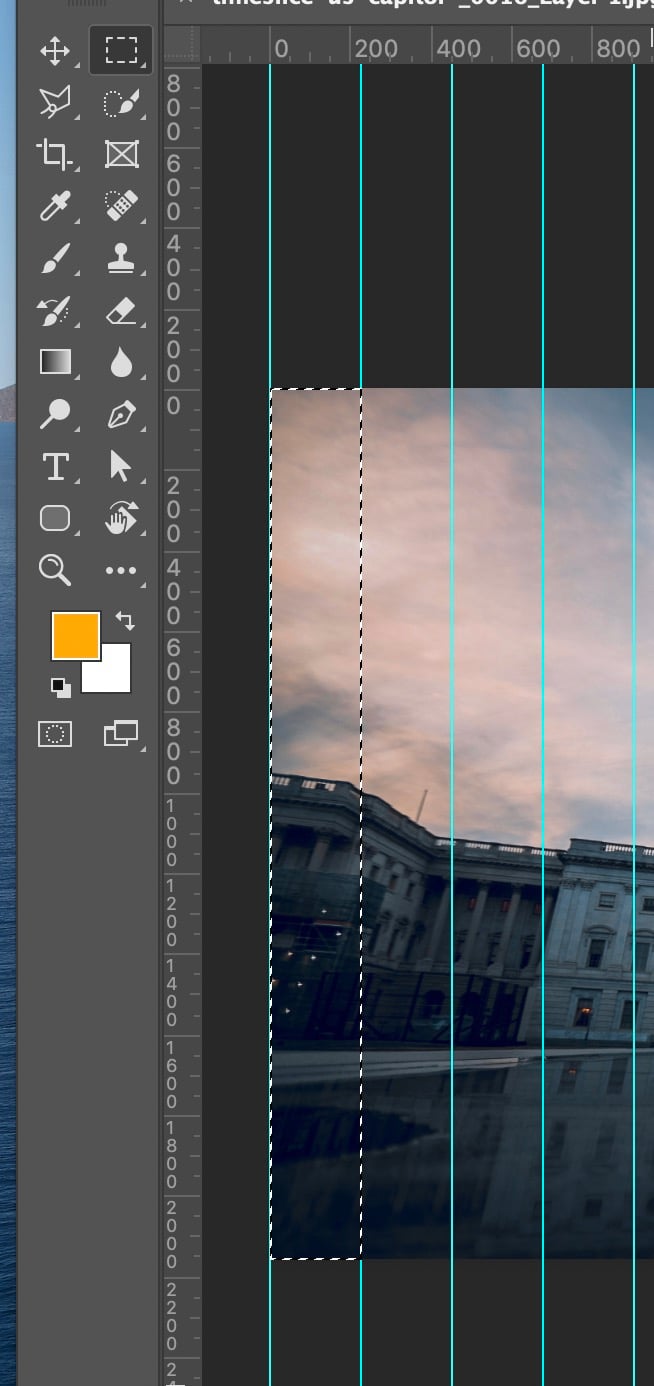
After selecting the slice create a mask on the layer using the create mask button.
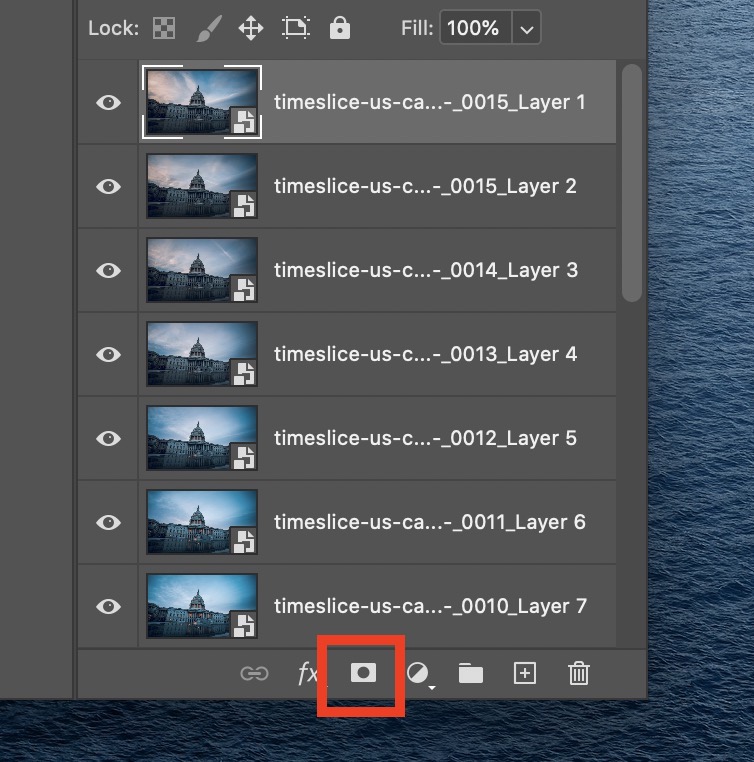
This will only show that sliver of that image creating our first “slice”.
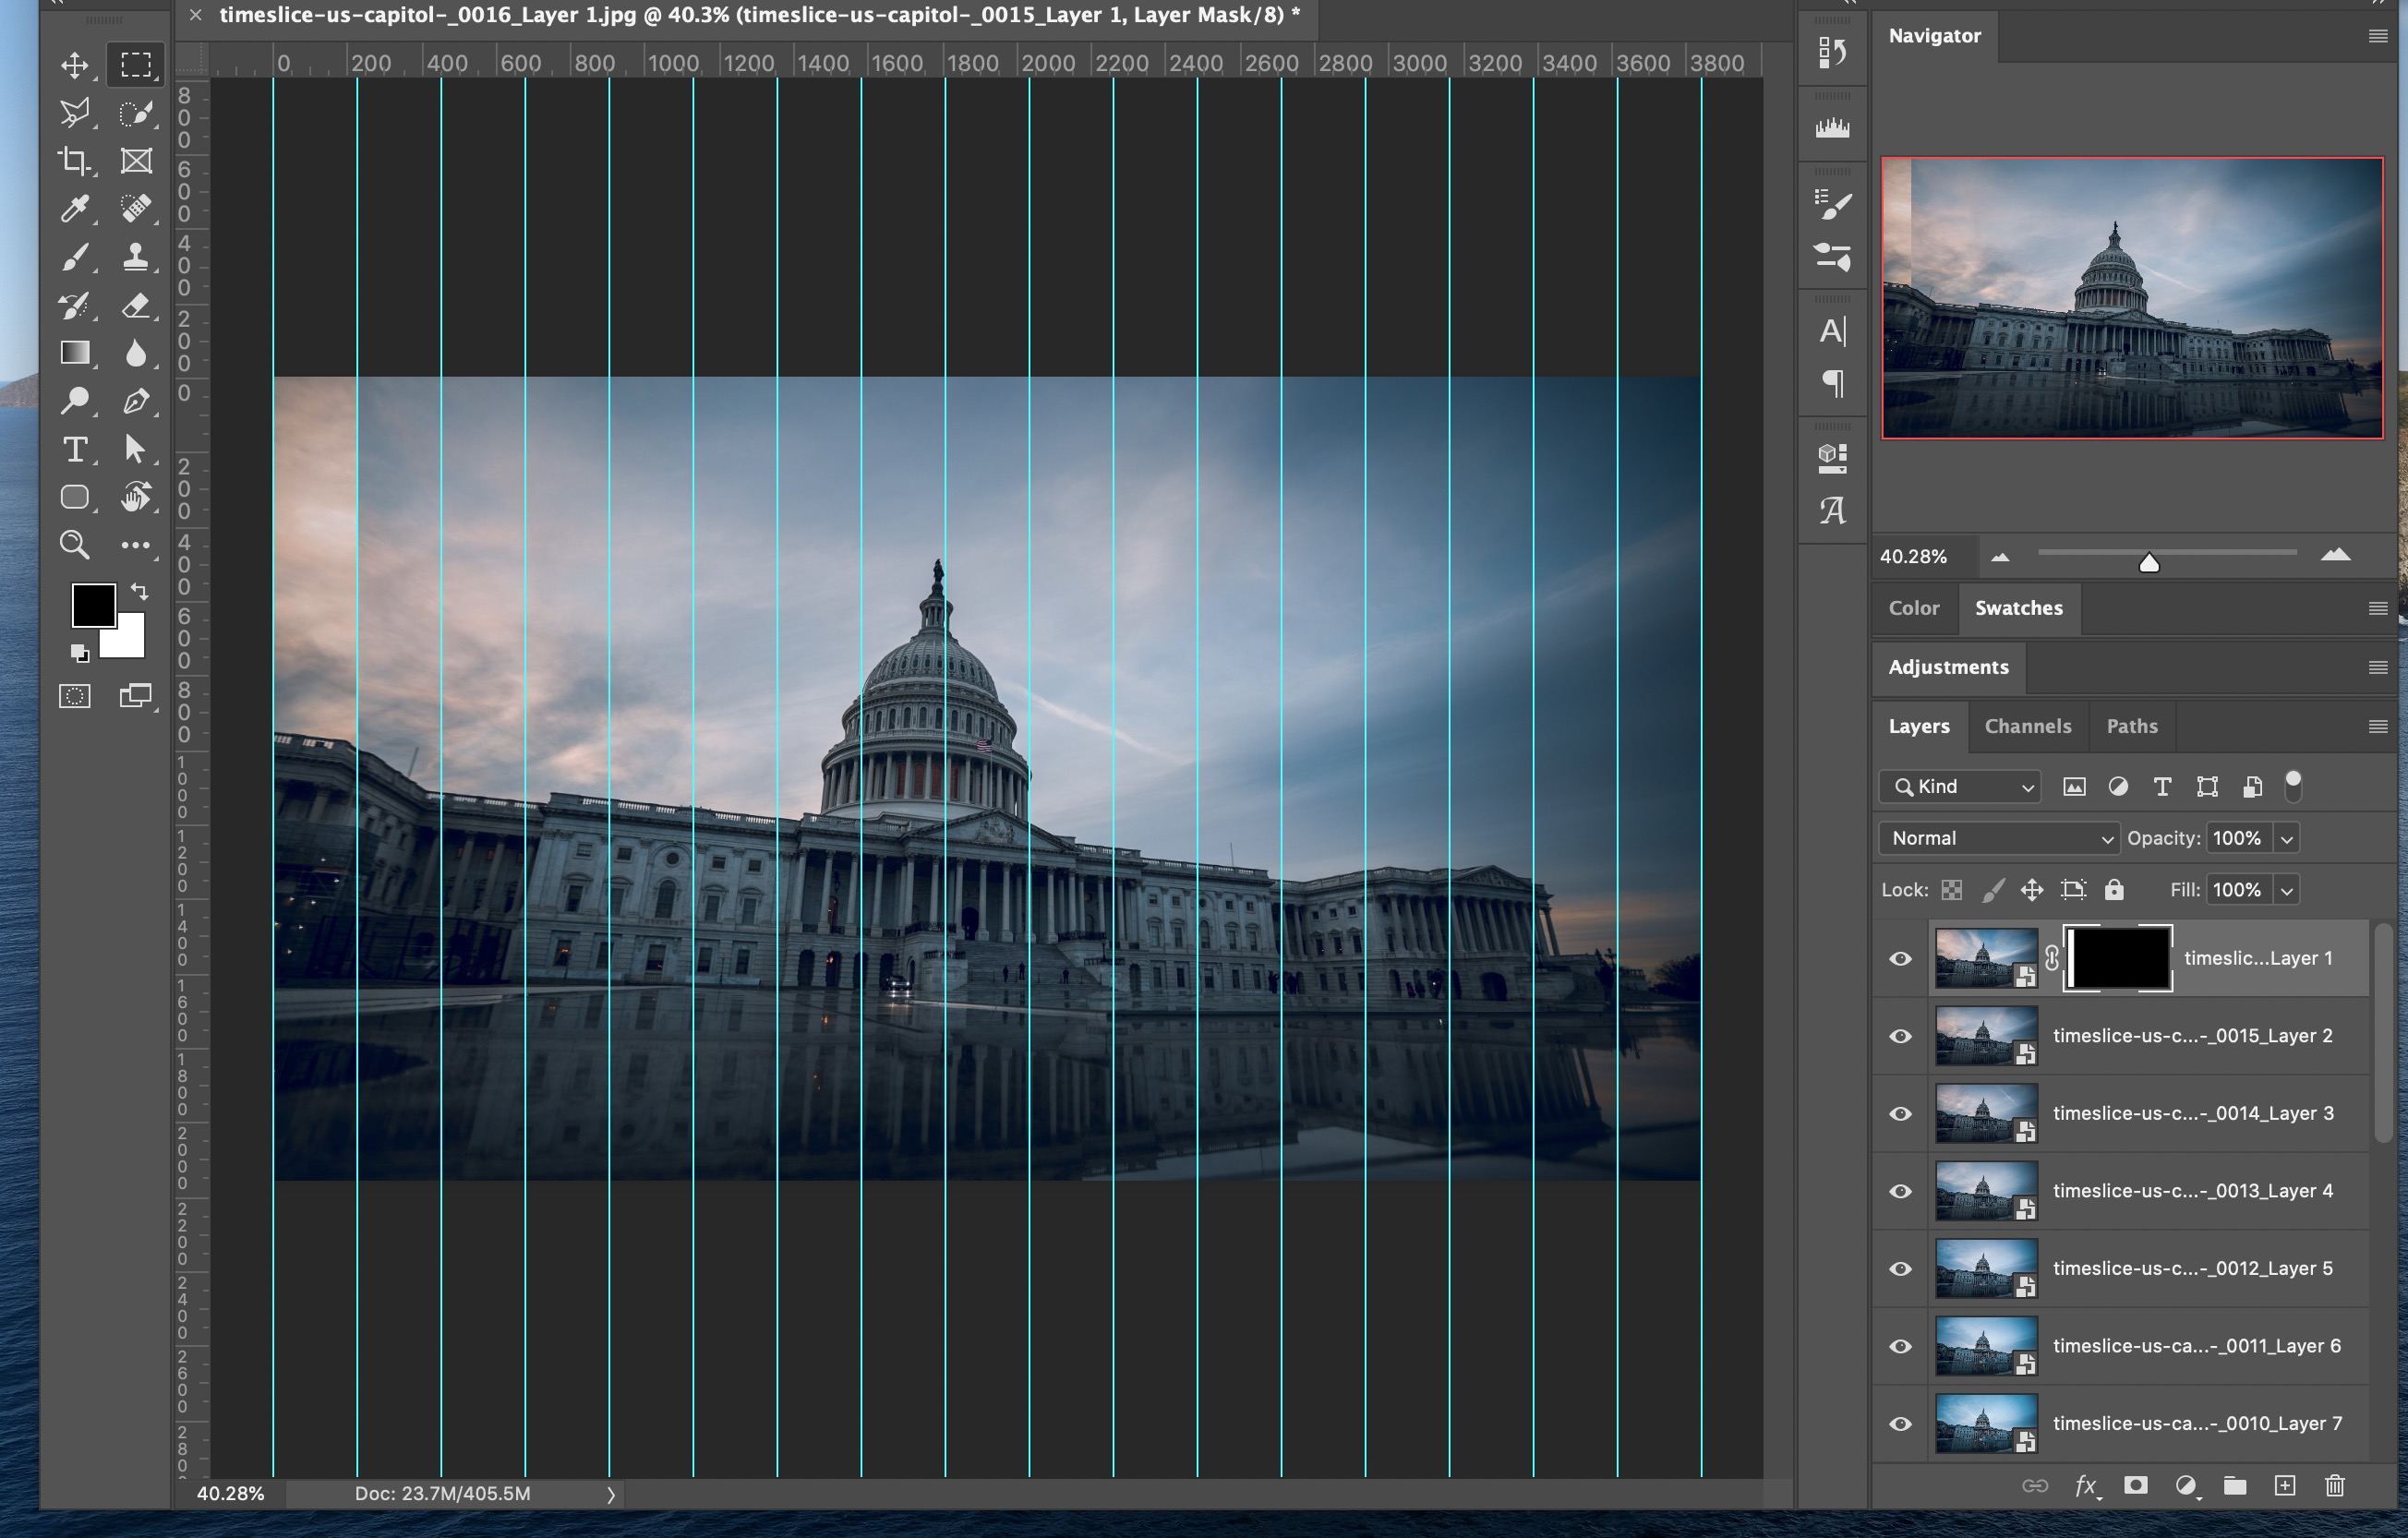
Repeat this masking process for every layer in the time slice. You can select the area to the left of the slice when making masks since the others are stacked on top of it. That makes it easier later if you want to switch from “hard” slices to a gradient/feathered transition.

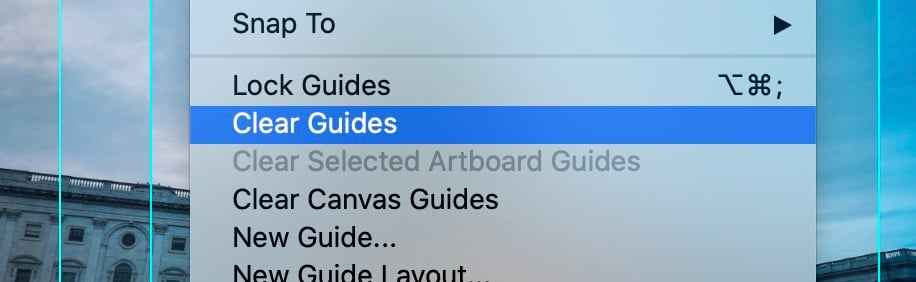
Once you have done this to all of the slices you can remove the guides.
You’ll now have your completed time slice photo!

Now there are plenty of effects you can play with. Including adding a shadow to the slices to increase separation.
You can try out different values for the shadows but I typically do 50% opacity and 30px blur.
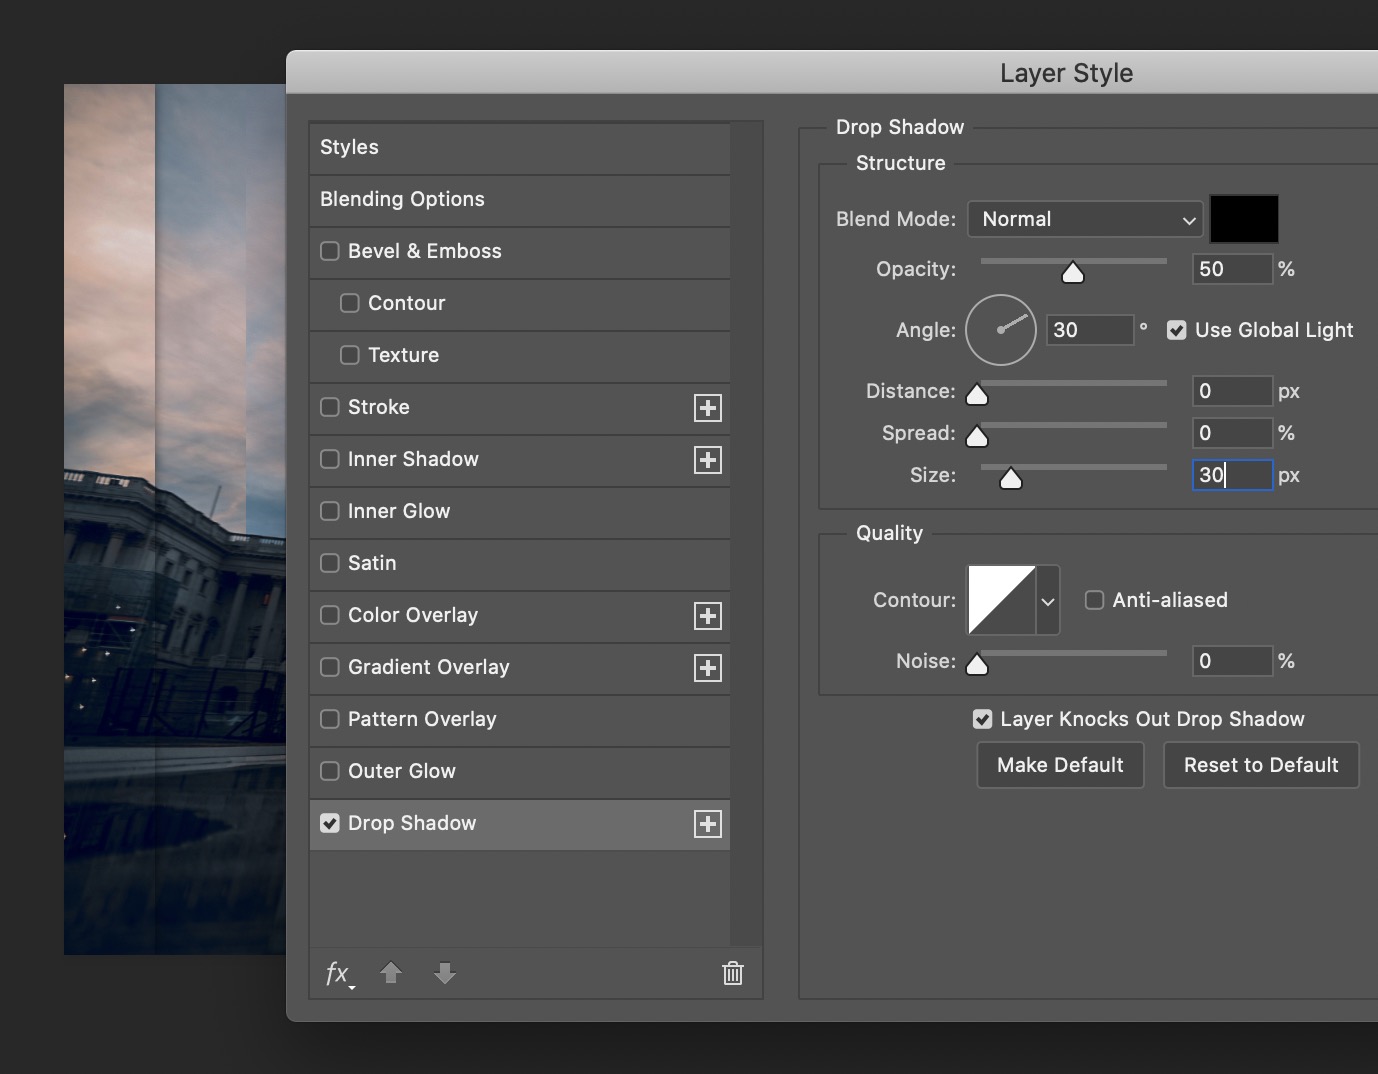
Once you have an effect you want; you can copy it to all of your layers by right-clicking on the layer with the shadow and clicking “Copy Layer Styles”.
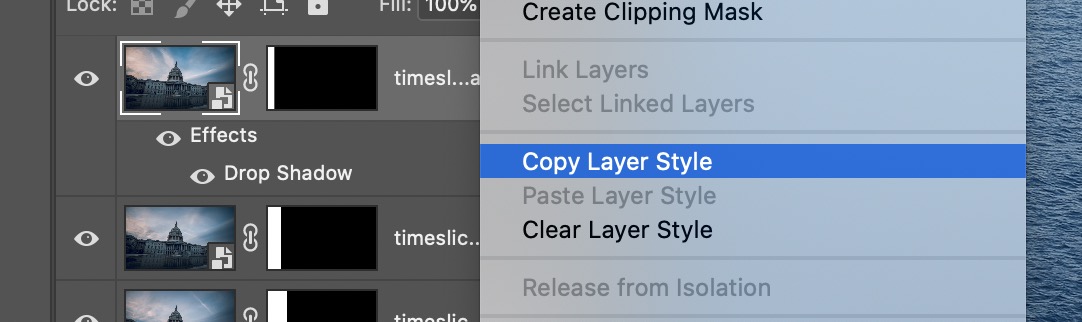
Then you can select the rest of the layers and right-click “Paste Layer Styles”.
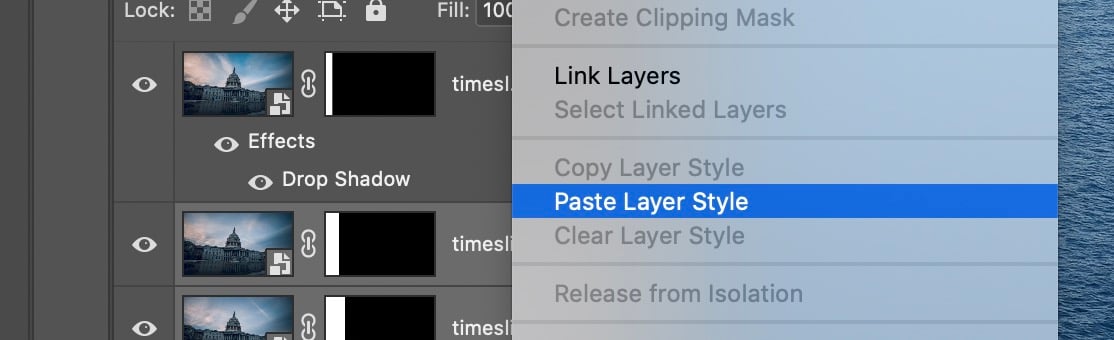
Now you’ll have shadows separating each slice of your time slice.
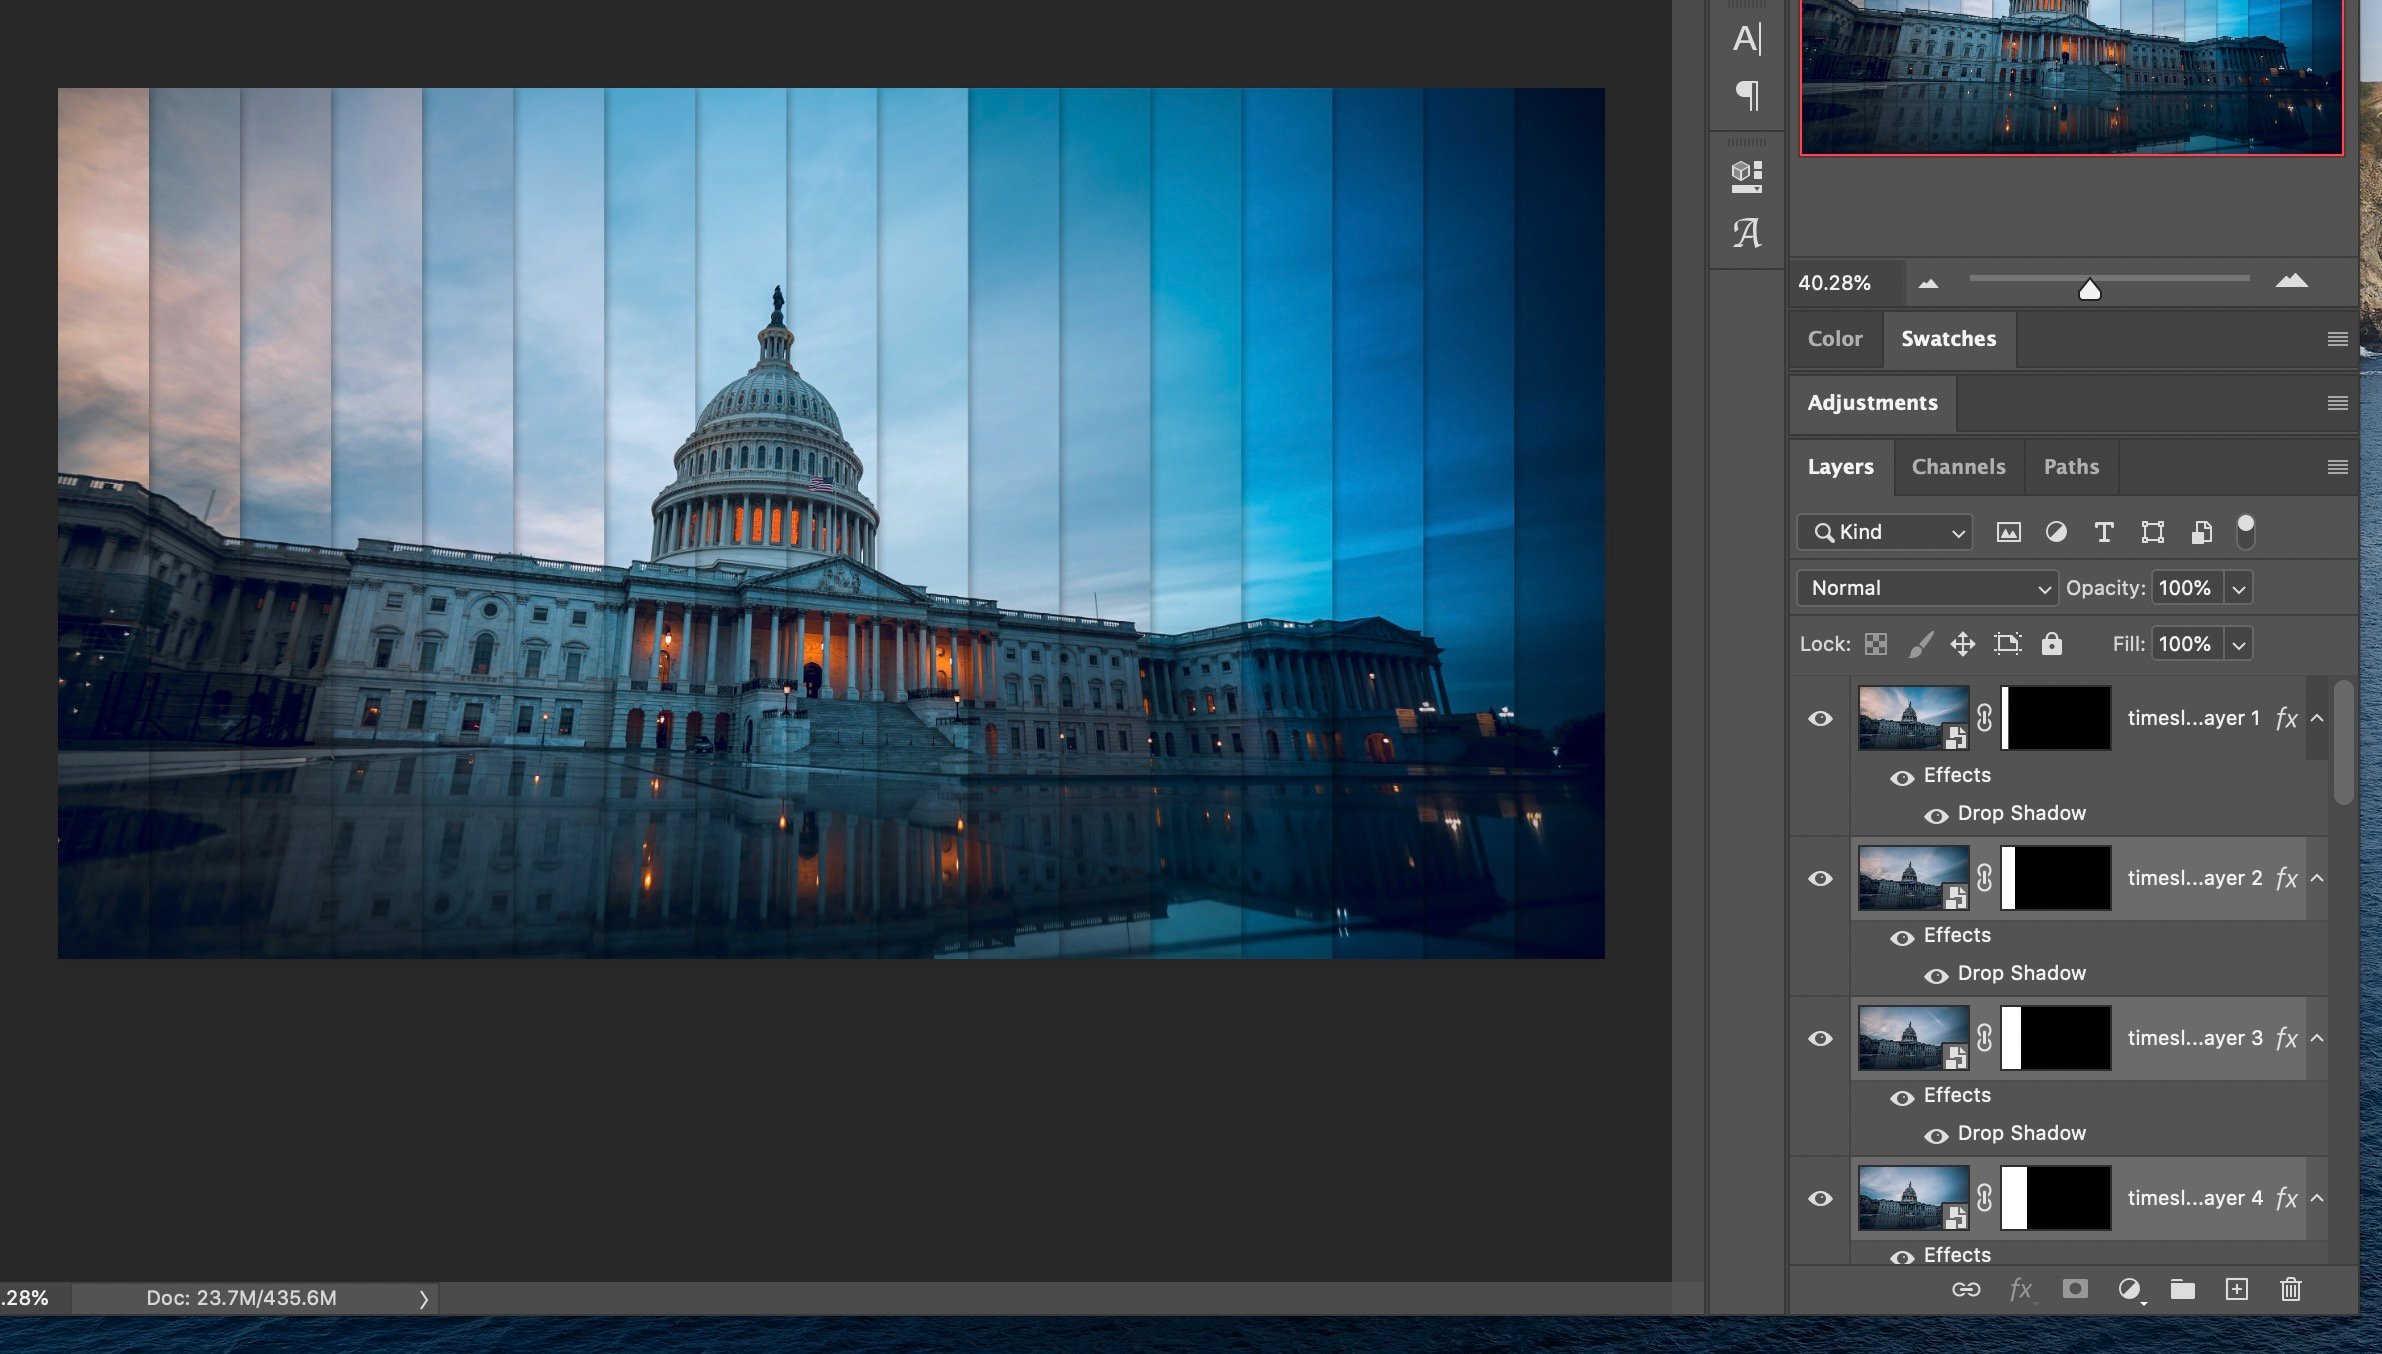
Your first time slice photo is now complete!
Now go out and find unique locations for your timeslice photography.
There is so much you can do with this effect. Like changing the angle of the slices, shape, and even adding a feather to the masks to make the effect smoother.
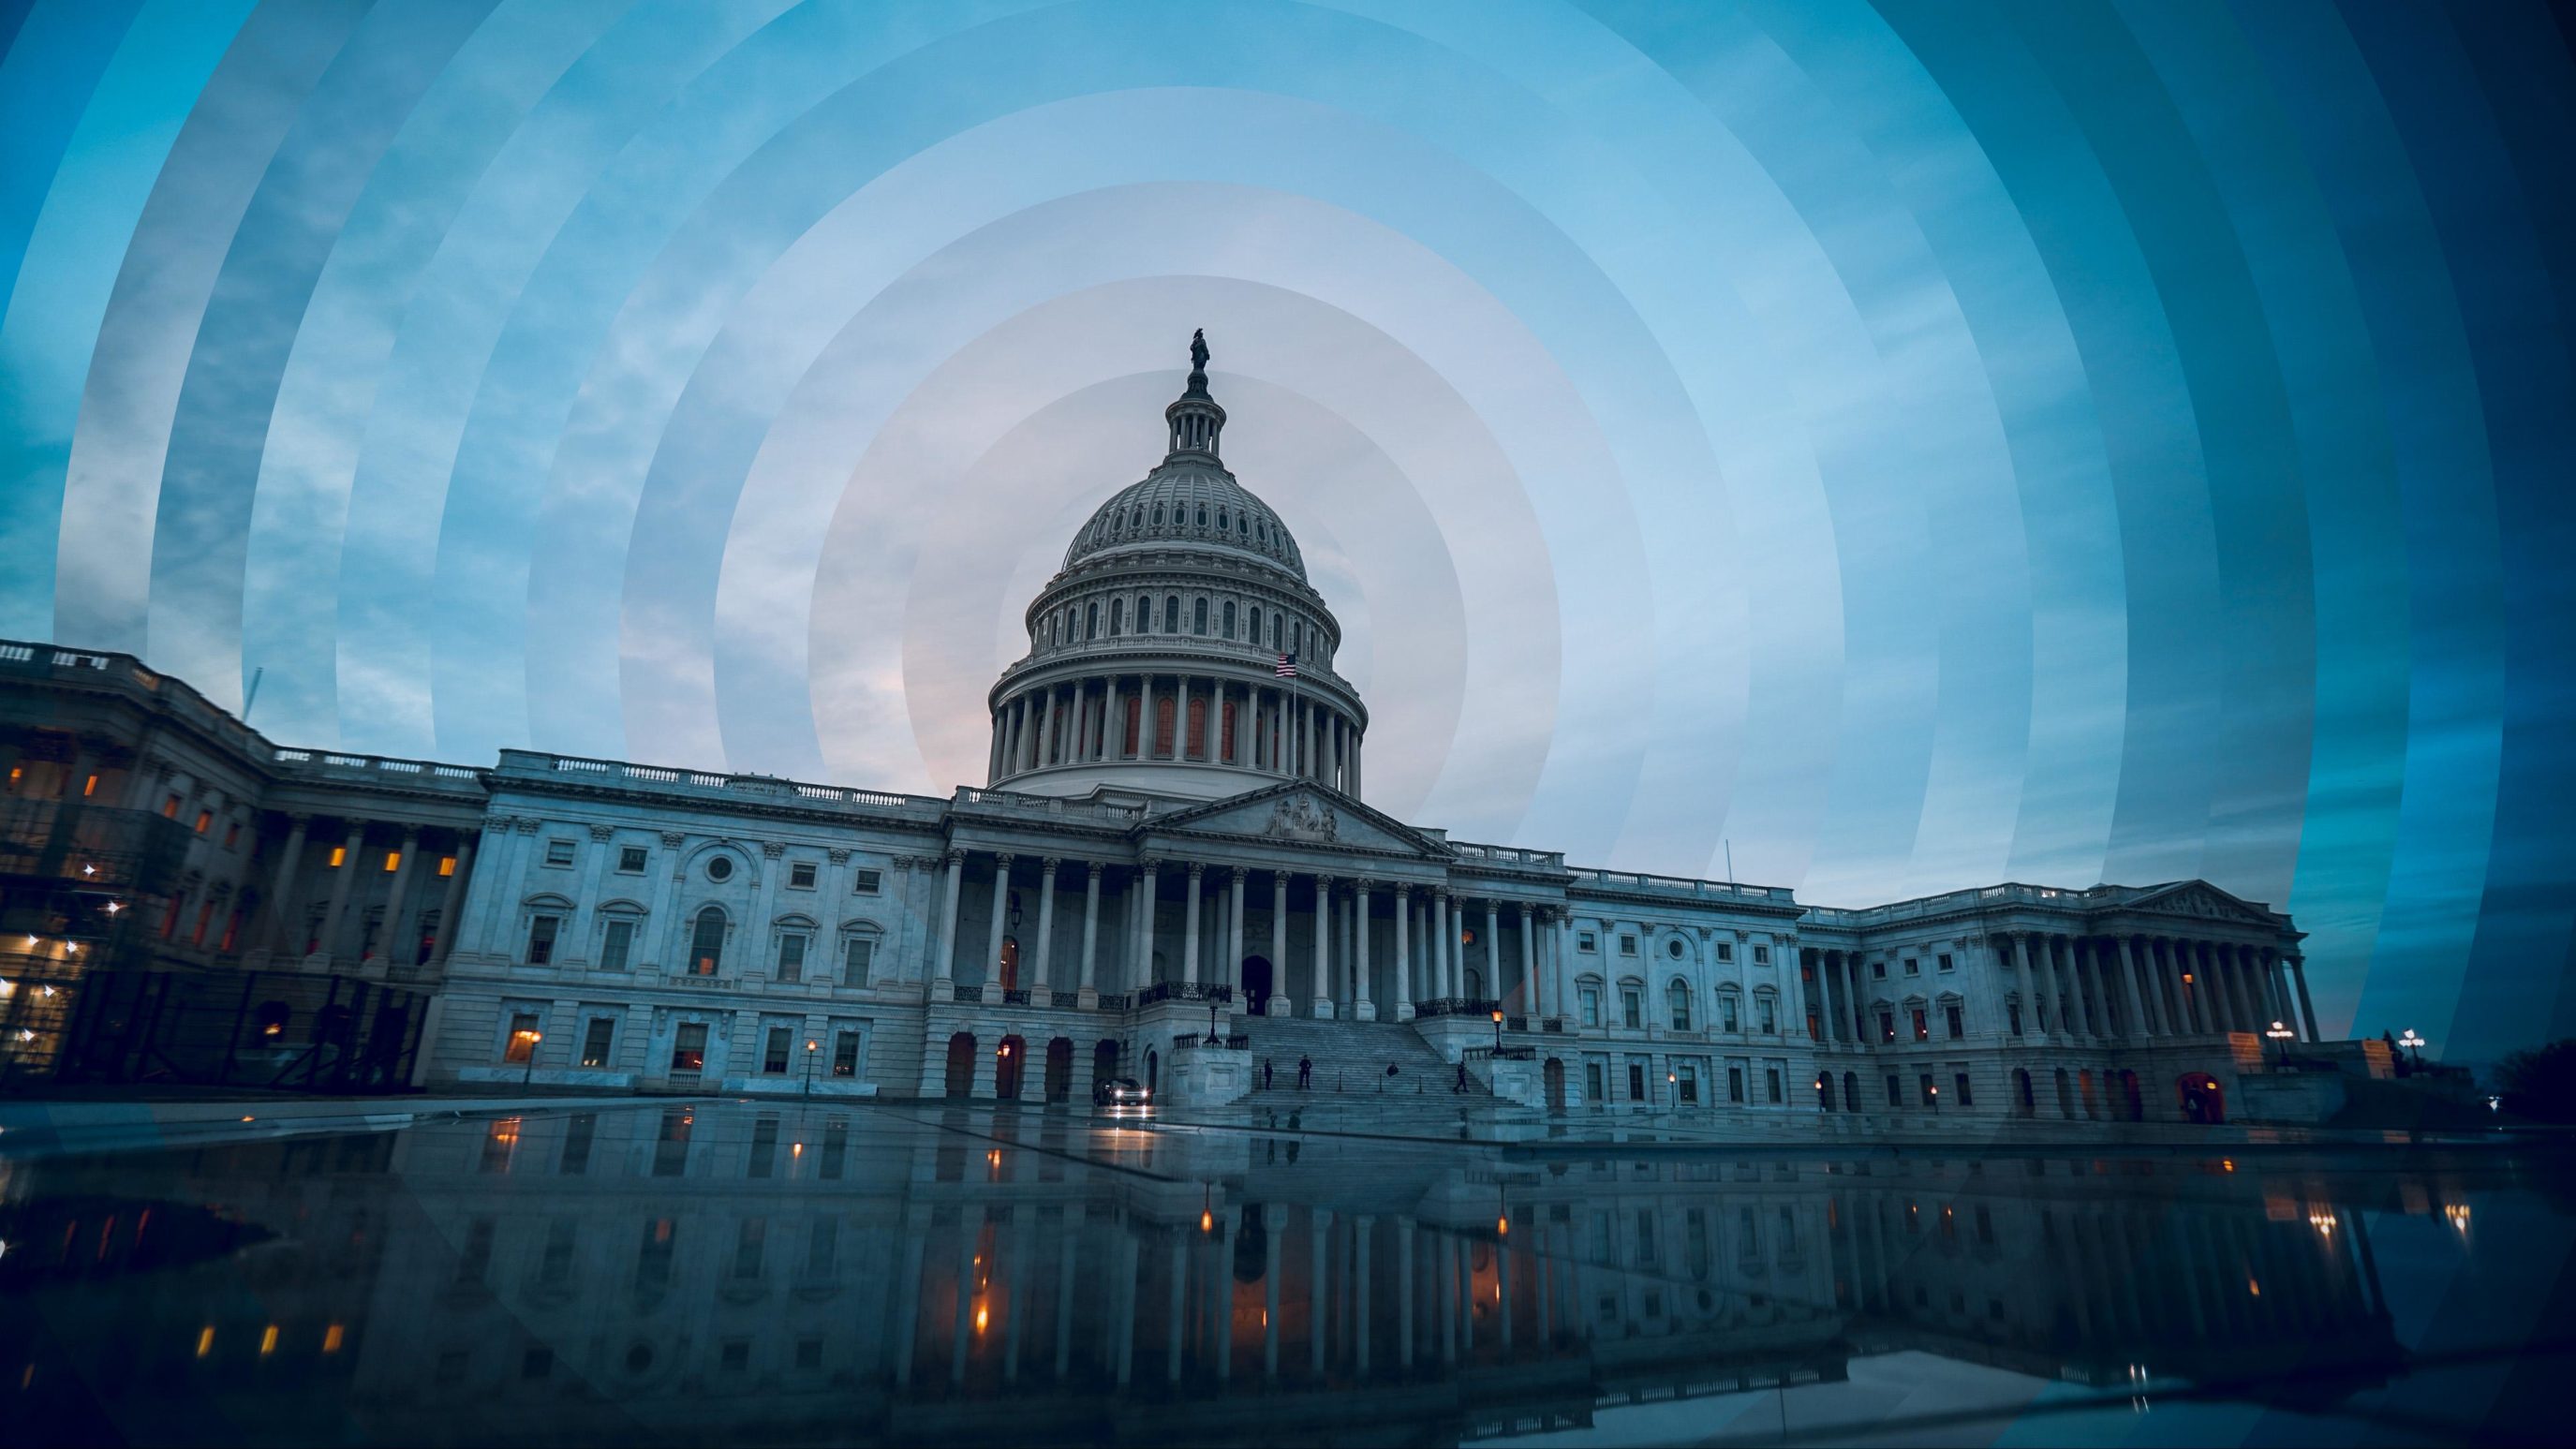
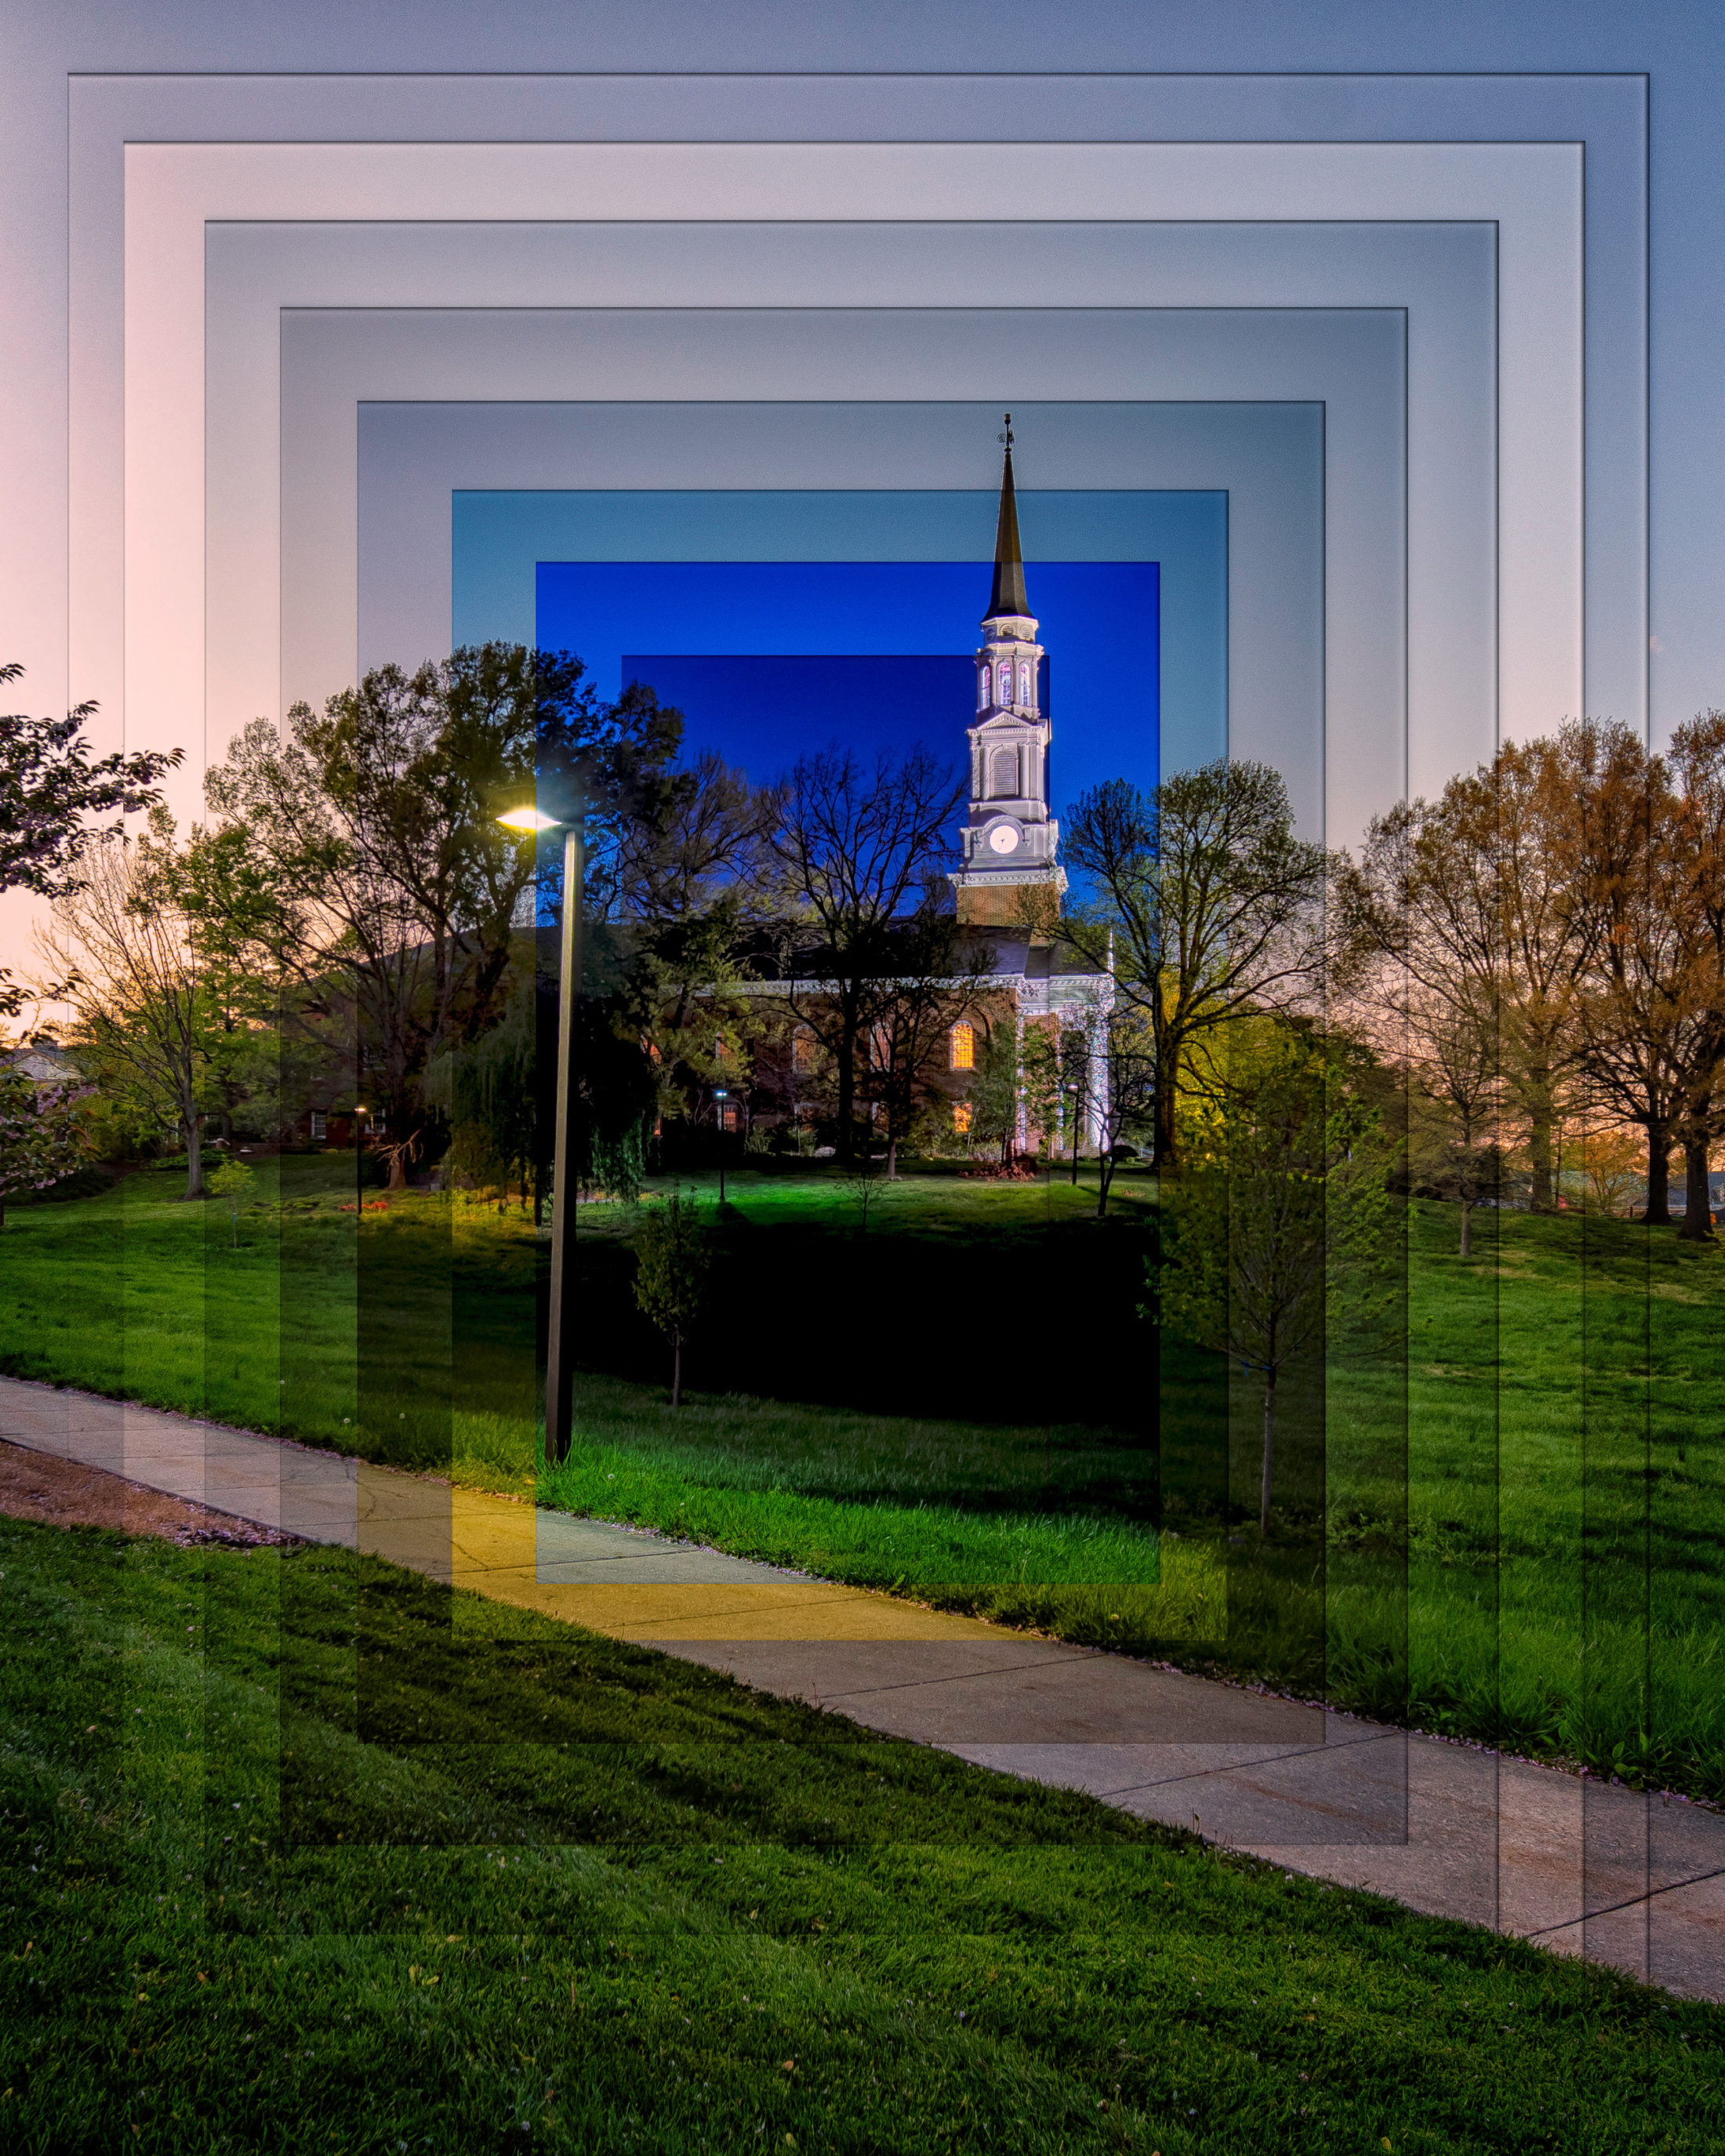
Time Slice Photography Inspiration
Here are some more examples of time slice photos for inspiration. Additional examples provided by @adam_brockett


Variations to Try
Once you have the vertical-slice version down, the same masking technique works with other shapes. A few worth trying:
- Slanted slices: Rotate the marquee selection (or use the polygonal lasso) to make diagonal slices instead of straight vertical ones. Works well on cityscapes with strong horizontal lines.
- Radial / circular slices: Use the polygonal lasso or elliptical marquee to carve pie-shaped wedges out of each layer. Best with subjects that have a clear central focal point.
- Square grid slices: Use guides at both vertical and horizontal intervals to create a grid of slices, then assign frames to each cell in chronological order.
- Feathered transitions: Add a feather (5-20 pixels) to your marquee selection before creating the mask. The slices blend into each other smoothly instead of having hard edges.
Time Slice Photography FAQ
What is time slice photography?
Time slice photography is a compositing technique where you take multiple photos from the same fixed position over an extended period (usually an hour or two during a sunset or sunrise) and combine them into a single image. Each frame becomes a vertical strip or “slice” in the final image, so you see the passage of time across one composition. It’s sometimes called a “time-lapse photo” because it captures the same change in light a time-lapse video would.
Can you do time slice photography without Photoshop?
Yes. Any image editor with layers and masks can do this, including GIMP (free), Affinity Photo, and Photopea (free, browser-based). There are also a few mobile apps that automate the process (search “time slice” in the App Store or Google Play). Photoshop is the most flexible option because of its precise masking and layer styles, but it isn’t required.
How many photos do you need for a time slice?
At least 5 to see a clear transition. 10 to 20 is a sweet spot: enough slices to show smooth progression without each slice becoming too narrow to read. I usually shoot one frame every 5 minutes over 90 minutes for around 18 frames.
What’s the best subject for time slice photography?
City skylines at sunset or sunrise. The combination of a clear horizon, dramatic sky color changes, and city lights coming on creates the strongest “passage of time” effect. Landscapes can work too, especially around alpenglow on mountains, but they don’t have the dramatic light-on transition that cityscapes do. Avoid scenes with moving people or vehicles in the foreground; they’ll show up oddly across the slices.
Do I need an intervalometer?
No, but it helps. Most modern cameras have a built-in interval timer in the menu, and a basic phone timer also works fine. The benefit of an intervalometer (or built-in interval mode) is that you can set it once and let the camera shoot on its own while you stay back from the rig, which reduces the chance of bumping the tripod between frames.
A time slice photo is part photograph, part time-lapse. It takes a bit of planning at the shoot and some patience in Photoshop, but the result is worth it. If you have questions or want me to expand on any step, drop a note in the comments.
I hope this timeslice tutorial was helpful!
Save a pin to Pinterest below for later

Good!!!
hey Man thank you! I struggle finding the app that does it automatically, can you please post a link? love that effect! would be cool to do a tutorial on a endless loop with a time slice for an insta reel!
Sadly TimeSlice studio app for Mac that I used in the video is no longer available. For the video one that’s a great idea I will work on a video for that!
Love this! could you give us some tips for the other timelapse version as well? I’m struggling in photoshop to get it as clean as your examples. thanks!
Do you mean a video version or just more examples? I’ll try to shoot another soon and add more examples, I see you also want to see a radial effect which I’ll try to add in the next month!
Great video! It is inspiring.
Could you please shed a light on how to achieve the Radial Effect / Sunburst-Type slice by manual in Photoshop?
Thank you.
Wish you and your family good health and happiness.
Hi terry,
Have you found a good tutorial on the radial/sunburst effect?