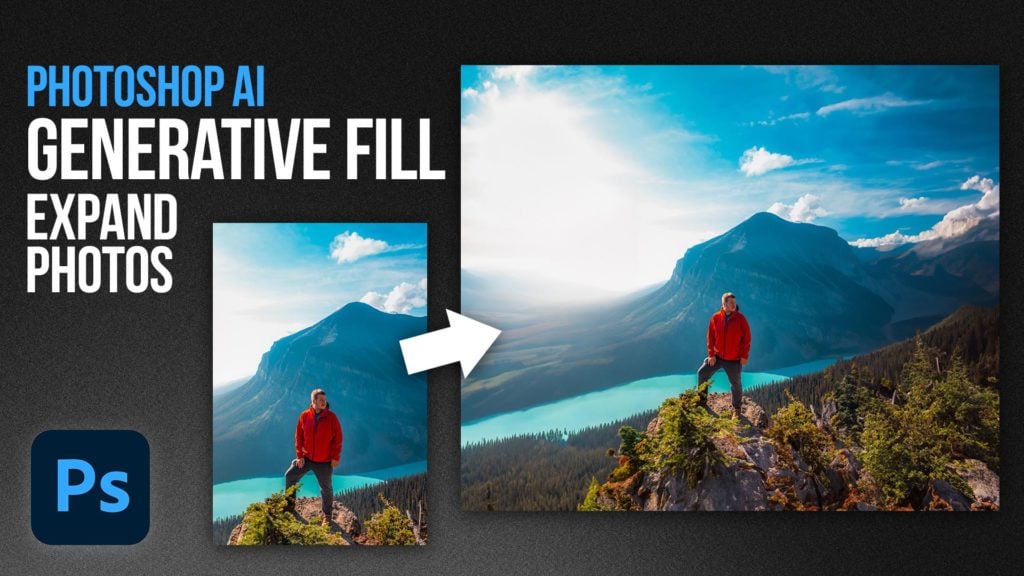
Adobe Photoshop has finally added an extremely powerful AI tool called Generative Fill. This new feature is powered by Adobe Firefly and can be used for many things including removing things from a photo, adding things, and extending the frame of images.
Previously you had to use content aware scale to get great results but with the help of Artificial Intelligence. This Photoshop feature works a lot like Midjourney, this of it like a content aware fill on steroids.
Note: This feature is currently part of the Photoshop beta using at least version 24.5. You can get the Photoshop beta in the “Beta Apps” tab of the Creative Cloud app.
In this quick tutorial I’ll show you how to use Photoshop’s Generative Fill feature to extend the frame of any existing photo.
How to Extend an Image with Generative Fill in Photoshop
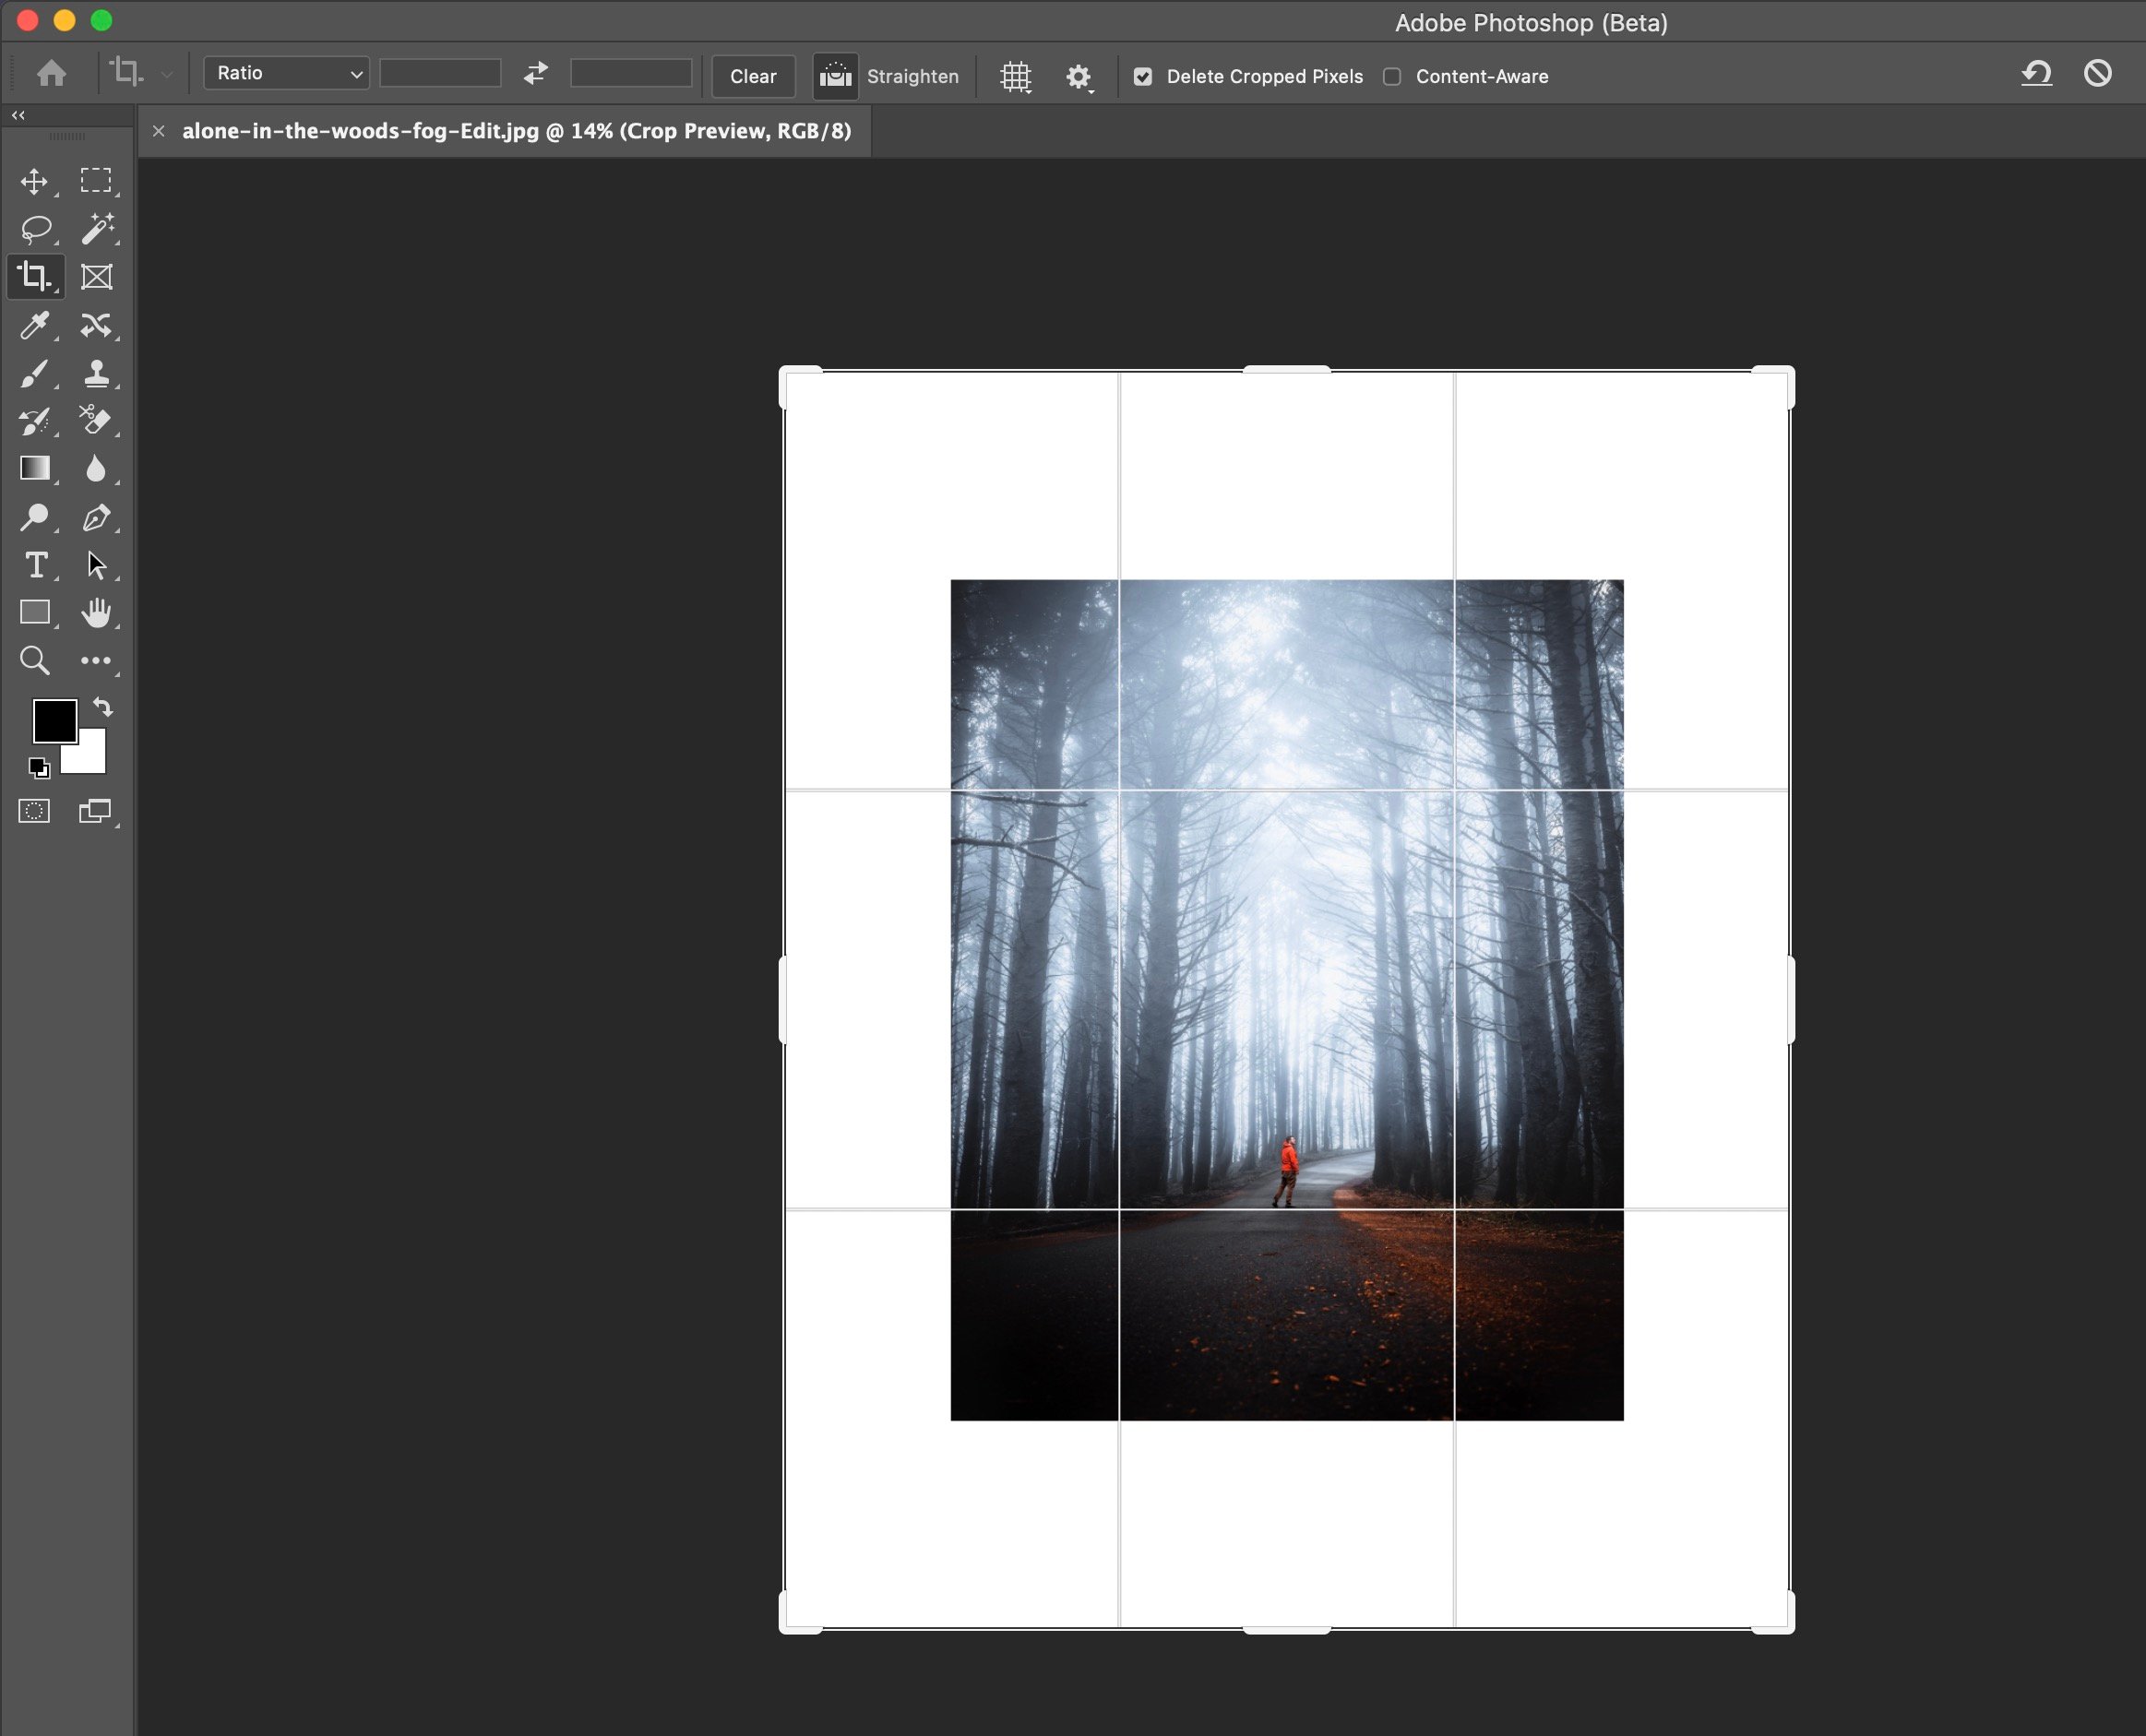
1. Enlarge the Canvas with Cropping Tool
Since we’re making our image larger of course the first thing we need to do is enlarge our canvas. This is as simple as using the crop tool and extending beyond the frame on the image.
If you want to keep a specific ratio you can also use the ratio options in the crop tool which will force your crop to keep a specific aspect ratio.
2. Select Your Image
Now you’ll need to select your image using the marquee selection tool. This is pretty easy, just select about 95% of your image.
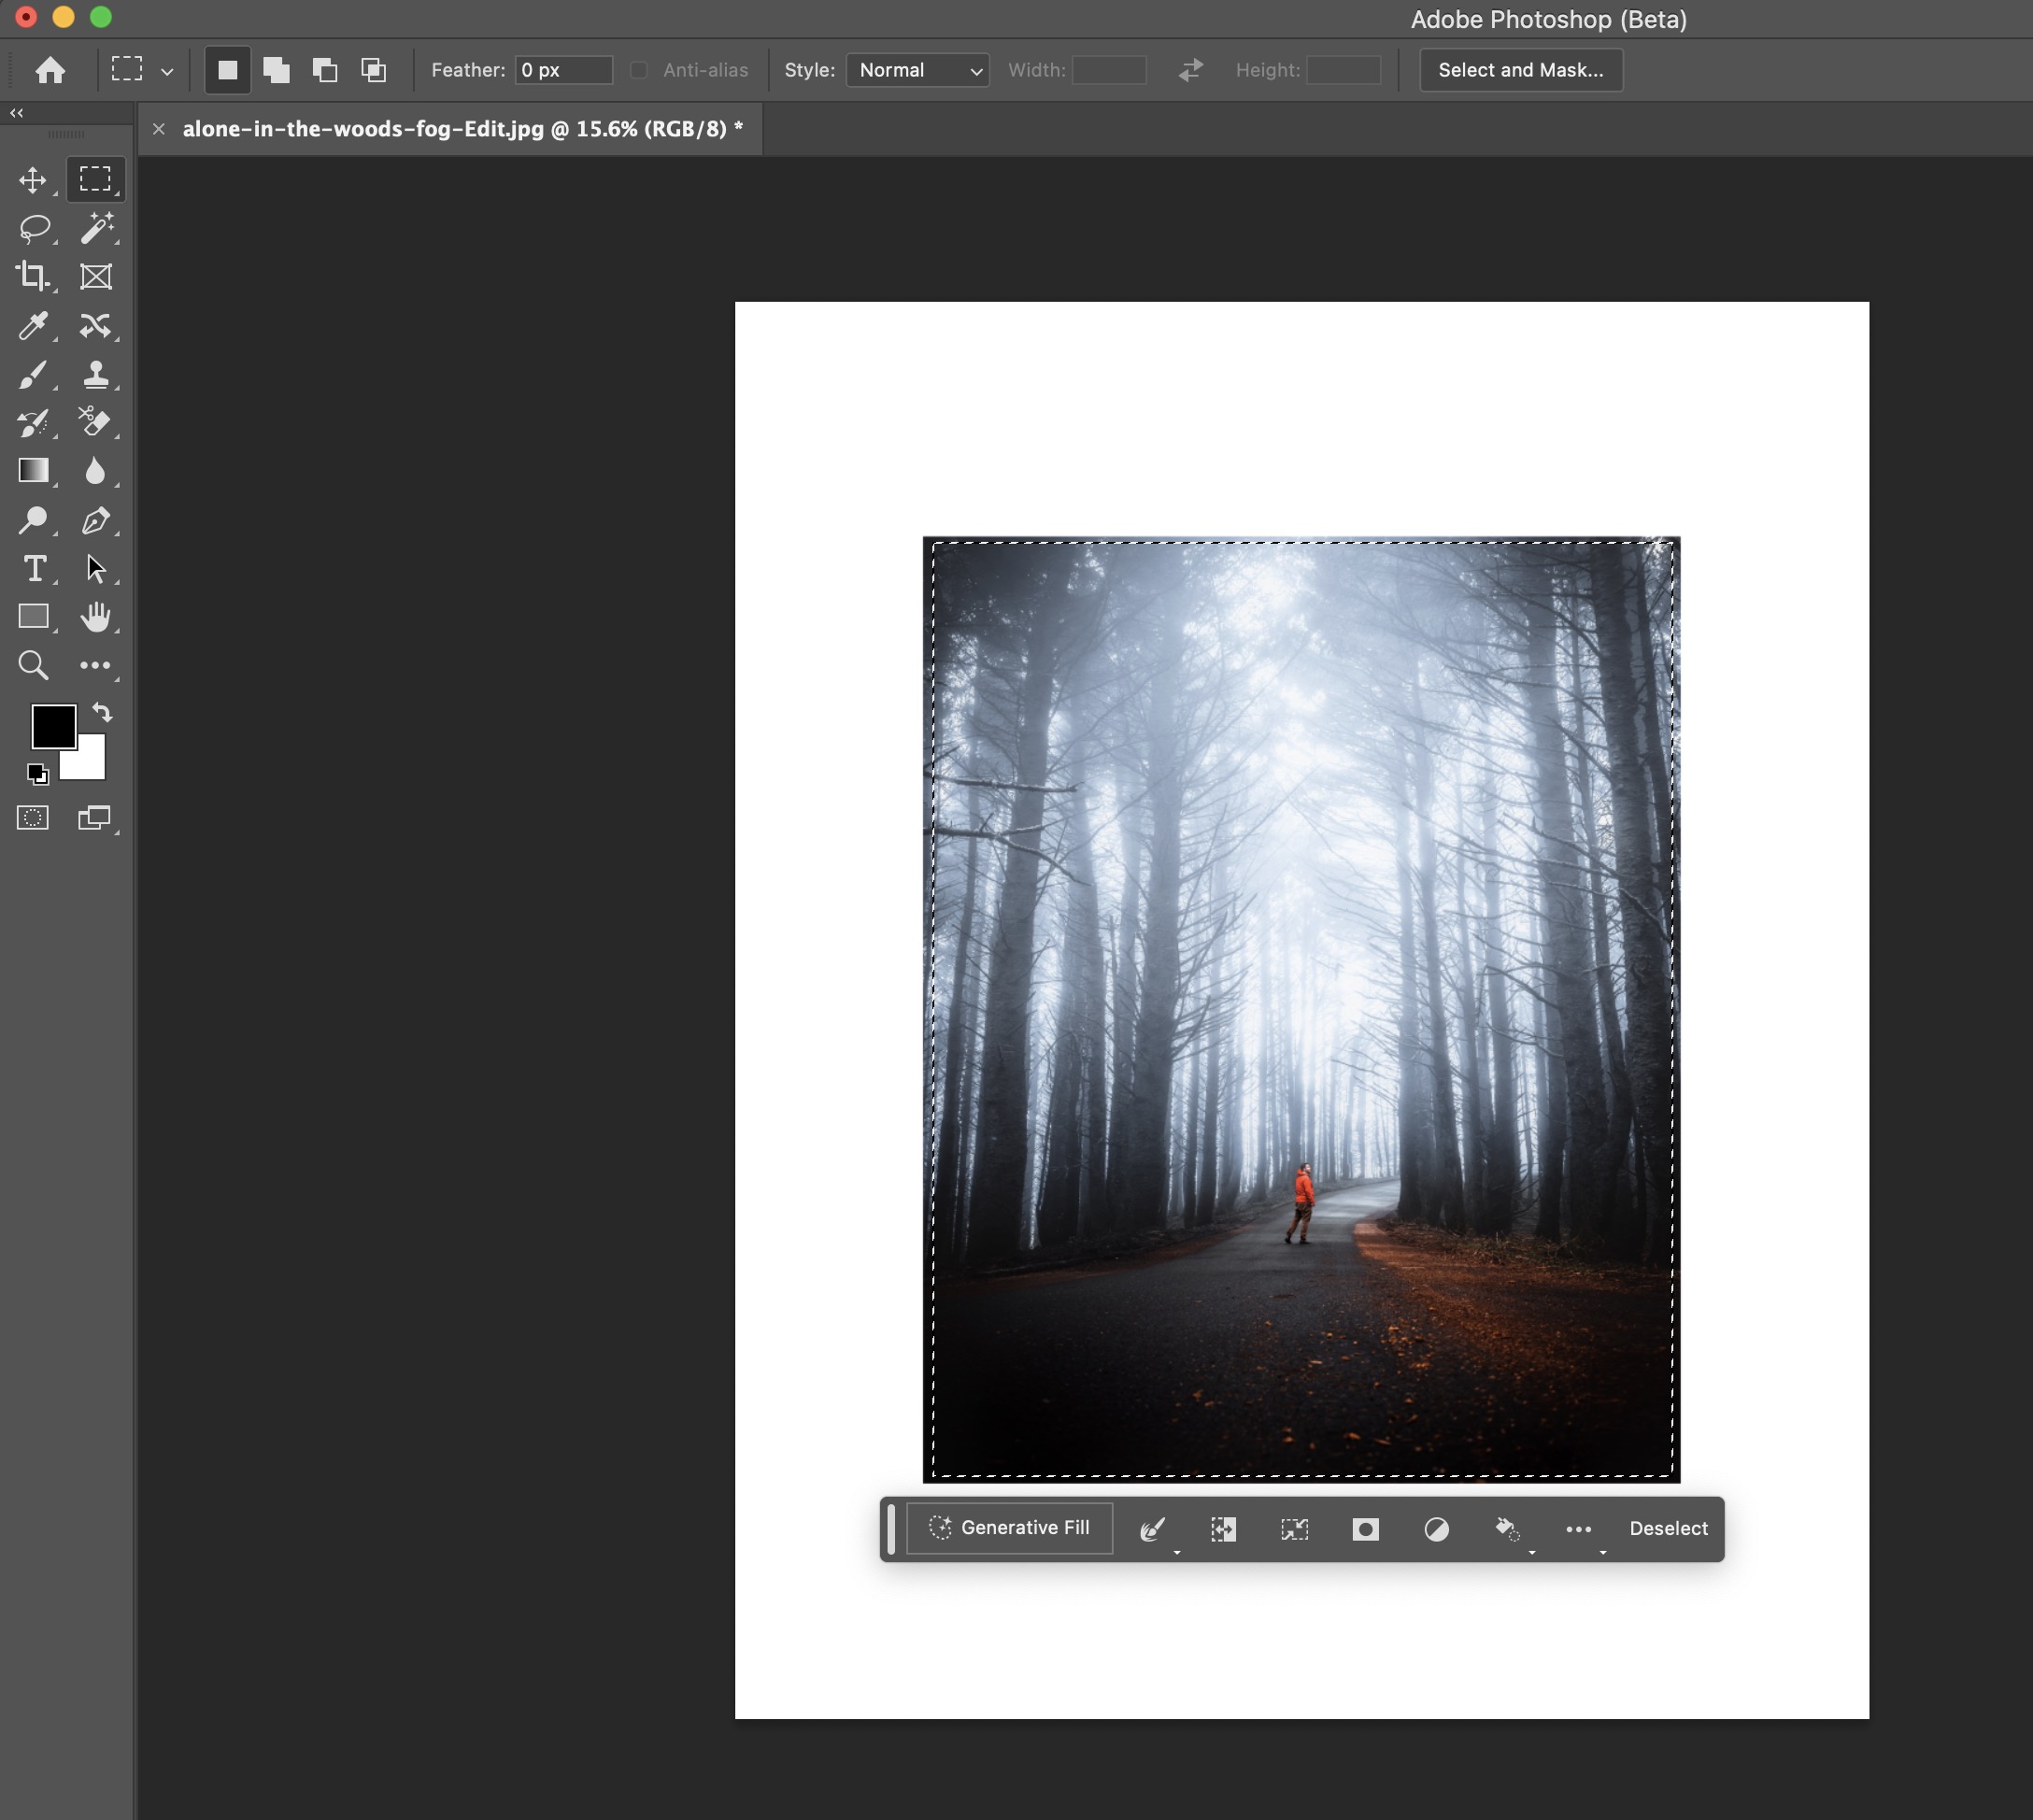
While selecting you’ll want to make sure there is a little bit of a buffer between the edge and the whitespace as shown below. This is essential for Generative Fill to properly fill in the whitespace.
If your results aren’t what you expect at the end of the process I recommend returning to this step and adding a larger buffer between the edge of the frame.
3. Invert Selection
Now that you’ve selected the image you’ll want to invert the selection. This can be done on Mac by hitting CMD+Shift+I or clicking the invest selection button on the contextual task bar that pops up.
Now that the selection is inverted we can generate the surrounding area.
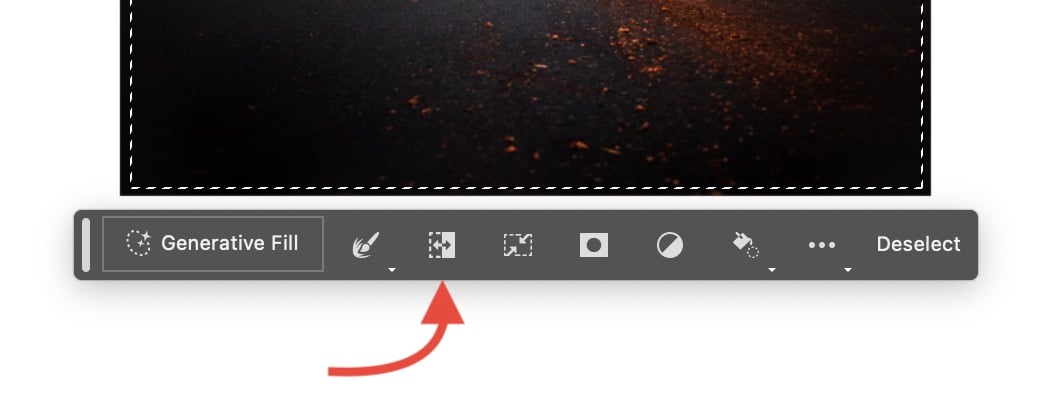
4. Generative Fill the Edges
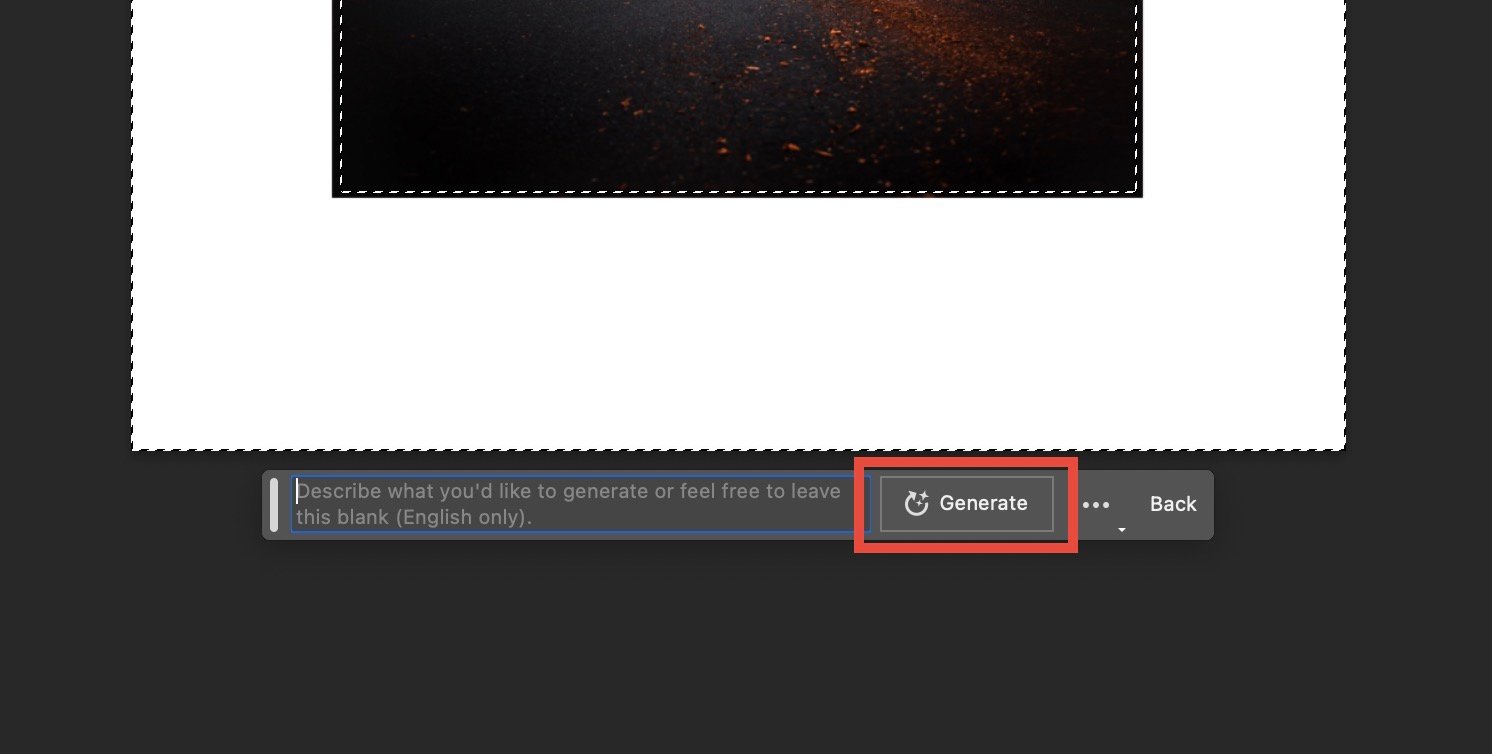
Simply just click Generative Fill then leave the prompt blank and then click Generate. Of course you can guide the output using a text prompt but I recommend keeping it blank to let it use the image as a reference.
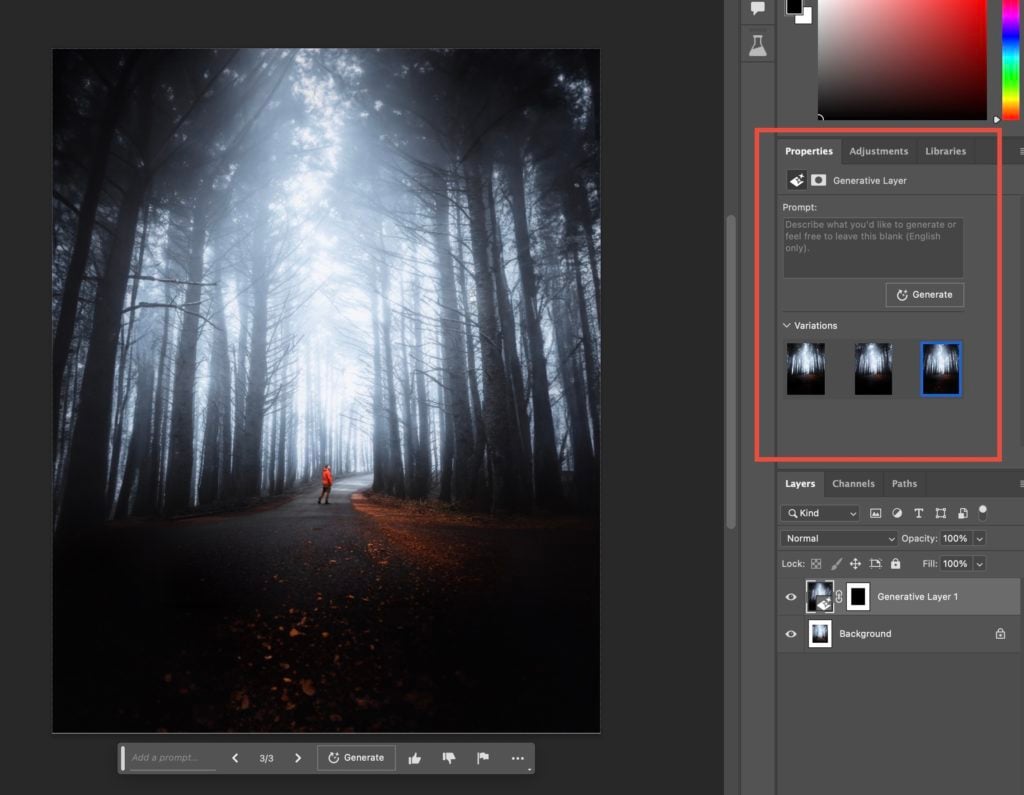
After Generate Fill runs which will take about 30 seconds you’ll be given 3 options for fill options in the properties panel. If you don’t like any of the results you can also hit generate again to quickly get 3 more options. If the results still aren’t to your liking I recommend going back to step 2 and selecting less of the image.
After you’re happy with your results you can just save your image like you would any Photoshop image.
Keep in mind that Generative Fill output is done in 1024×1024 pixel chunks and stretched over the area you’re trying to output on. This means that if you want the highest quality possible you’ll want to generate each part of the area in 1024×1024 “chunks”.
You may also enjoy my video of Photoshop Generative Fill tips that goes more into detail about Photoshop’s generative AI features.
Using Photoshop’s Generative Fill feature can take your image editing skills to the next level. With just a few clicks, you can easily extend your original image and create a seamless background that looks like it was always there.
The feature is powered by Adobe Firefly which is made to be safe for commercial use. It uses images from Adobe Stock, work that is openly licensed, and material that is in the public domain because the copyright has expired.