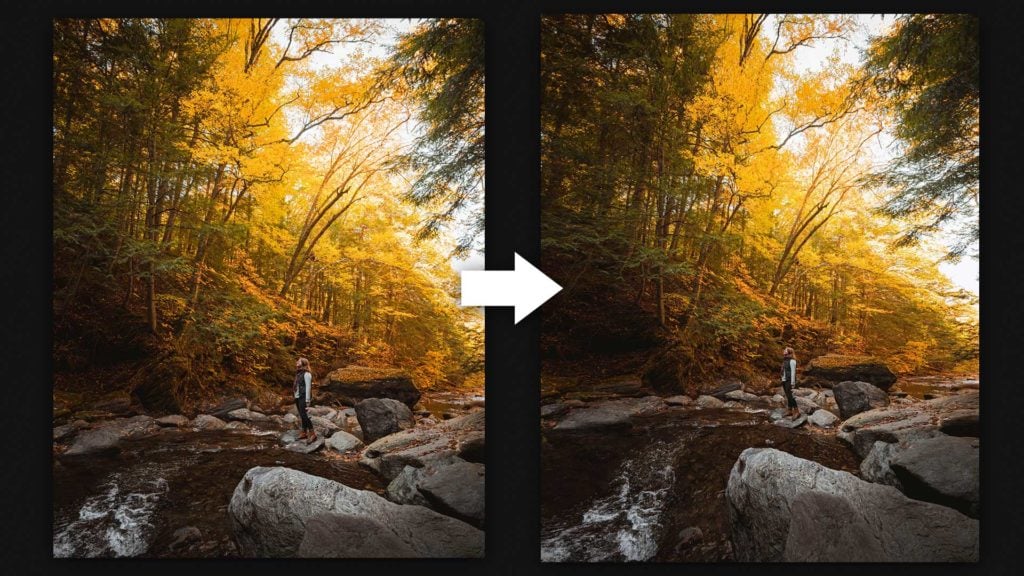
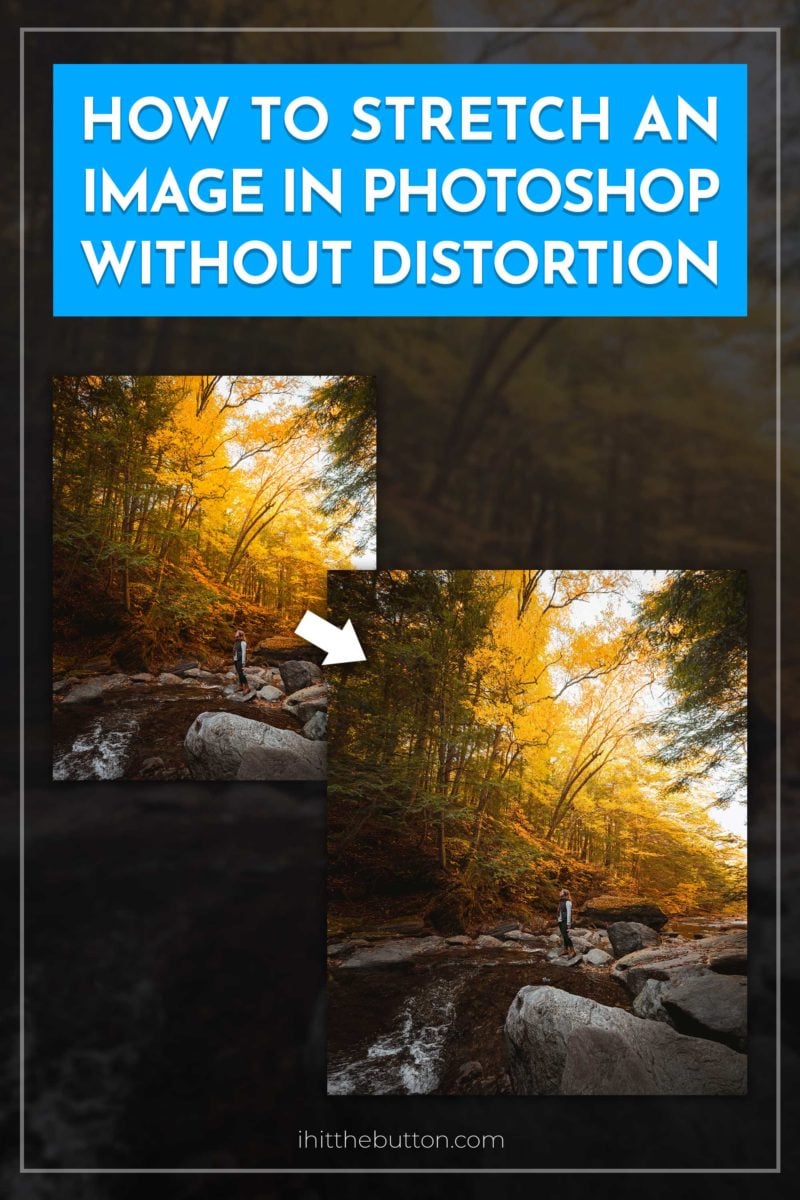
If you are cropping photos for the 4×5 Instagram you know how difficult it can be to fit your subject in the frame. This is where adding a bit more room vertically or horizontally to your photo using content aware scale in Photoshop can be useful.
In this article I’ll go over how to use Photoshop to add a bit more breathing room to your photo without distorting the photo.
It’s important to note that this won’t work with all images but photos with simple edges will work best. This includes photos with simple horizons and landscapes.
There are two main ways to do this. The fastest is Generative Expand, Photoshop’s AI tool that generates new space for you (covered first below). The classic approach uses Content-Aware Scale, which stretches your existing pixels without any AI and gives you full manual control. I’ll walk through both, and you can also see my deeper guide to Photoshop’s Generative Fill.
How to Stretch an Image in Photoshop Without Distortion
The Easy Way: Generative Expand (AI)
If you have Photoshop 2024 or newer, Generative Expand is by far the fastest way to stretch a photo into a new size. Instead of stretching your existing pixels, it uses Adobe’s Firefly AI to generate brand-new pixels that blend into the scene, so there’s no distortion at all.
- Select the Crop tool from the toolbar (or press C).
- In the options bar at the top, set the Fill dropdown to Generative Expand.
- Drag the crop handles outward to the size you want. Hold Option (Mac) or Alt (Windows) to expand both sides at once.
- Leave the prompt box in the contextual task bar empty so it matches the surrounding scene, then click Generate. Add a short prompt only if you want something specific in the new space.
- Pick your favorite from the variations in the Properties panel.
Generative Expand uses generative credits on your Adobe plan, and it works best for landscapes, skies, and simple backgrounds. If you’d rather not use AI (or want to avoid spending credits), the manual Content-Aware Scale method below is free and gives you precise control.
Prefer the manual route? The classic method uses Content-Aware Scale and doesn’t touch any generative credits. First, open your image in Adobe Photoshop. If you’re using Lightroom, right-click your photo and choose Open in Photoshop.
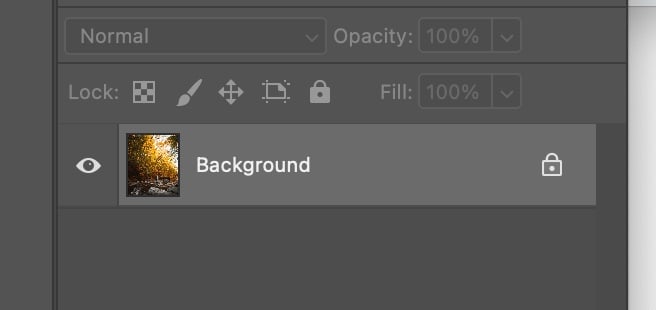
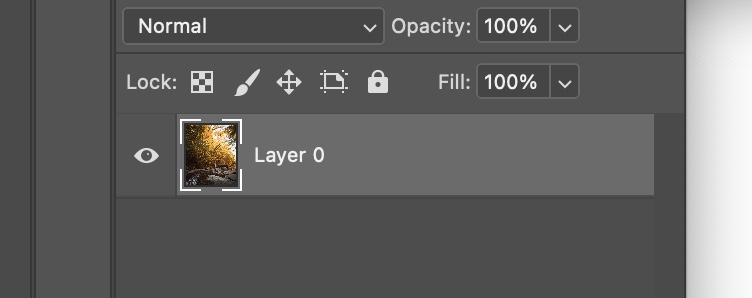
1. Unlock Your Canvas
Once you have your photo in Photoshop you want to be sure the layer is unlocked. This is usually indicated with a tiny lock symbol on the layer. You can unlock a layer by double clicking it and hitting ok.
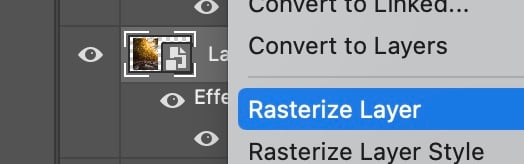
You’ll also want to make sure the layer is not a smart object. If you believe that to be the case you can right click the layer and select “Rasterize Layer”
Now that we know our canvas is unlocked and the layer isn’t a smart object we can move on to the next step in stretching your photo.
2. Enlarge Your Canvas
Since you want your photo to be horizontally or vertically larger we’ll need to enlarge the canvas.
This can be done by going to Image > Canvas Size.
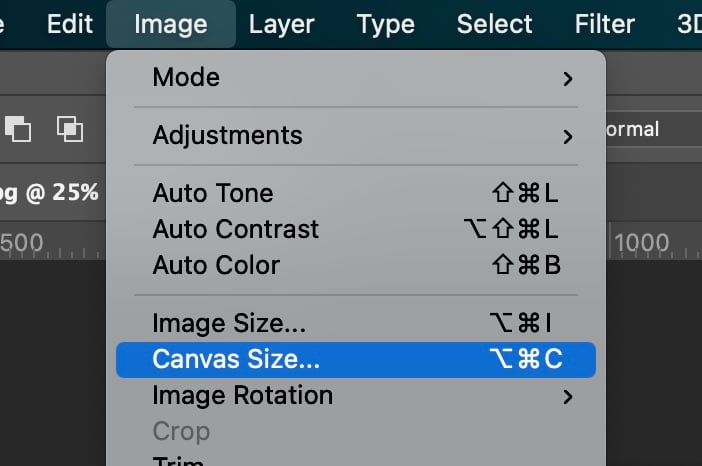
Once the canvas size option appears you’ll be able to enlarge the canvas in any direction. For this tutorial I recommend using a percentage scale and setting the width to 120%.
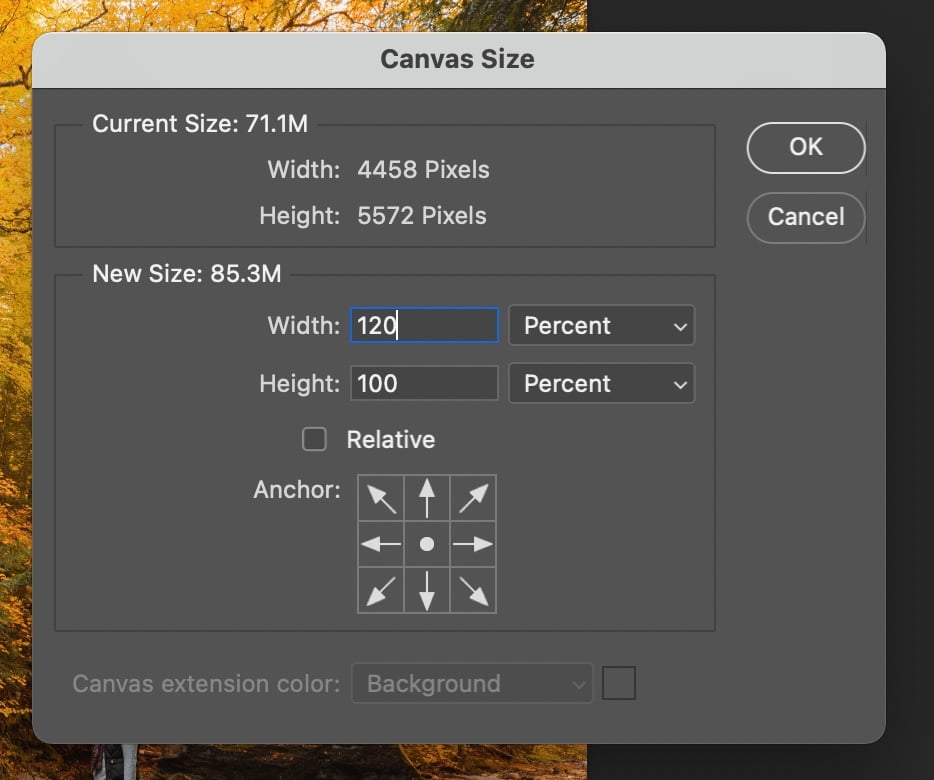
After hitting OK you’ll be greeted with your extended canvas to work with.
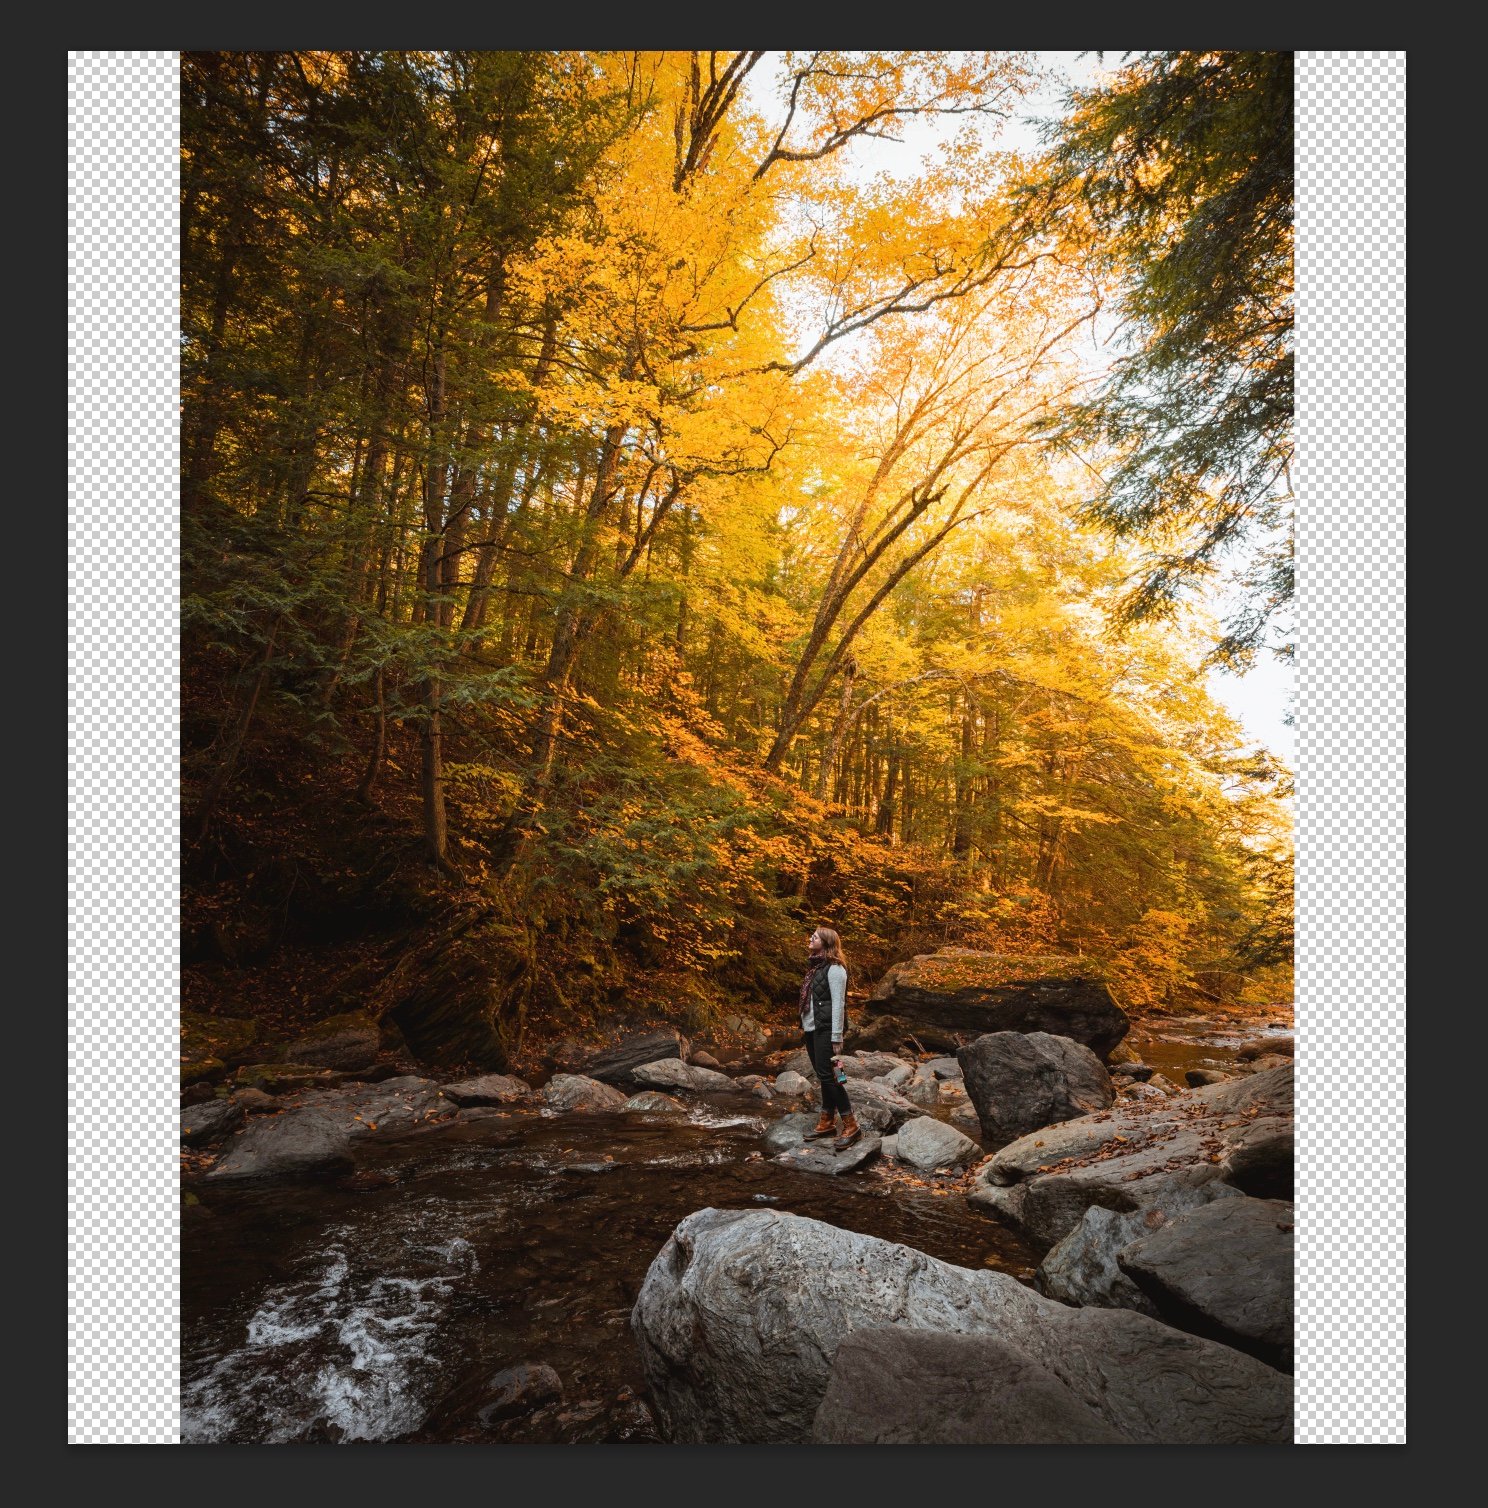
Now that we have our extended canvas we can stretch the edges of our photo.
3. Stretch the Edges with Content Aware Scale
Here comes the fun part, actually stretching our image without distortion. We’ll do this by selecting one of the edges with the marquee tool. You’ll want to do this logically since some elements will stretch better than others. For example if you select your subject (such as a person) the modification will be more obvious.
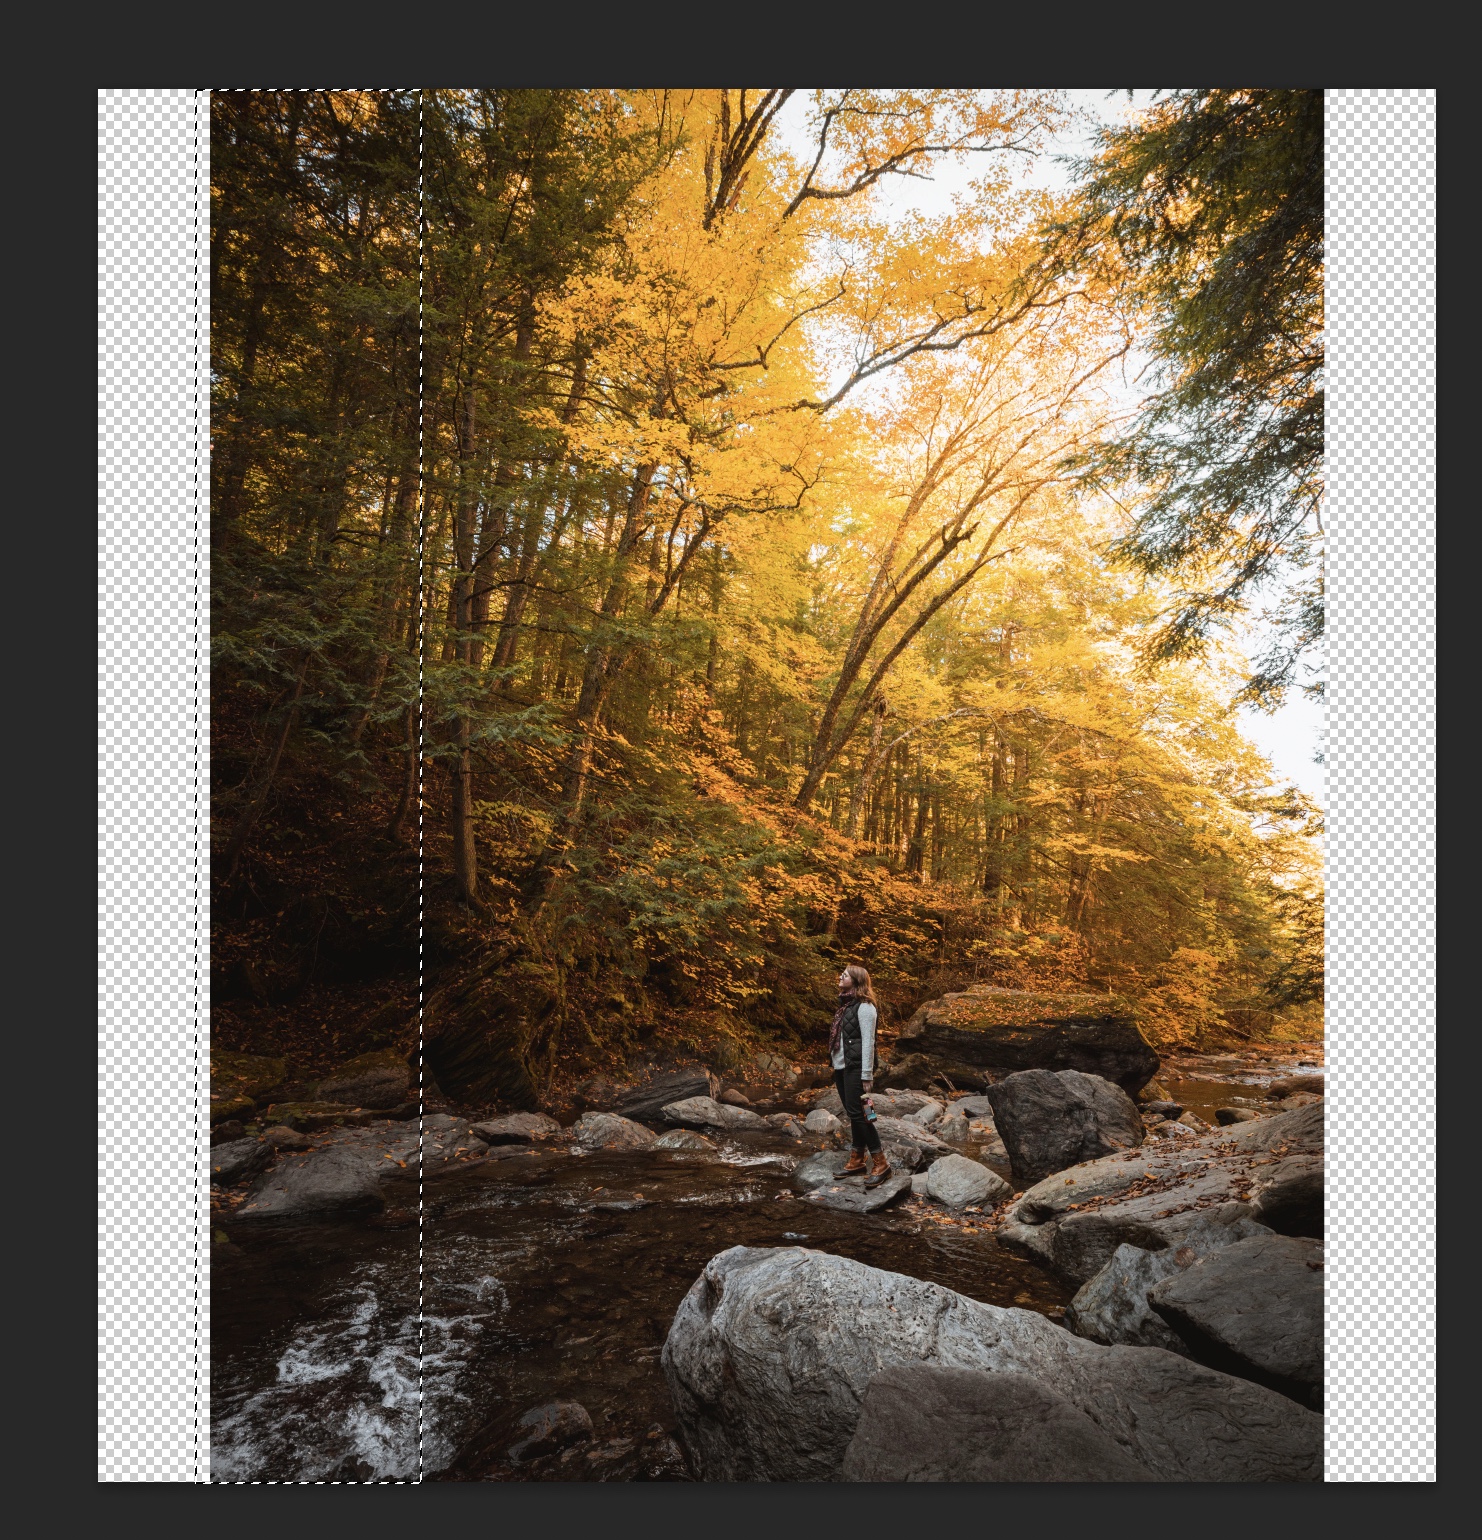
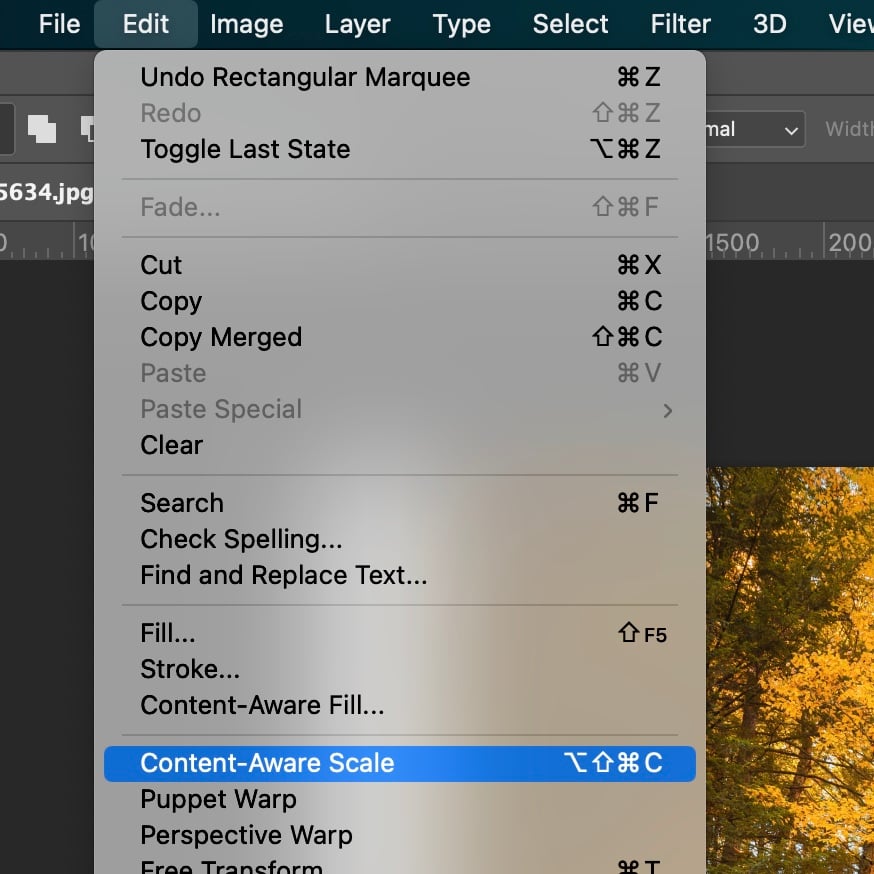
Once you’ve selected an edge you’ll want to content-aware scale the section of the photo. This can be done by going to Edit > Content-Aware Scale.
Content-Aware scaling will intelligently widen the area so it looks natural. This won’t work for all photos but should look great on most after some cleaning.
Looking to improve your travel photography?
Read: Travel Photography Tips to Improve Your Photos
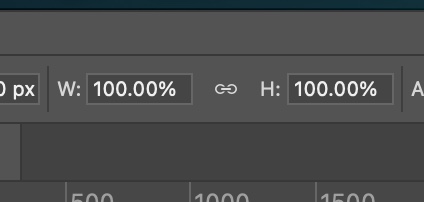
After clicking Content-Aware Scale you’ll want to make sure the aspect ratio isn’t locked by unchecking the little “link” button at the top.
After this we can drag the edge of the photo to the edge of the canvas to stretch the image without distortion.
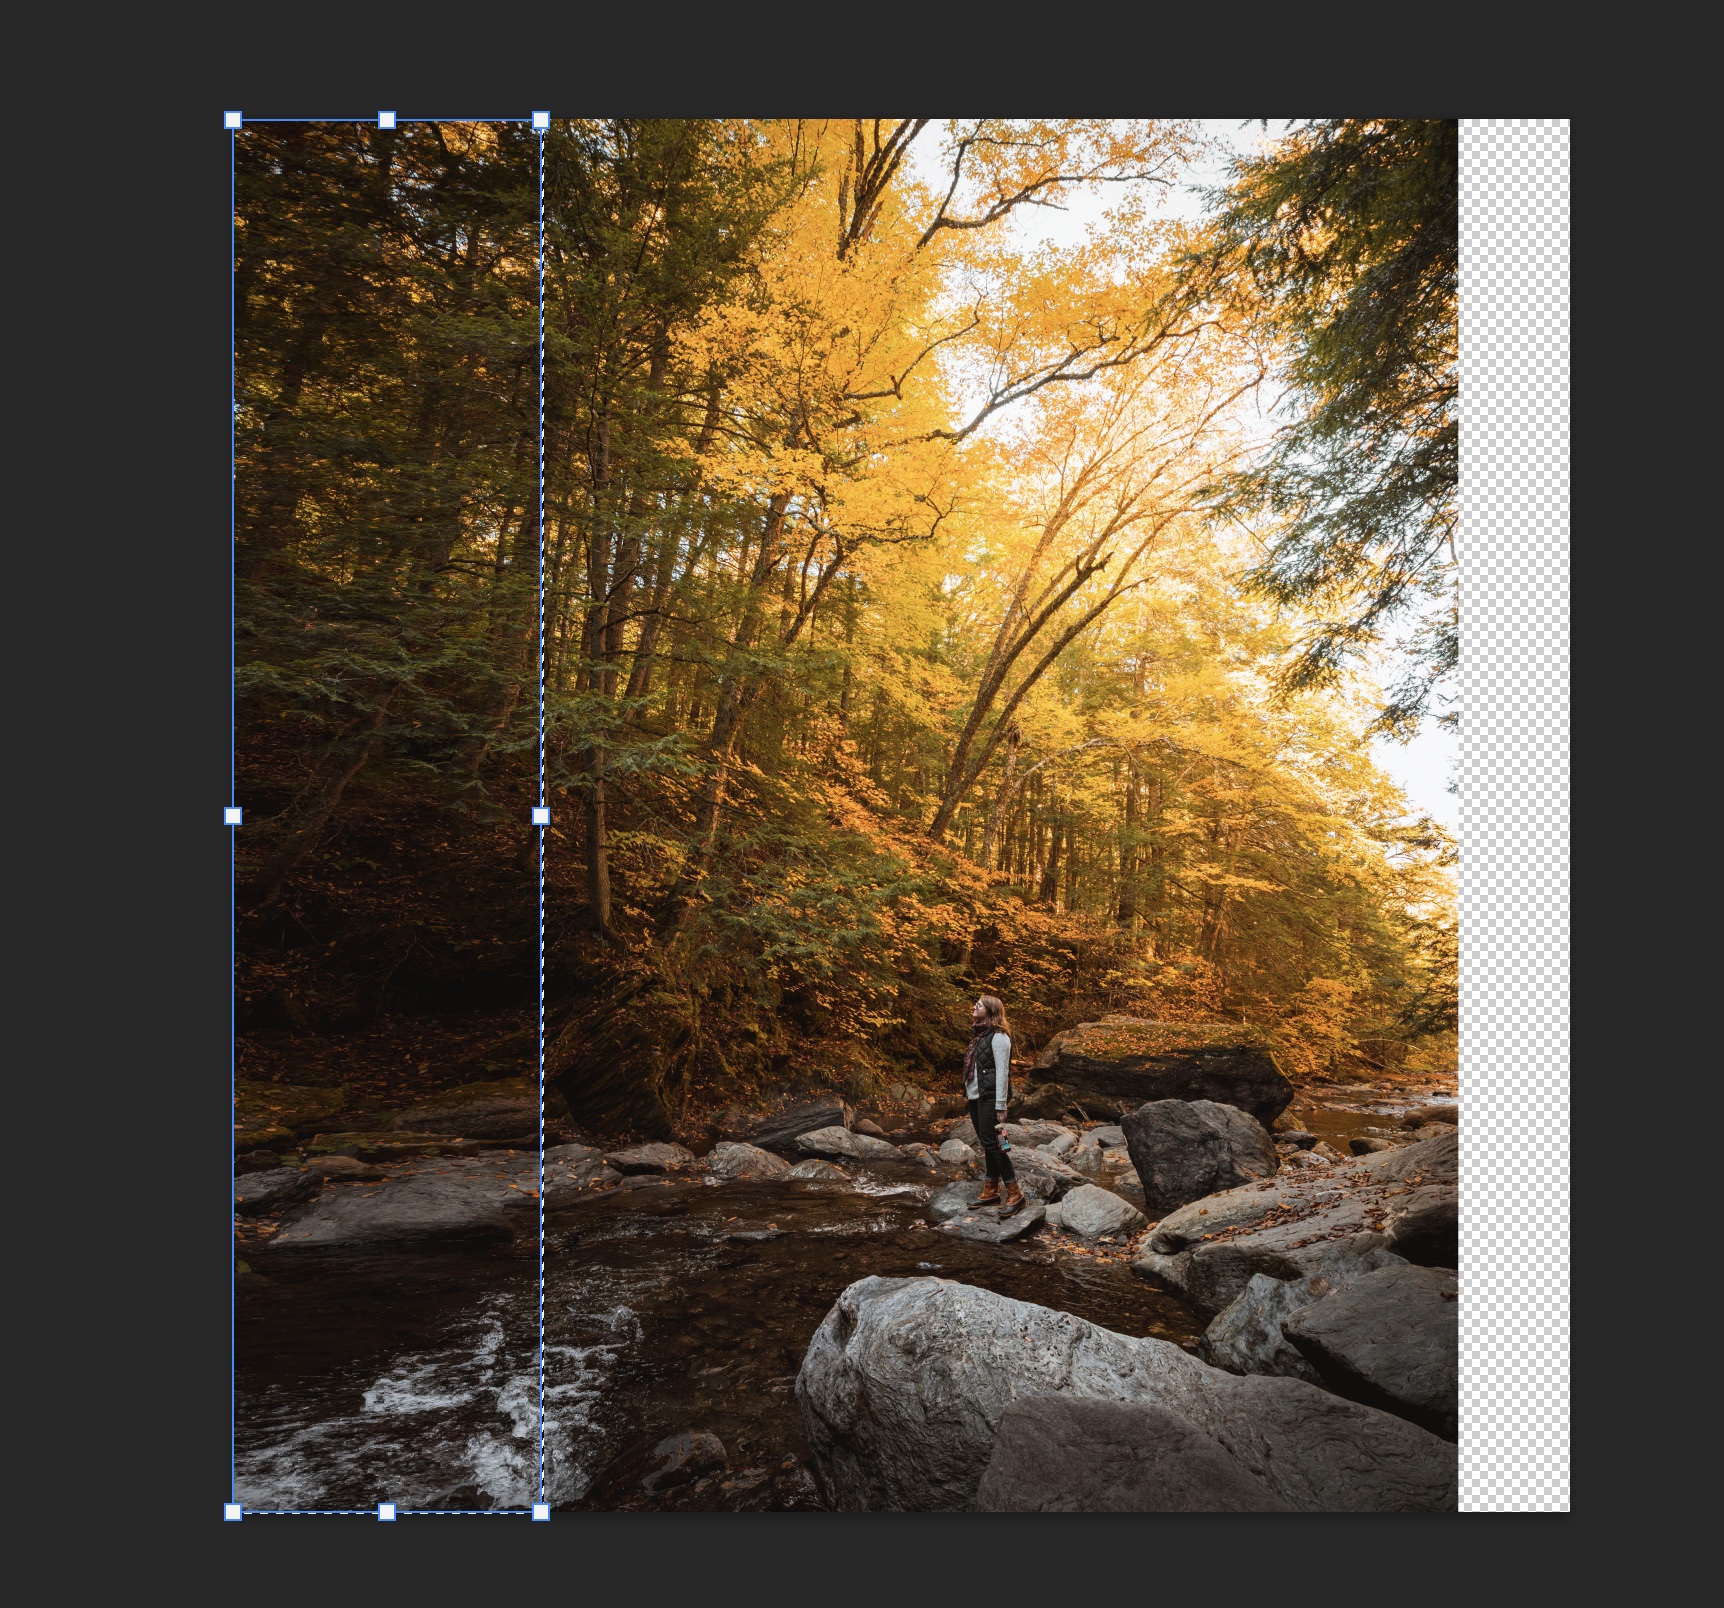
After hitting check to commit the transformation you can repeat the process on the other side.

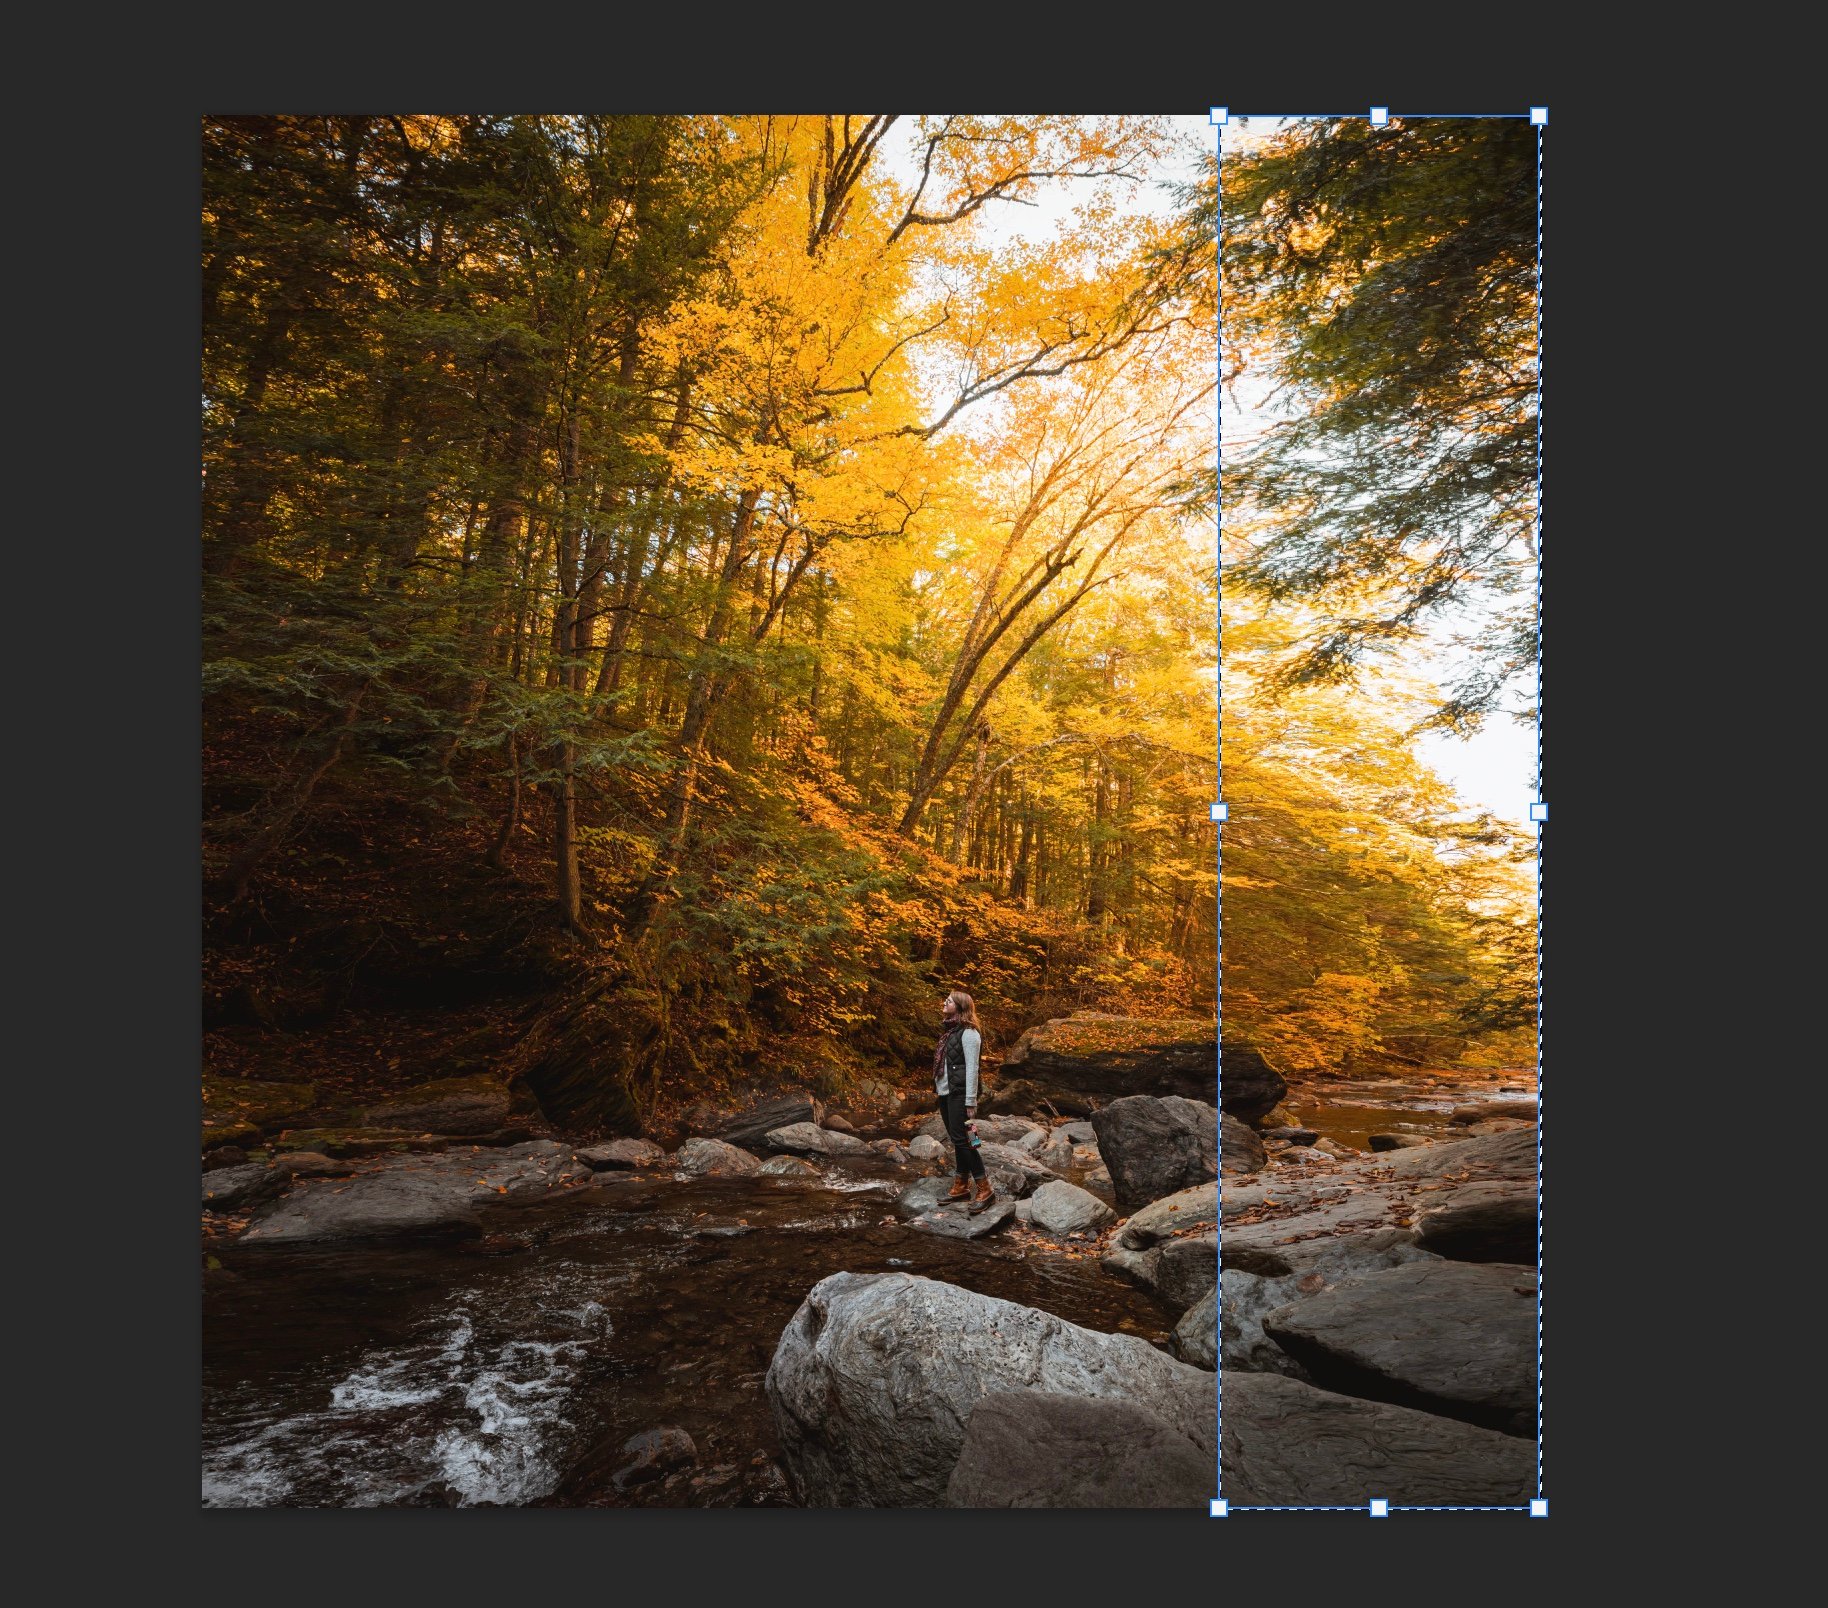
After finishing that side you can repeat the process vertically or move on to the next section to fix any visual artifacts.
Here is an example where I did the process horizontally and vertically.

4. Clean Visual Artifacts
If you notice any small spots or issues, one of the easiest fixes is the Spot Healing Brush. The best mode to use it on is Content-Aware but the others are worth playing around with especially if Content-Aware isn’t working.
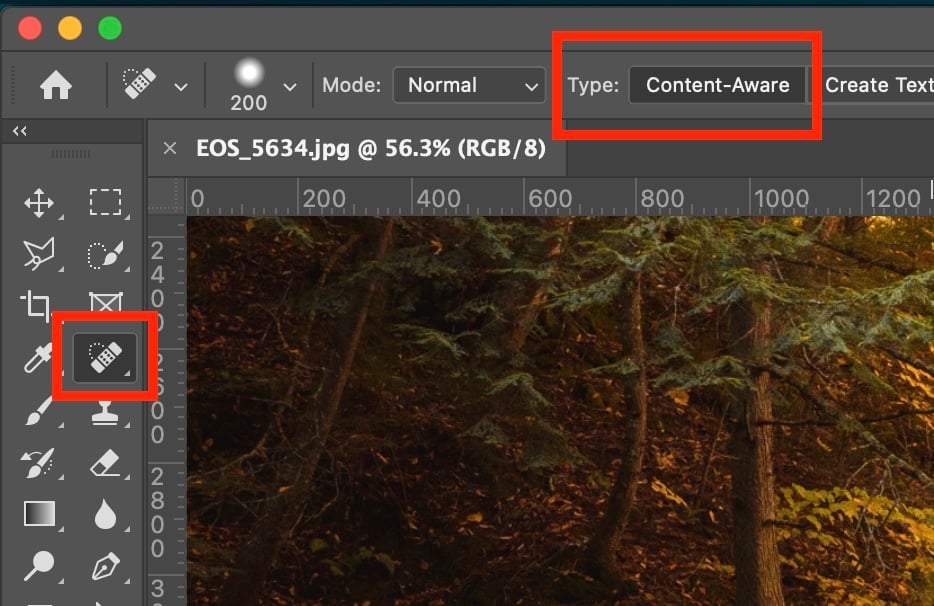
You can also use the clone stamp to replace problematic areas of the image as well.
Stretching Images in Photoshop FAQ
What is the best way to stretch an image in Photoshop without distortion?
For most people, Generative Expand is the easiest because the AI fills the new space for you. If you want full manual control or don’t want to spend generative credits, Content-Aware Scale is the classic method. It protects detailed areas while stretching the simpler parts so the result still looks natural.
What is the difference between Content-Aware Scale and Free Transform?
Free Transform (Edit > Free Transform) scales everything uniformly, so people and objects get visibly squished or stretched. Content-Aware Scale protects the detailed areas of your photo and stretches the simpler parts, like sky or water, which is what keeps it looking natural.
How do you stretch only part of an image in Photoshop?
Make a selection around the area you want to stretch with the Marquee tool first, then run Edit > Content-Aware Scale. Only the selected region is affected, which is handy for widening a background without touching your subject.
Does stretching an image in Photoshop reduce quality?
Content-Aware Scale and Generative Expand rework or add pixels rather than just blowing up the image, so you usually keep good quality. Avoid stretching too far in a single pass, and zoom in afterward to clean up any artifacts with the Spot Healing Brush.
Why does my image look distorted when I stretch it?
That usually means you’re using Free Transform with the aspect ratio unlocked, which squishes the entire image. Switch to Content-Aware Scale, or use Generative Expand, to add room without distorting your subject.
I hope this guide helps you stretch your images without distortion. Whether you’re fixing an Instagram crop or just adding a little more room to a photo, it’s a handy trick to keep in your editing kit.
Enjoyed this article?
Please share a pin on Pinterest


This was super helpful! Thanks a ton! XD
Happy it helped!