You don’t need a DSLR to shoot long exposure photos. Any iPhone with Live Photos can fake a long exposure in seconds, and modern iPhones with Night Mode can capture real long exposures up to 30 seconds. This guide walks through three ways to do it, when to use each, and the gear that actually helps.
Quick Answer
- Easiest (any iPhone 6s or newer): Take a Live Photo, open it in Photos, tap Live in the top-left, then choose Long Exposure.
- Best at night (iPhone 11 or newer): Use Night Mode on a tripod for true long exposures up to 30 seconds.
- Most control: A third-party app like Slow Shutter Cam, Spectre, or Reeflex gives you manual shutter speed and light-trail modes.
Table of Contents
Method 1: Live Photo to Long Exposure
This is the fastest way to get a long exposure look on iPhone. iOS stitches together the 1.5 seconds of frames captured around your shutter press and blurs the motion into a single image. It works on every iPhone that supports Live Photos (iPhone 6s and newer).
How to do it
- Open the Camera app and make sure Live Photos is on. The Live Photos icon (concentric circles) at the top should be yellow, not crossed out.
- Steady the phone on a tripod, lean it on something solid, or brace it against a railing. The 1.5 second capture window starts before you tap the shutter, so hold still.
- Tap the shutter on a scene with motion: running water, traffic, crashing waves, a moving fountain, or people walking through a crowd.
- Open the photo in the Photos app.
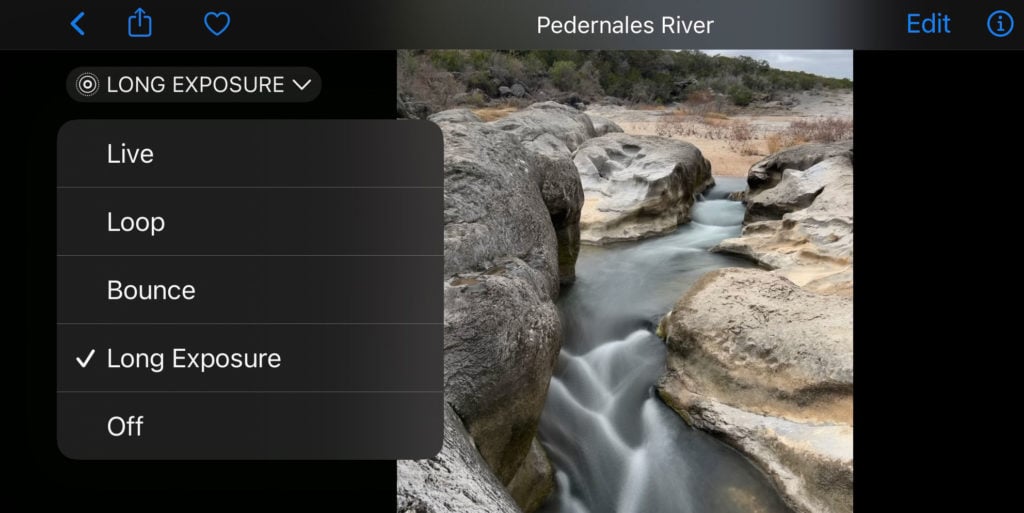
- Tap Live in the top-left corner of the photo.
- Choose Long Exposure from the menu.
That’s it. iOS will blend the Live Photo frames into a long exposure version that you can tap to swap back at any time.
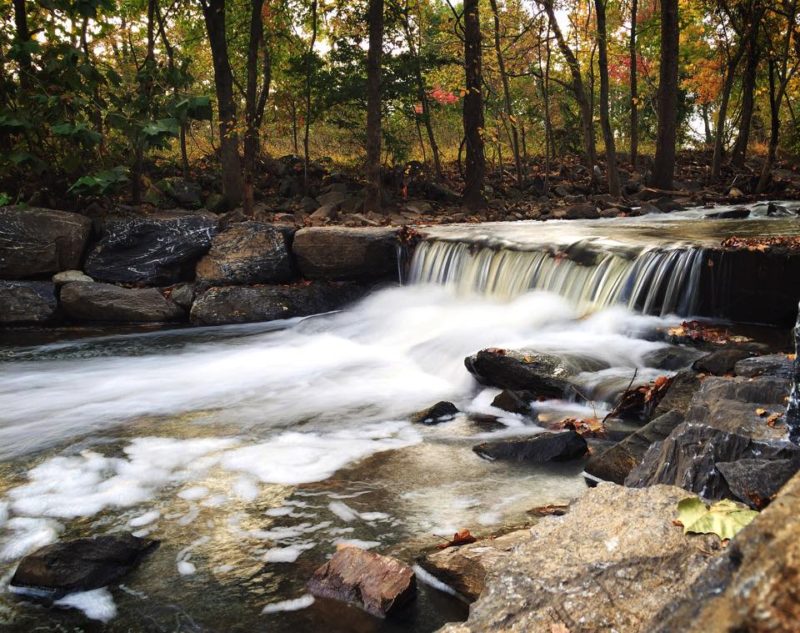
What it’s good for: waterfalls, fountains, light traffic, busy streets in daylight. What it’s not great at: star trails, very low light, or anything where you want a true 10+ second exposure.
Method 2: Night Mode for Real Long Exposures
Night Mode is iPhone’s actual long exposure mode. Unlike the Live Photo trick, it captures a true multi-second exposure and uses computational stacking to keep the photo sharp. It’s only available on iPhone 11 and newer, and it activates automatically in low light.
How to extend Night Mode for long exposures
- Open the Camera app at night or in a dark scene. The Night Mode icon (a moon) appears at the top and shows a suggested exposure time.
- Tap the Night Mode icon to bring up the exposure slider.
- Drag the slider to Max. Handheld, you can usually push it to 3 seconds. On a tripod, your iPhone detects it’s stable and unlocks exposures up to 30 seconds.
- Use the 3-second self-timer (or the volume button on your earbuds) so tapping the screen doesn’t shake the phone, then take the shot.
- Hold the iPhone perfectly still until the timer counts down. The longer the exposure, the more important this is.
Night Mode is the right call for cityscapes after sunset, the Milky Way (with patience), light painting, and any scene where you want real motion blur from a multi-second shutter. Pair it with my night photography tips for sharper handheld shots when you don’t have a tripod.
Method 3: Use a Long Exposure App
Apps give you what the stock camera doesn’t: precise shutter speed control, light-trail mode, motion blur mode, and (in some cases) RAW capture. They’re worth it if you shoot light trails on highways, paint with light, or want a specific shutter time like 8 seconds in daylight.
- Slow Shutter Cam ($1.99) is the original. Three modes (Motion Blur, Light Trail, Low Light), a 1/2s to bulb shutter range, and a self-timer. Great for highways and waterfalls.
- Spectre Camera (free, with paid features) is built around an AI-stabilised long exposure engine and makes 3, 5, or 9 second exposures handheld. Especially good for waterfalls and crowd-removal at landmarks.
- Reeflex Pro Camera ($4.99) is a full manual camera app with shutter speed control, RAW capture, and a long exposure mode. Worth it if you also want manual control for everyday shots.
For all three, the workflow is similar: mount your iPhone on a tripod, set a self-timer or use a remote shutter, choose the mode (Light Trail for traffic; Motion Blur for water), and press the shutter. Edit in Snapseed or VSCO afterwards.
Gear That Helps
You don’t need expensive gear to get sharp long exposures, but a stable mount changes everything.
- Tripod: A Joby GorillaPod or any compact travel tripod with a phone mount. The bendable legs are great for street shooting.
- Phone mount: If you already have a tripod, you only need a clip-style phone mount. Look for one rated for at least the Pro Max sizes.
- Remote shutter: Apple EarPods or any Bluetooth remote. Pressing the volume up button fires the shutter without touching the phone.
- ND filter (advanced): Brands like Moment, Sandmarc, and NiSi sell magnetic ND filters that clip over the iPhone lens. Useful for daylight long exposures of waterfalls or ocean scenes.
Tips for Sharper Long Exposures
- Lock focus and exposure by tapping and holding on your subject in the Camera app until you see “AE/AF Lock” at the top.
- Use the 3-second timer so the act of tapping the shutter doesn’t shake the phone.
- Shoot in ProRAW on iPhone Pro models for the most editing flexibility (Settings > Camera > Formats > Apple ProRAW).
- Watch the histogram in your editing app. Long exposures of bright water can clip highlights fast.
- iPhone 16 and newer: Use the Camera Control button on the side instead of tapping the on-screen shutter, which causes much less camera shake.
FAQ
Can you do long exposure on iPhone?
Yes. Any iPhone that supports Live Photos (iPhone 6s and later) can simulate a long exposure by converting a Live Photo. iPhone 11 and later can also use Night Mode for true multi-second exposures up to 30 seconds on a tripod, and any iPhone can use a third-party app like Slow Shutter Cam for full manual control.
What is long exposure on iPhone?
Long exposure on iPhone is a Live Photos effect that blends the 1.5 seconds of frames captured around your shutter press into a single image, blurring any motion in the scene. The result mimics the look of a DSLR shot taken with a slow shutter speed, like silky waterfalls or light trails from cars.
How do you turn on long exposure on iPhone?
You don’t turn it on at capture. Instead: take a Live Photo, open it in the Photos app, tap Live in the top-left corner, and choose Long Exposure from the menu. The effect is applied non-destructively, so you can switch back to the original Live Photo at any time.
What’s the difference between Night Mode and Long Exposure on iPhone?
Long Exposure is a Photos app effect applied after the shot, blending Live Photo frames to fake motion blur. Night Mode is a real long exposure that runs at the time of capture, using computational stacking to keep the photo sharp during a multi-second exposure. Night Mode handles low-light scenes; the Long Exposure effect handles motion blur in normal light.
Which iPhone models support long exposure?
The Live Photo to Long Exposure effect works on every iPhone with Live Photos: iPhone 6s and newer. Night Mode requires iPhone 11 or newer. Long exposure apps work on any iPhone running a current iOS version.
How do you take a long exposure on iPhone without an app?
Use the built-in Live Photo to Long Exposure flow: take a Live Photo, open it in Photos, tap Live in the top-left, then choose Long Exposure. For real long exposures at night, use the iPhone’s Night Mode and a tripod (iPhone 11+).
Why is my iPhone long exposure blurry?
The most common reason is camera shake during the 1.5-second Live Photo capture window. Brace the phone or use a tripod, and tap the shutter gently (or use the volume buttons on a wired earbud as a remote). For Night Mode, longer exposure times need a tripod or other rigid support, since the phone has to be perfectly still for the entire countdown.
Can iPhone shoot long exposure in daylight?
Yes. The Live Photo to Long Exposure effect works fine in daylight and is the easiest option. For a true daylight long exposure of more than a couple of seconds (silky waterfalls, smooth ocean), you’ll need a third-party app like Slow Shutter Cam plus an ND filter to cut down the light.
For more iPhone photography techniques, see my guide to night photography tips and the wider list of travel photography tips.