Just got your hands on a Canon EOS R8? Well you’re in the right place. In this post I’ll go over the best settings to change on the Canon R8. Whether you’re a photographer or a videographer, we’ll cover the settings worth knowing on the R8.
About the R8: The Canon EOS R8 is Canon’s lightest current full-frame mirrorless body. It uses the same 24.2MP sensor and DIGIC X autofocus system as the more expensive EOS R6 Mark II, which is why the autofocus settings here punch above what you’d expect at this price point. The trade-offs are no in-body image stabilization, no rear joystick, and the smaller LP-E17 battery (rated for about 220 shots through the EVF or 370 through the LCD).
First there are a few things I recommend doing before using your new camera:
Write down the serial number: It’s always a good idea to note down your camera’s serial number. Whether your camera is stolen or needs repairs, having the number easily accessible is important.
Charge the R8 battery: For the best results, I recommend fully charging the camera battery when you first get your R8. This way, you won’t have to stress about the camera running out of juice right away.
Update the firmware: You can find the latest R8 firmware on Canon’s website.
Once your battery is fully charged pop in a SD card to update the firmware we can dive into photo and video settings on the Canon R8.
Now let’s dive into my recommended settings for the Canon EOS R8:
Best Canon R8 Photo Shooting Settings
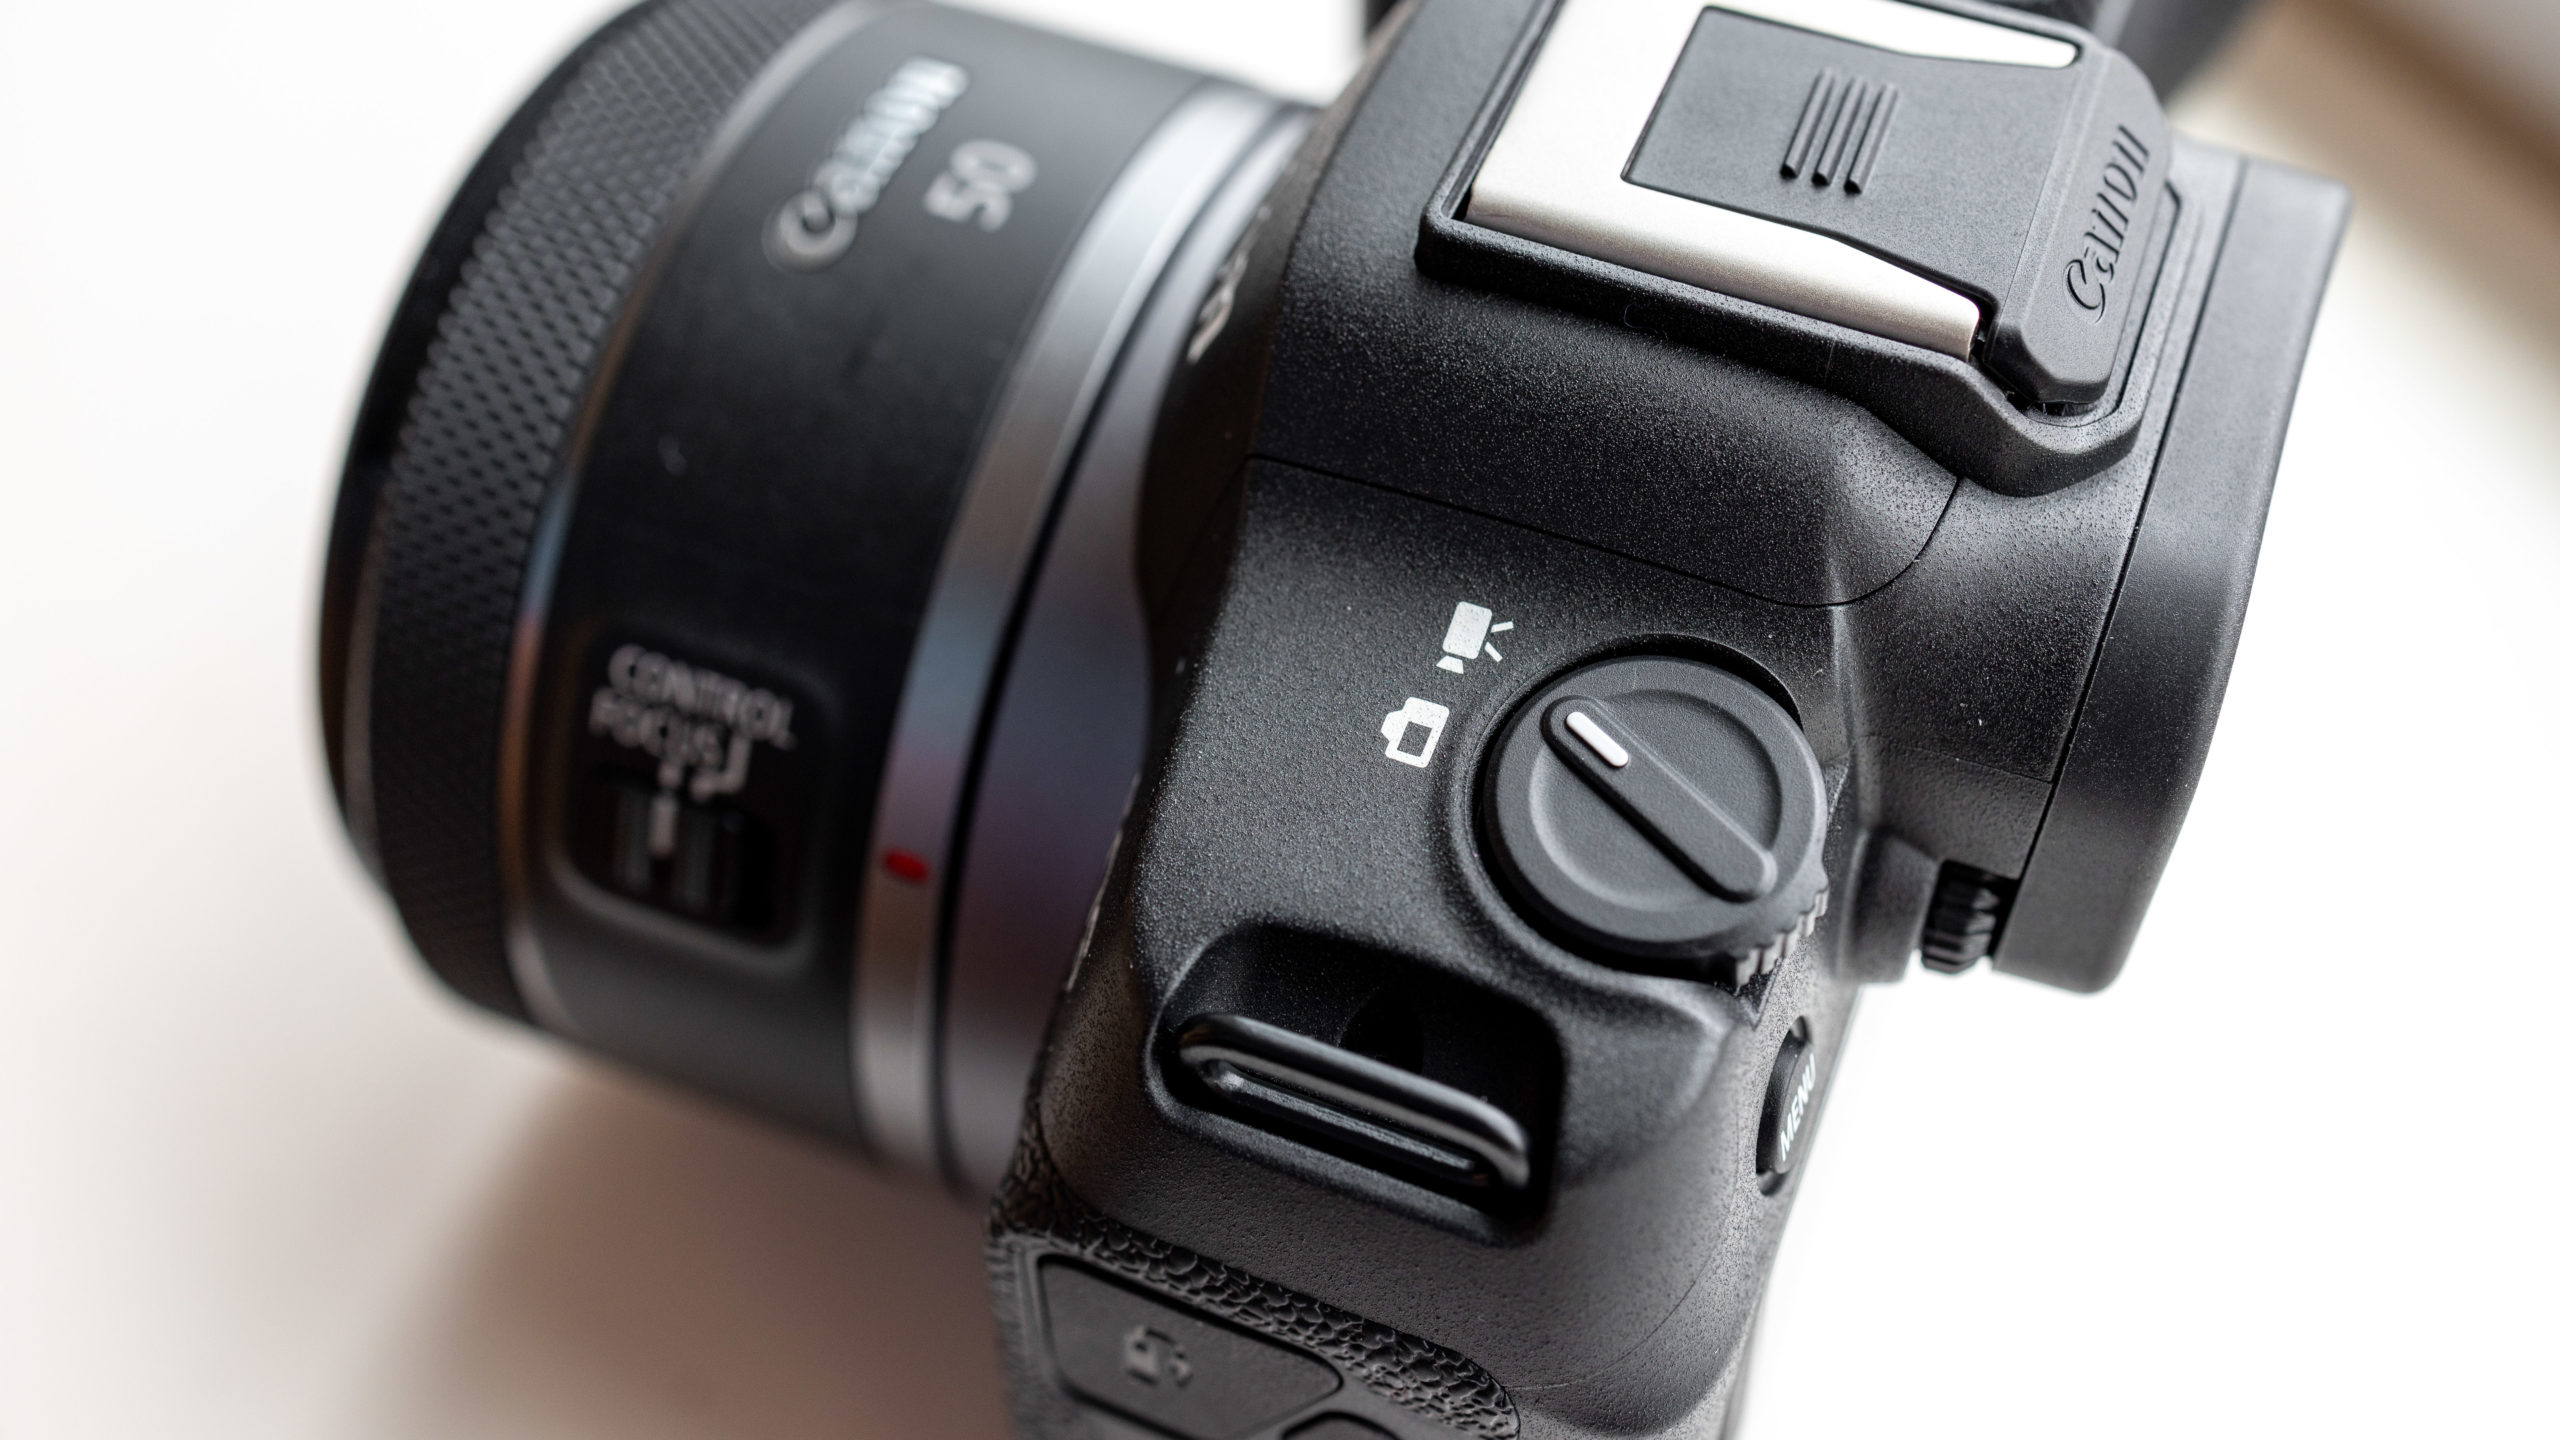
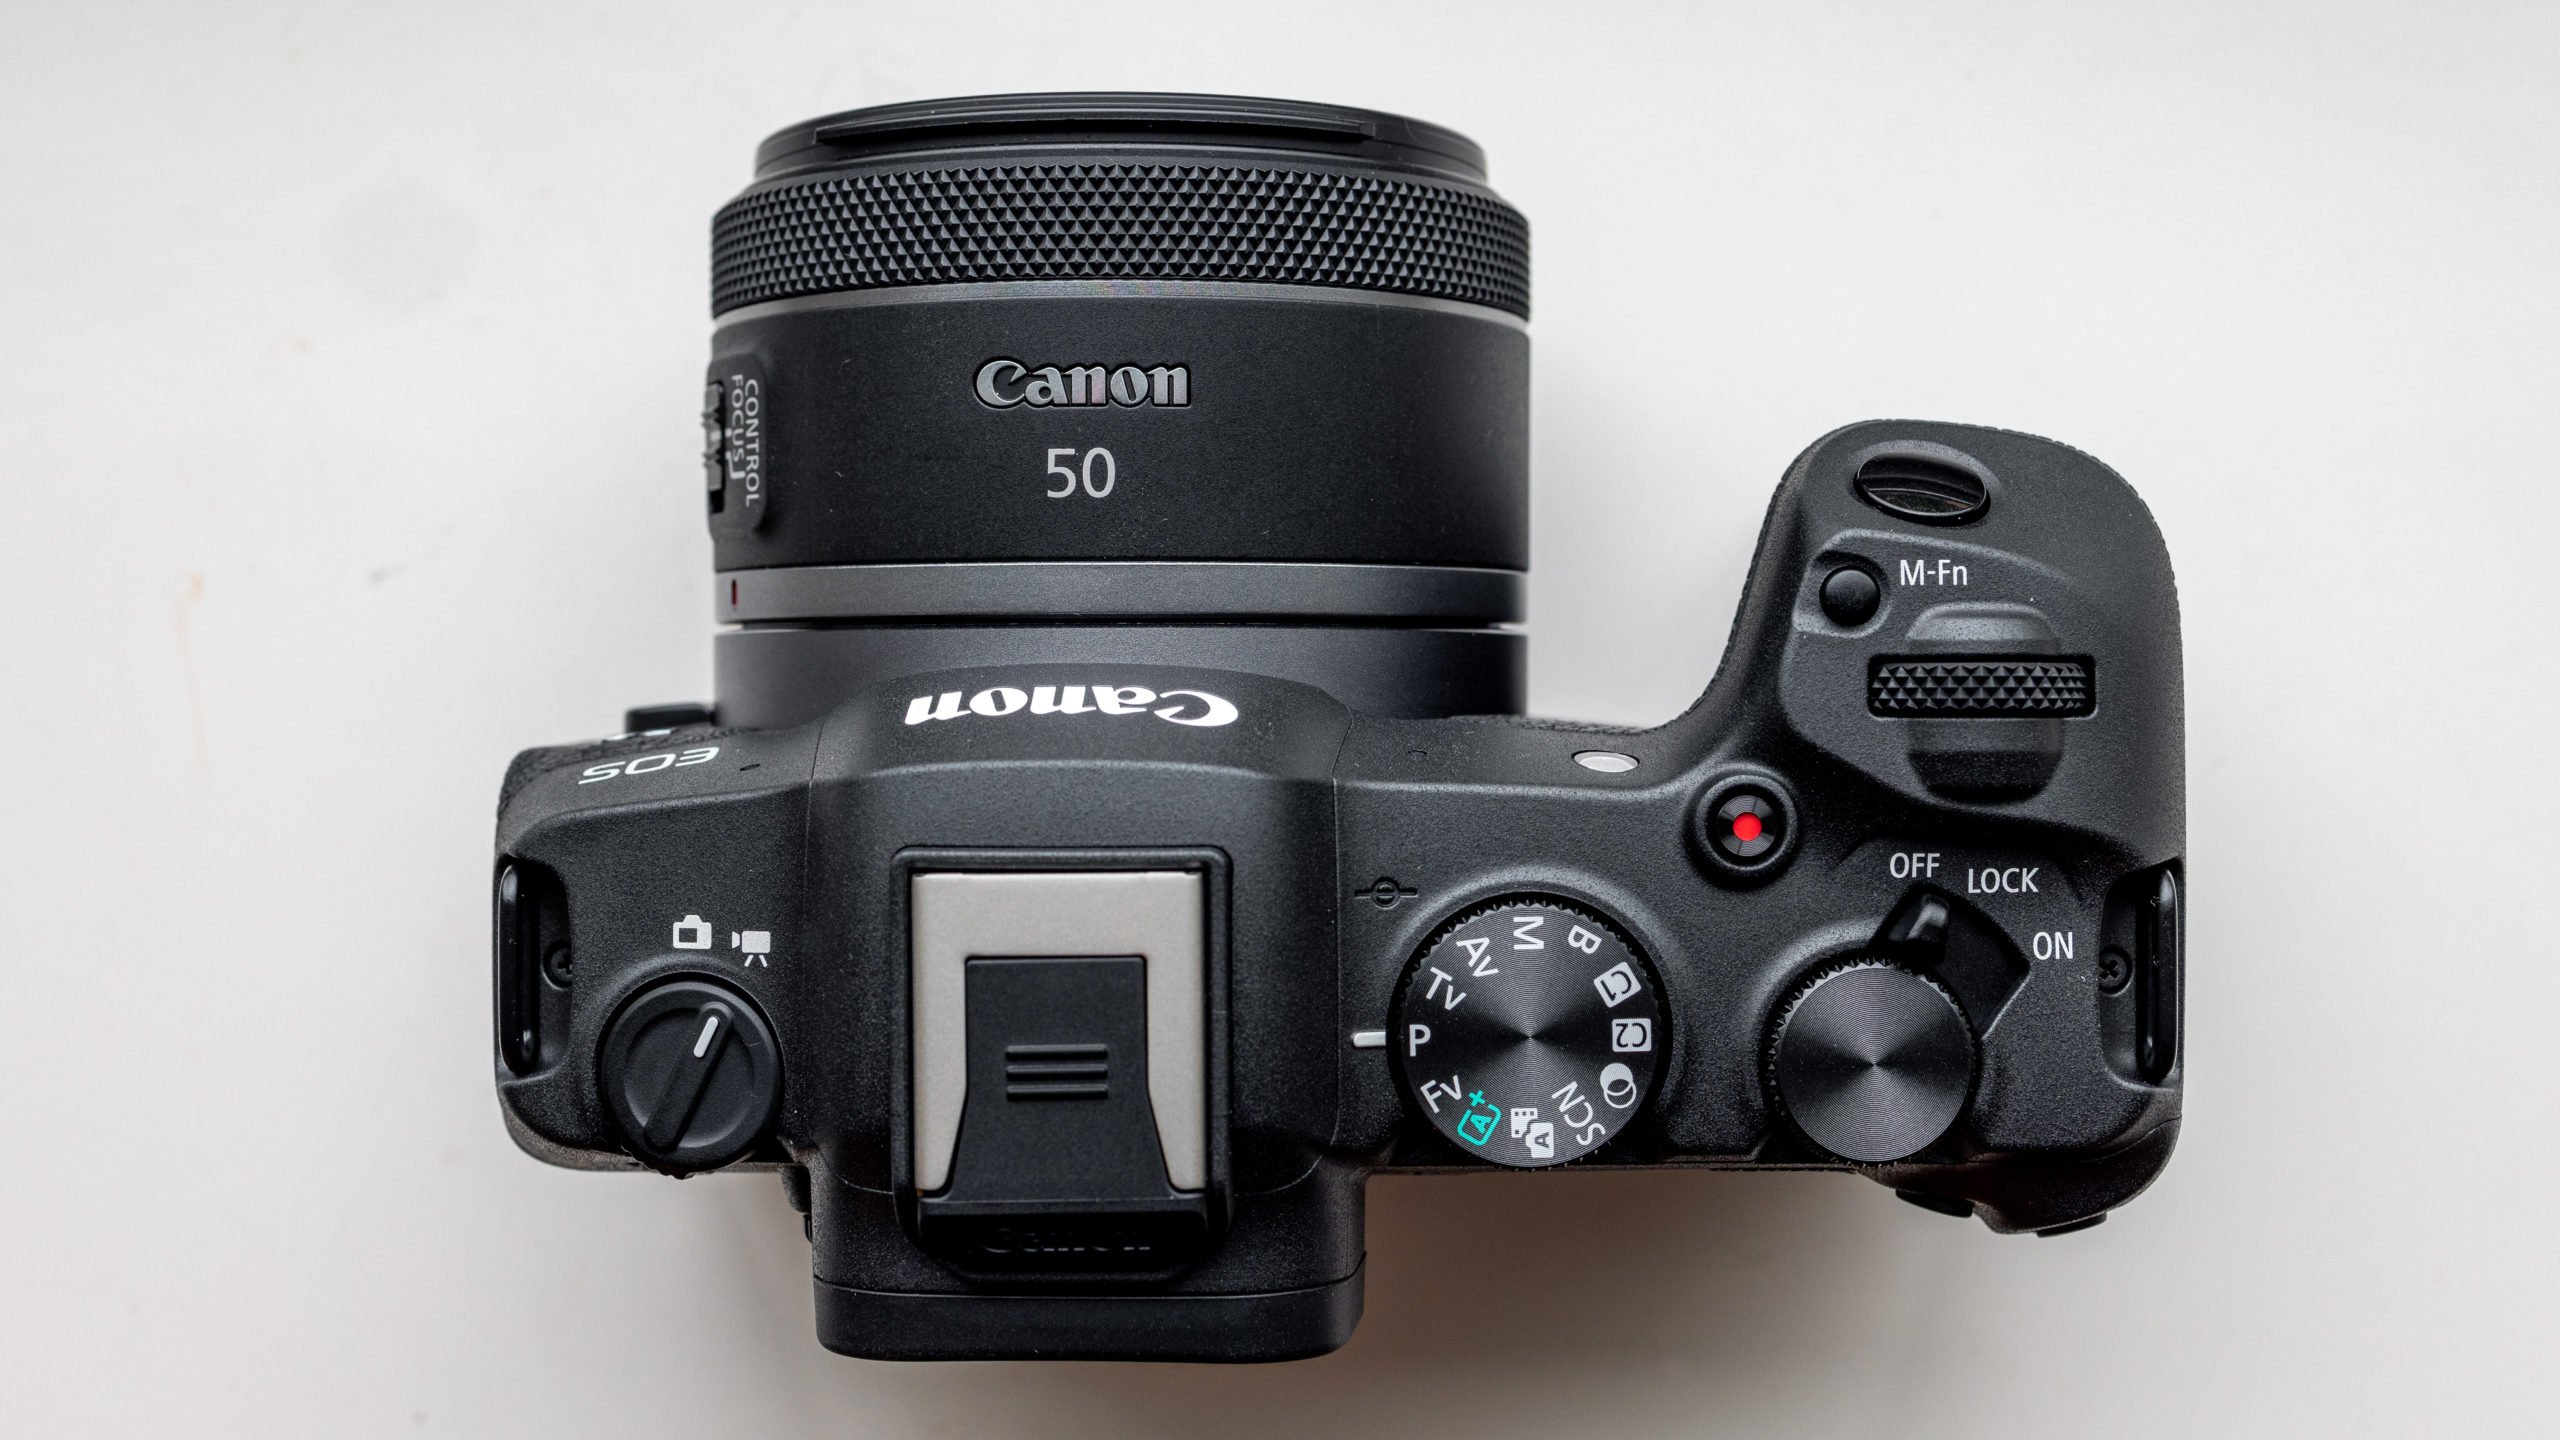
First we’ll go over photography settings on the Canon EOS R8. You’ll need to switch the R8 to photo mode which can be done using the switch on the top right of the body. You’ll also want to make sure you’re in P, Av, Tv, or Manual mode, this will show us all camera settings while Auto provides a simplified menu.
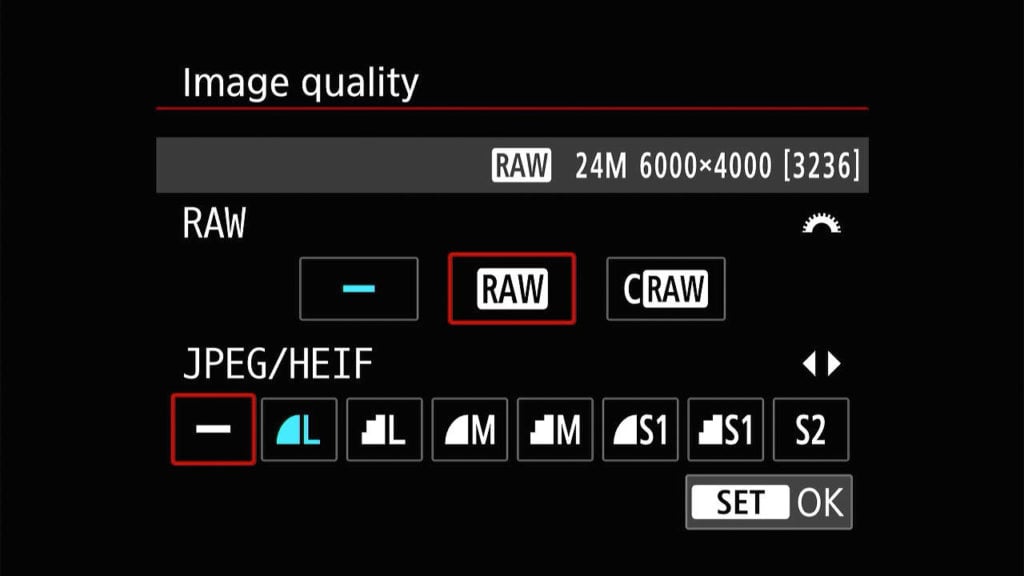
Shooting Menu 1: Image Quality: Enable RAW shooting and disable JPEG. There are many reasons to shoot RAW that I won’t go over here but shooting RAW will help you get the highest quality possible from your images.
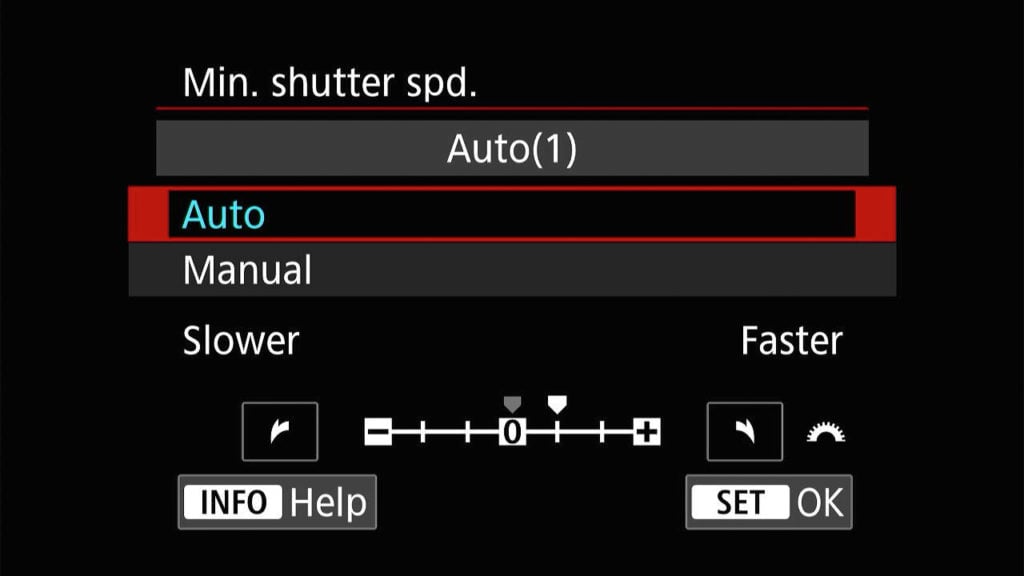
Shooting Menu 2: ISO speed settings: Change Min. shutter spd. to auto(1). This will make the camera’s functions prefer a faster shutter speed. Since the Canon R8 has such great high ISO performance I personally prefer to use a faster shutter speed for sharper shots. Of course this is preference but it’s nice to know where this is. You can also change the range of the auto ISO setting here but I think the default settings are great.
Shooting Menu 2: Auto Lighting Optimizer: Since you’ll be using RAW the Auto Lighting Optimizer won’t affect your photo files. That being said it will affect the previews generated on the camera when viewing RAW files which could cause mistakes, so we’ll want to set this to disabled. If you are shooting JPEG the mode may help improve high dynamic scenes.
Shooting Menu 5: High ISO speed NR: I change this to low, you can always apply more noise reduction while editing your photos in Lightroom.
Shooting Menu 7: Release shutter without card: Turn this off, this option on by default lets you hit the shutter button without a card. All this will end up doing is make you forget your memory card.
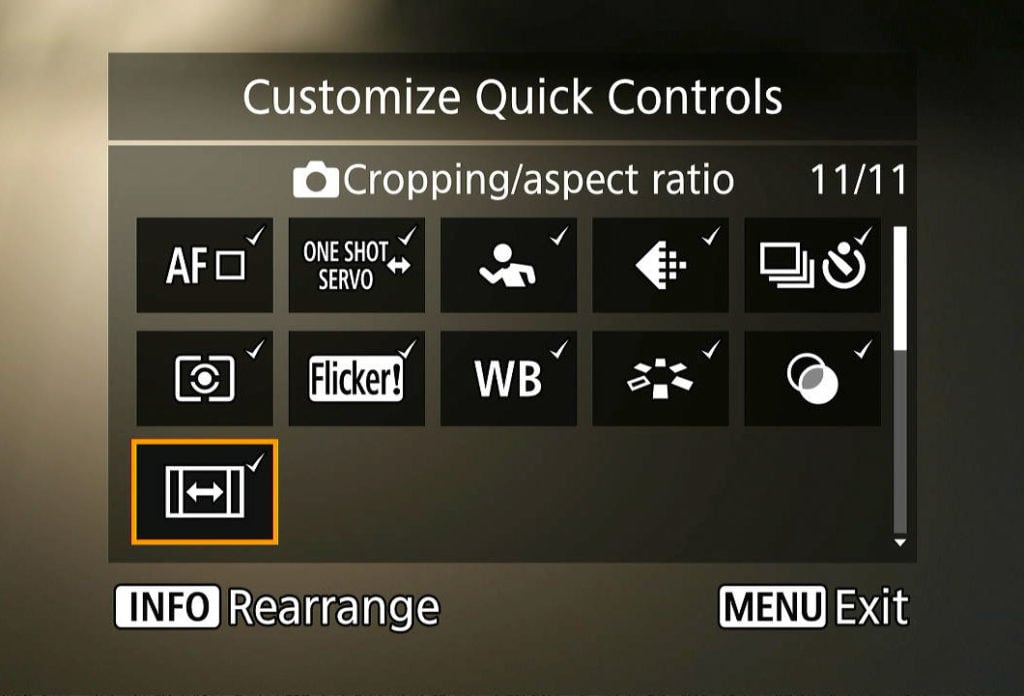
Shooting Menu 8: Customize Quick Controls: This one will be your preference but it’s great to know it’s there. When you hit Q while you’re shooting a bunch of options appear, and this setting lets you customize what shows up there.
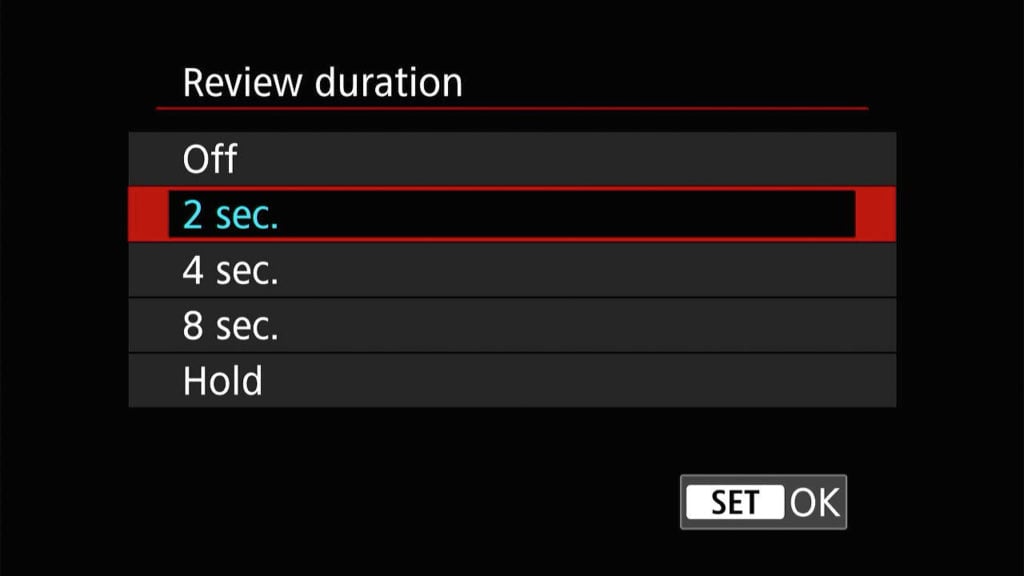
Shooting Menu 8: Image review: Review duration: Here you can change the amount of time an image appears after shooting. The default 2 seconds is good for my needs but this is great if you’d like to turn it off or show the images longer.
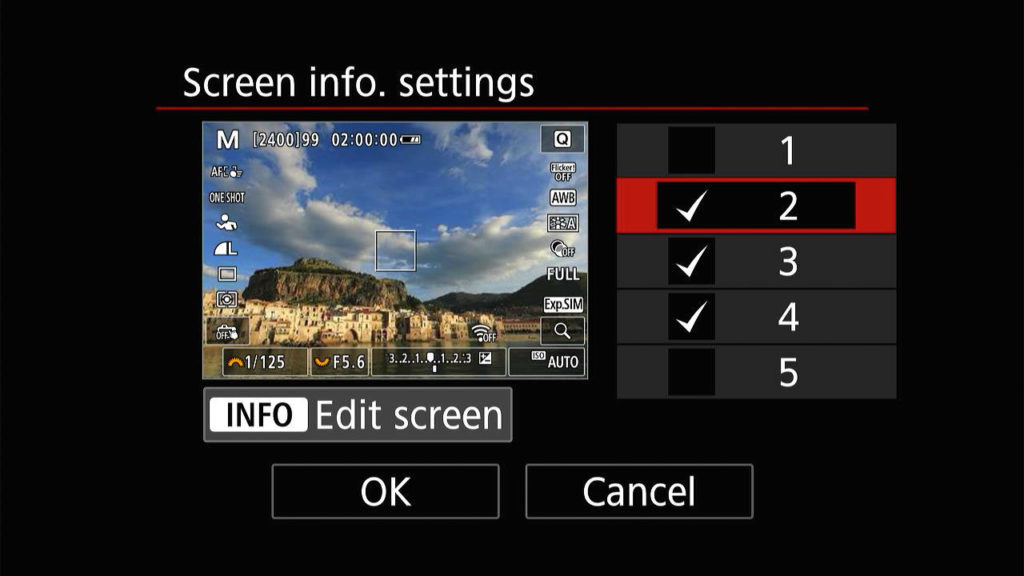
Shooting Menu 9: Shooting info. disp.: Screen info. settings: To reduce the number of screens you have to cycle through while changing views, I like to disable a few of these. I like to use 2, 3, and 4, where 3 may be modified to display the level and histogram and 4 provides a clear view. Of course this will be up to your preference.
Shooting Menu 9: Shooting info. disp.: Grid display: Here you can select a grid overlay on your image. The 3×3 grid is useful for lining up shots using the rule of thirds.
Shooting Menu 9: Shooting info. disp.: Histogram disp: Change this to RGB and the size to small. This will allow you to see the histogram of all color channels while keeping the display of it much smaller while shooting.
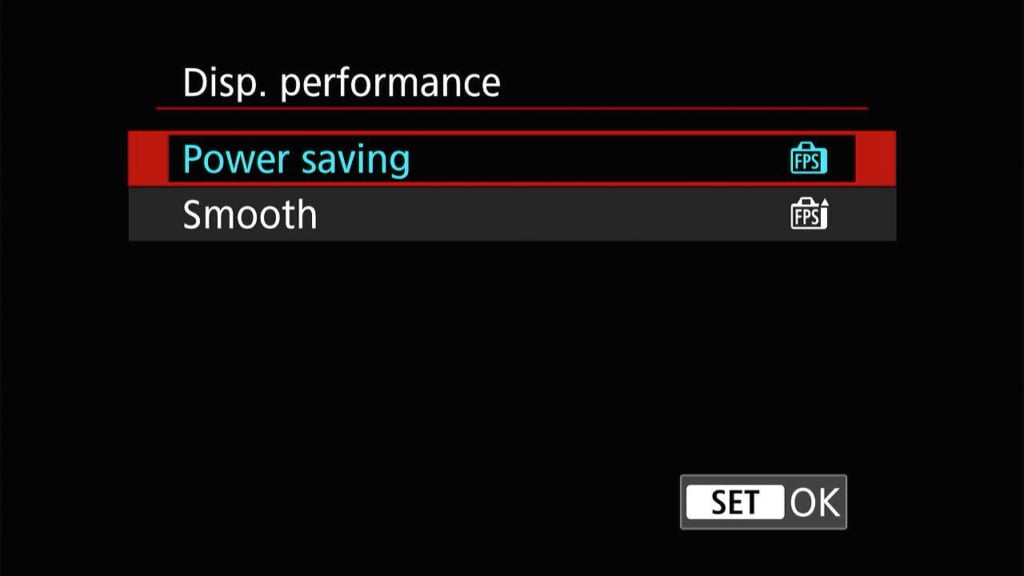
Shooting Menu 9: Disp performance: By default the power saving mode is fine here, especially with the smaller battery in the R8. If you are shooting lots of action or fast moving subjects you’ll want to set this to smooth. Basically this controls the frames per second of the displays on the R8.
Autofocus Menu 1: Subject to detect: Great to know these options are here, basically you can tell the autofocus system in the Canon R8 to prefer people/animals/cars. By default these settings are also available in the quick settings while shooting (when you hit Q). You can also set this to auto for the auto focus system to figure out what subject you’re shooting.
Autofocus Menu 3: AF-assist beam firing: In low-light scenes the camera will output an orange light to help it focus. This can be useful in some situations but I prefer to have this off since the camera does a pretty good job focusing in low-light scenes.
Autofocus Menu 3: Preview AF: I like to set this to ON. With it enabled the live view will give you a preview of faces and subjects you can track. So if you’re using point focus you can focus on a face, lock onto it, and visually confirm the camera is holding focus.
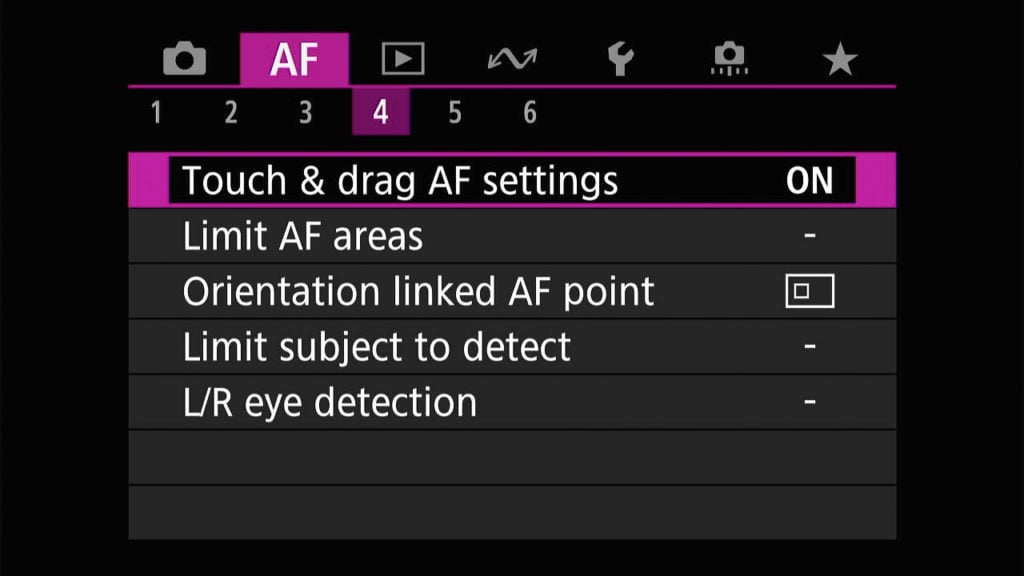
Autofocus Menu 4: Touch & drag AF settings: Touch & drag AF: Since the Canon EOS R8 has no joystick on the back you’ll likely want to turn on the touch & drag AF option. Basically this allows you to use the touch screen as a joystick when you’re using the viewfinder. So you can have your eye in the viewfinder and move your thumb around the screen to move your focus point quickly.
Autofocus Menu 4: Limit AF methods: The R8 has a lot of different focus modes, if you aren’t using all of them you’ll likely want to disable a few. Personally I recommend keeping on Spot AF, 1-point AF, Whole area AF.

Autofocus Menu 5: MF peaking settings: Peaking: Focus peaking can heavily help you while using manual focus. Enabling this will show a red pixel on anything you’re focusing on while manually focusing. The best part of this setting is that it only turns on when you switch the camera to manual focus.
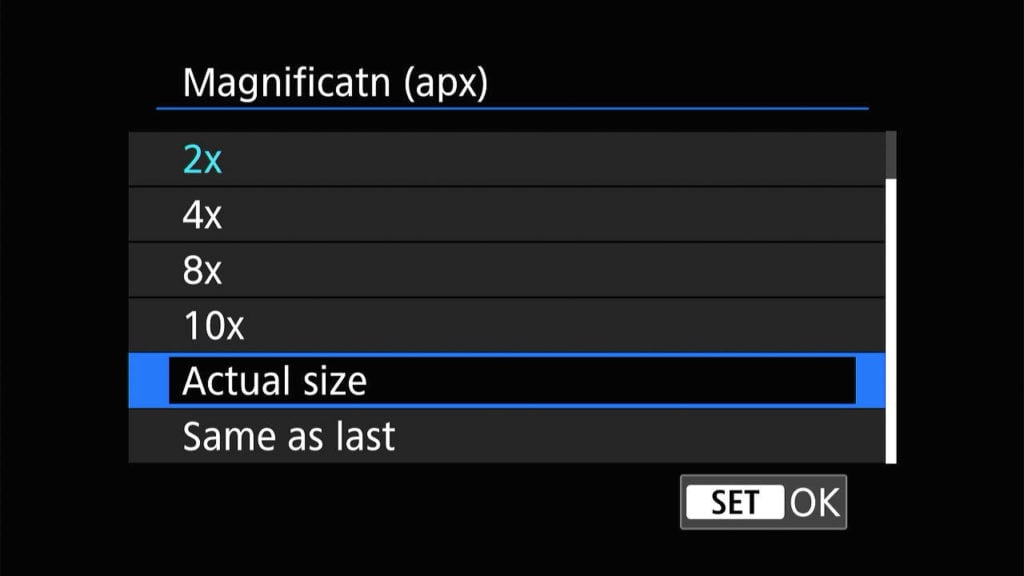
Playback Menu 3: Magnification: Magnify (apx): This will change the amount of zoom is applied when you are reviewing your photos and hit the magnify button. I like to set this to actual size so the image goes to its full size instead of the default 2x. This makes it easy to quickly check if a photo I took is sharp.
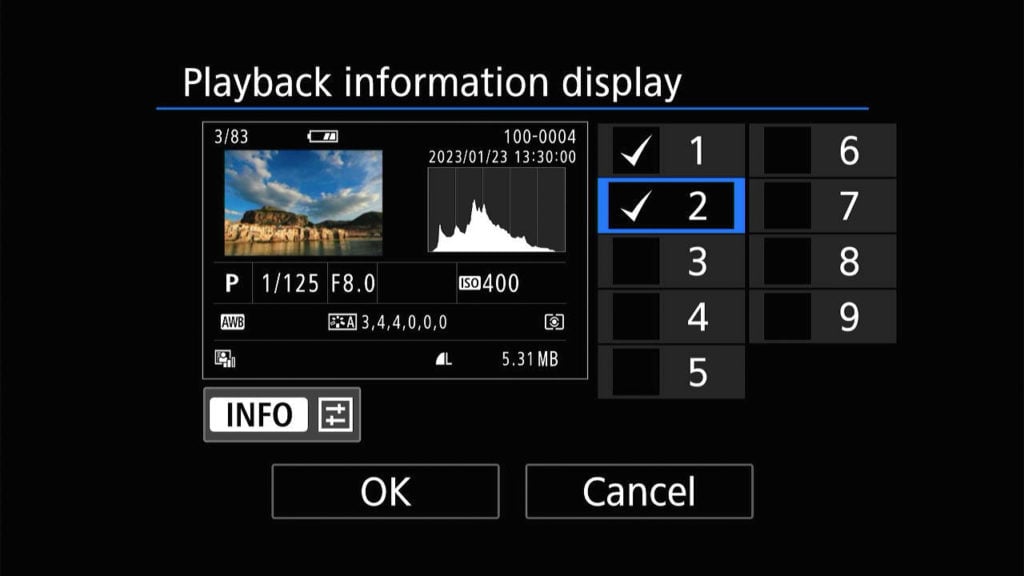
Playback Menu 4: Playback information display: I like to enable 1, 2, and 3, otherwise it’s too many menus to cycle through when reviewing images. Of course this is up to your preference.
Playback Menu 4: Highlight Alert: Enable this, it’ll show a flashing white area on over-exposed areas of your photos while reviewing. This is helpful for knowing if you have blown out highlights in a photo.
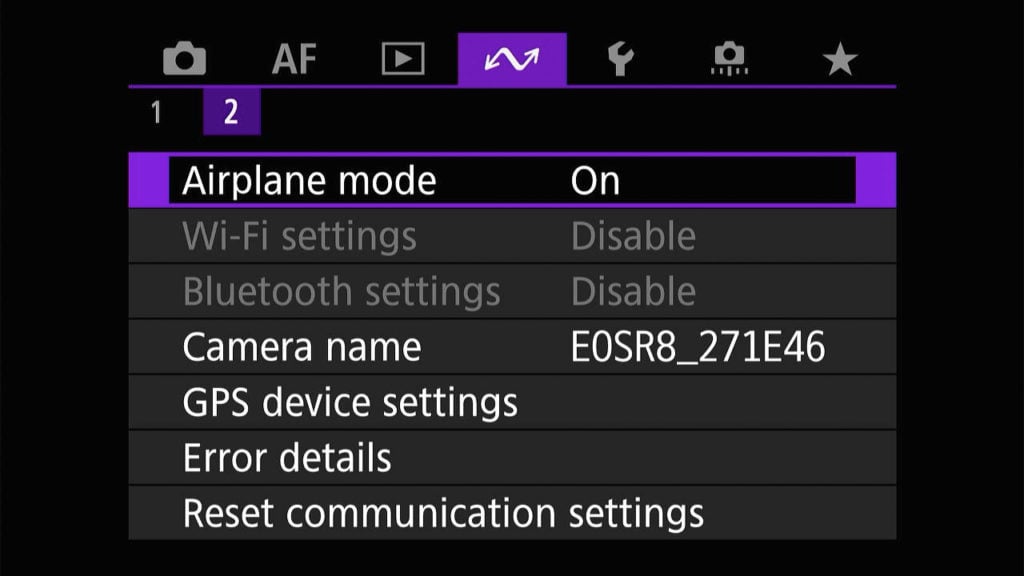
Wireless Menu 2: Airplane mode: If you aren’t using the Wi-Fi options of the camera I’d recommend turning this ON to save battery life. Of course when you want to transfer images to your phone with Wi-Fi you’ll need to turn this off.
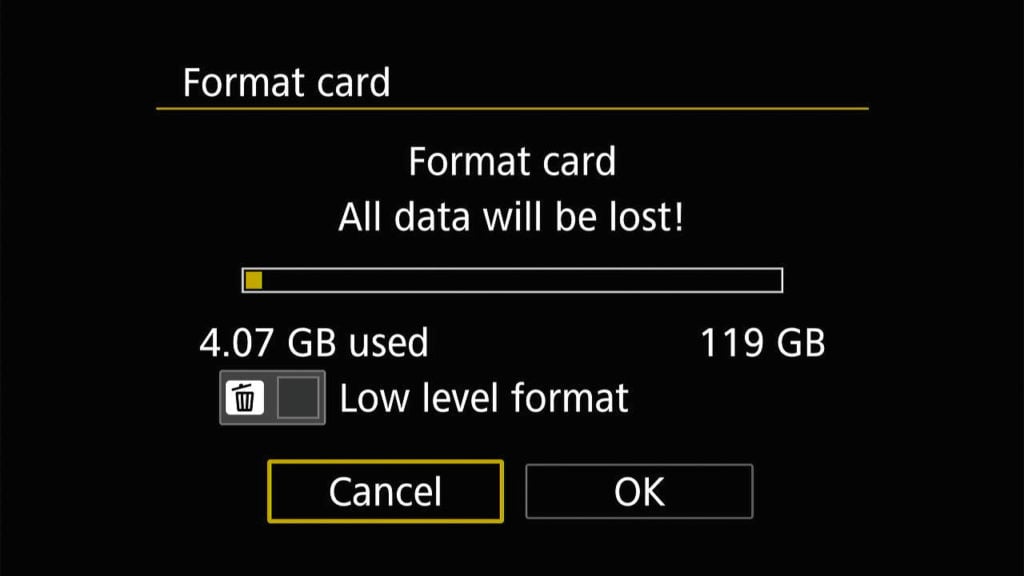
Setup Menu 1: Format card, just note where this option is. It’s always helpful to completely erase your SD card using the camera. I typically do this after offloading my images to my computer.
Setup Menu 1: Auto Rotate: Set this to “On computer”, this will disable the image rotating on the back of the screen when reviewing. Often this can be disorienting depending on how you review your images. Using the On computer option will ensure images are correctly oriented (landscape/portrait) when viewing them off the camera.
Setup Menu 2: Mode Guide: Every time you change the mode on the R8 a little menu appears explaining it. While great for beginners you likely won’t want this enabled since it can get annoying over time.
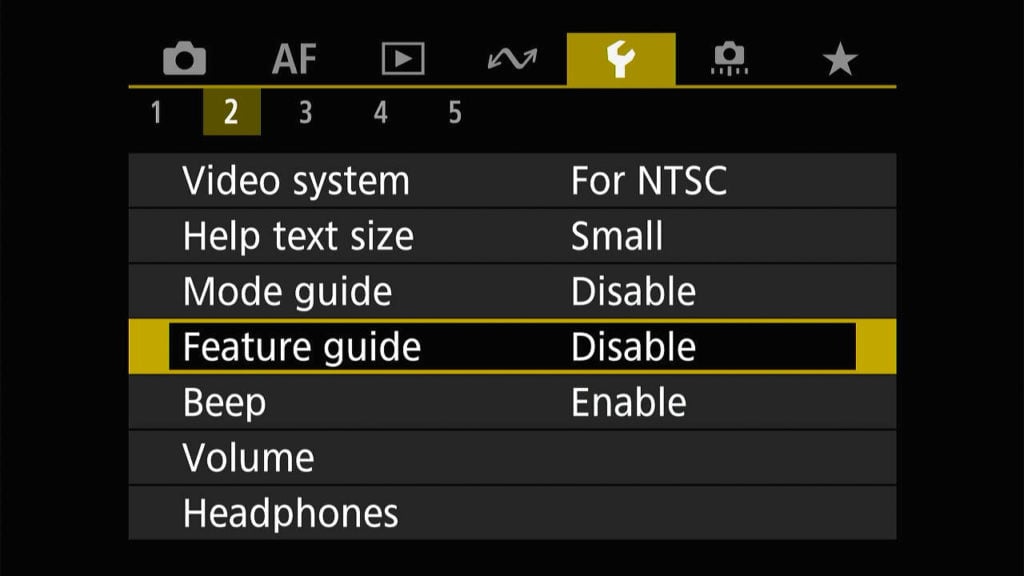
Setup Menu 2: Feature Guide: If you’re familiar with all of the features of the R8 you’ll likely want this OFF. This shows a little information about each feature when you’re using the quick control screen.
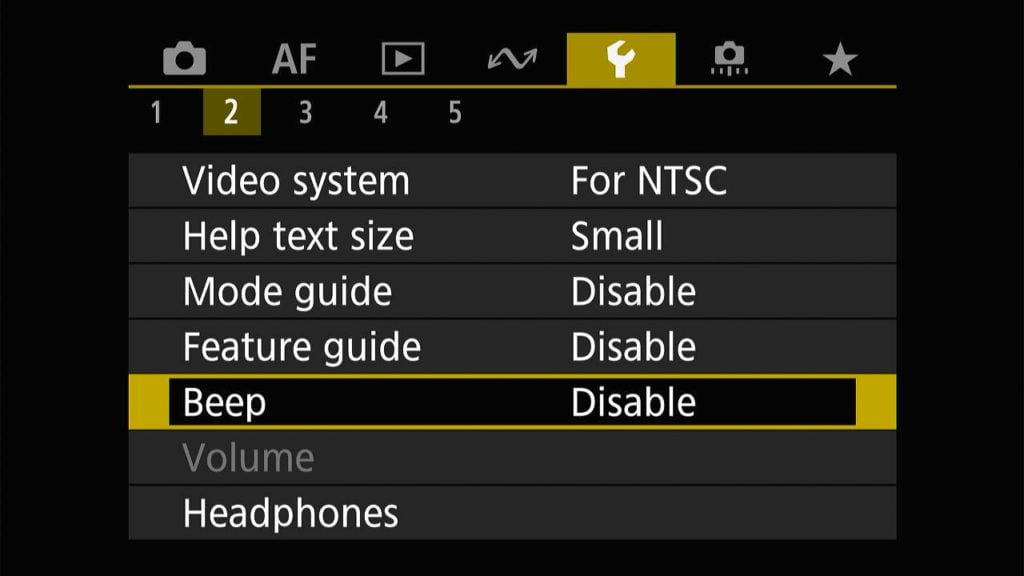
Setup Menu 2: Beep: Here you can disable the beep that occurs every time you focus a photo.
Setup Menu 5: Copyright information: Here you can enter copyright information that will be embedded in your files metadata.
I also recommend setting up Wi-Fi and the Canon App on your phone for the camera. This can help if you ever need it while out in the field. I’ve seen a lot of friends want to use Wi-Fi functions on their camera but never have so end up wasting time trying to configure it when shooting.
The last menu also lets you create a custom menu of your favorite functions. For me I like to include format card and exposure bracketing settings but of course this will change on your uses.
Best Canon R8 Video Settings
Now we can dive into video settings on the Canon EOS R8. You’ll want to switch the camera to video mode which can be done using the top left photo/video switch.
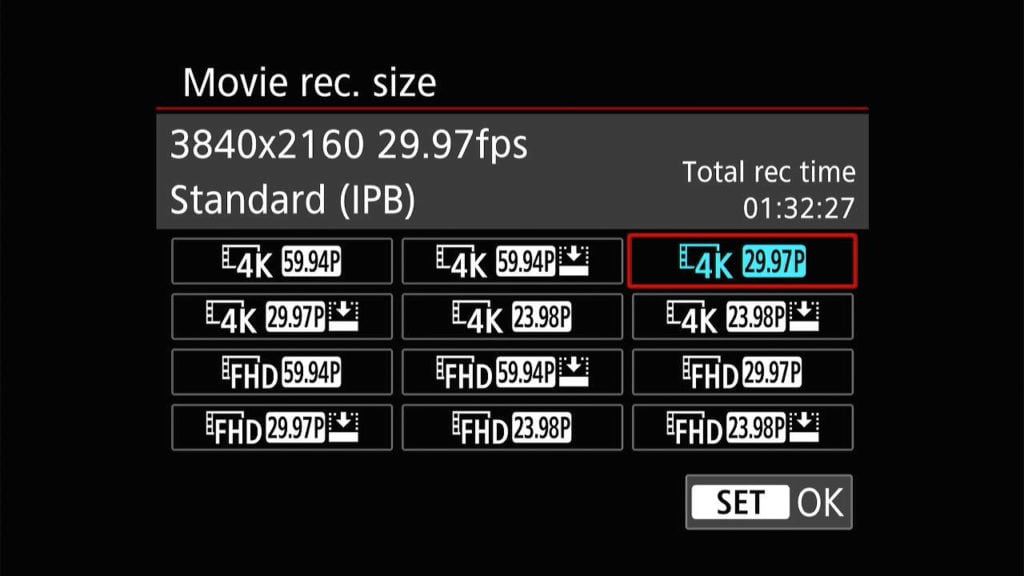
Shooting Menu 1: Movie rec. size: I prefer 4K 23.98p on the R8. The 4K modes read the entire 24MP (roughly 6K-wide) sensor and oversample down to 4K, which produces noticeably crisper footage than line-skipped 4K. Canon dropped the “4K Fine” toggle from earlier R bodies because every 4K mode on the R8 already uses full-width sensor readout.
Shooting Menu 1: Sound recording: If you plan to use an external microphone, you should set this to manual. When utilizing a microphone, this requires some configuration, but the quality of your audio will be much higher if you use the manual option. Since the pre-amp in the camera can produce hissing or noise, I usually set mine one notch from the bottom level and attempt to make the output of my external microphone as loud as possible. Be sure to test and get the recording level perfect for your microphone. Some companies like Rode even offer setting recommendations for specific cameras.
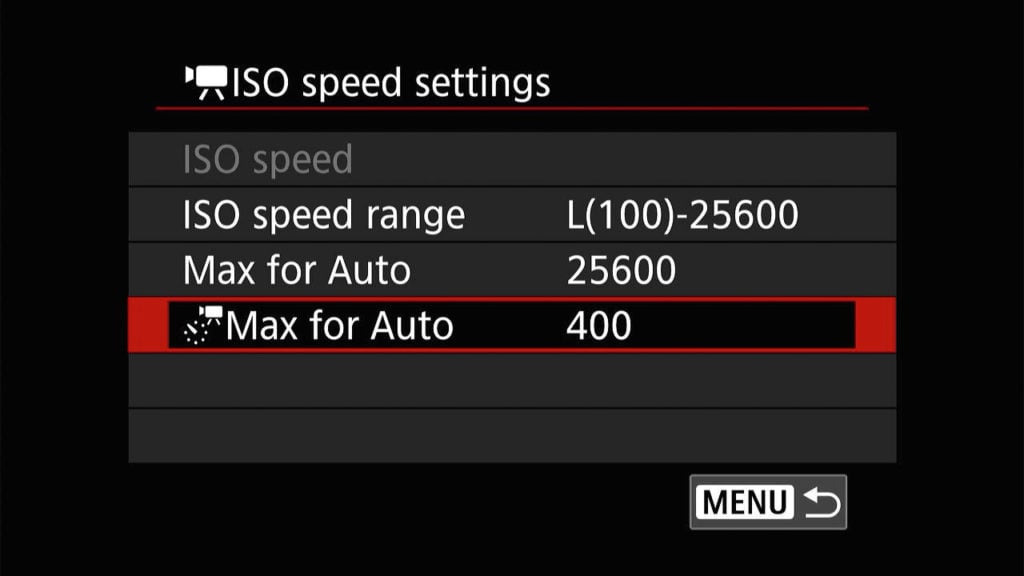
Shooting Menu 2: ISO speed settings: Timelapse max for Auto: This is the maximum ISO setting for time-lapse video recording. The built-in time-lapse mode is incredibly powerful but oddly this is set to a high ISO by default. Since you’ll probably be using a tripod for your time-lapse, I advise setting this to ISO 800 or 400.
Shooting Menu 4: Canon Log settings: Advanced video shooters will want to enable CLOG.3 here. I also use the Cinema Gamut color space, which gets the best colors out of CLOG.3. You can find LUTs online to convert C.LOG3 Cinema Gamut to Rec.709. (You can also adjust the sharpness to 3 in the characteristic panel for sharper output but of course that’s up to your preference).
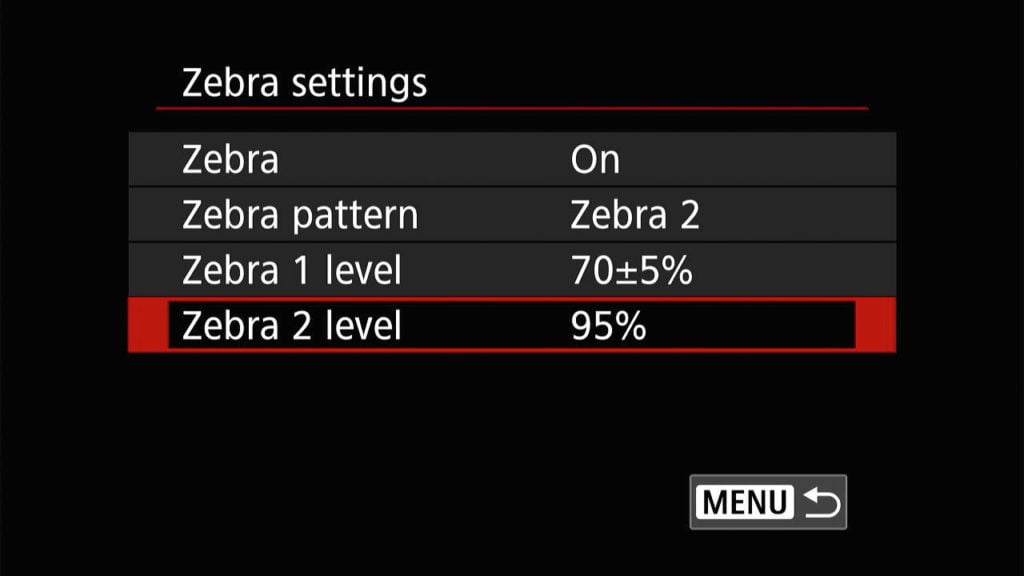
Shooting Menu 7: Zebra settings: If you’re using the C.LOG3 setting referenced previously it’s important to know what areas of your shot are over-exposed. This is where Zebras come in useful; I recommend turning this on and setting Zebra pattern to 2 and Zebra 2 level to 95%. This will make it so you’ll see a Zebra effect on highlight areas that are near being blown out.
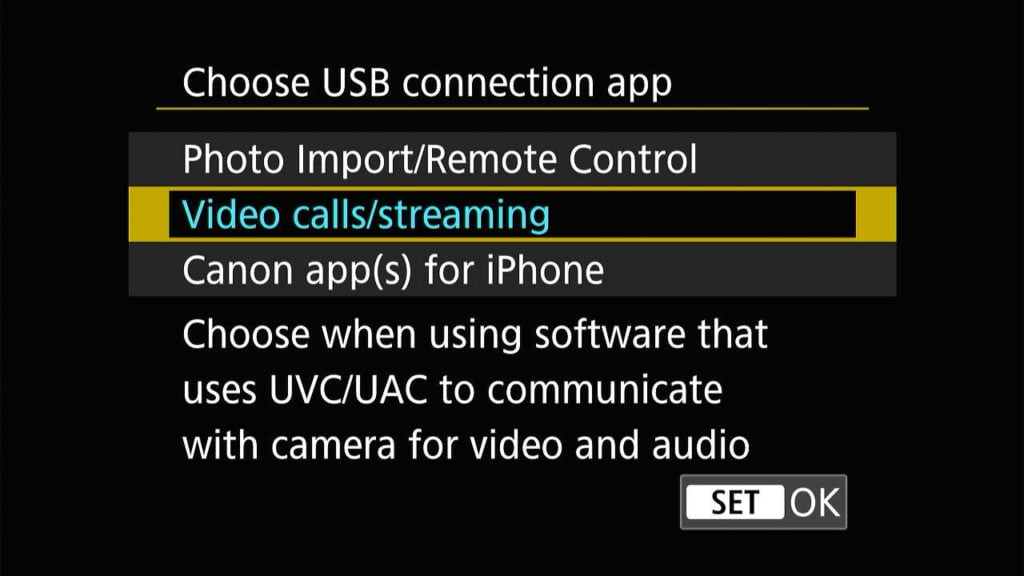
Setup Menu 4: Choose USB connection app: You can use the Canon EOS R8 as a webcam without any additional hardware or software. Change the USB connection app here to “Video calls/streaming,” then plug in a USB-C cable and most computers will recognize the camera as a webcam.
Canon R8 Settings FAQ
Does the Canon EOS R8 have IBIS?
No. The Canon EOS R8 does not have in-body image stabilization. For photos, use an RF or RF-S lens with built-in optical IS for shake reduction. For video, the menu has a digital movie IS option that adds software stabilization at the cost of a slight crop.
What is the battery life of the Canon R8?
The R8 uses the LP-E17 battery (the same battery as the R10, R50, RP, and a number of older Canon Rebel DSLRs) and is rated for about 220 shots through the EVF or 370 shots using the rear LCD. Pack at least one spare battery if you plan a full day of shooting.
The R8 has no rear joystick. How do you move the focus point?
Enable Touch & Drag AF (Autofocus Menu 4, covered above). With your eye on the viewfinder you can slide your thumb across the rear screen to move the focus point, similar to how a joystick would work. It takes a few sessions to get used to but it is the standard workaround on bodies in this class.
What is the difference between the Canon R8 and R6 Mark II?
The R8 and R6 Mark II share the same 24.2MP full-frame sensor, DIGIC X processor, and autofocus system. The R6 Mark II adds in-body image stabilization, dual card slots, a rear joystick, a deeper grip, the larger LP-E6NH battery, and a more weather-sealed body. If those features matter to you, the R6 Mark II is worth the price difference. If you want the same image quality and AF in the smallest, lightest possible body, the R8 is the better fit.
Is the Canon R8 good for vlogging?
The R8 is a capable vlogging camera with a fully articulating screen, oversampled 4K up to 60p, and Canon’s subject-detect autofocus. The main vlogging trade-off is the lack of IBIS, so for handheld walking-and-talking shots you’ll want digital movie IS enabled, an RF lens with optical IS, or a small gimbal. The R50 V is a cheaper option if vlogging is your only use case.
That wraps up my list of the best Canon EOS R8 settings. The R8 has been a fun camera to shoot with, and thanks to B&H Photo for lending me the body. If you’re interested in buying an R8 I recommend shopping for a Canon R8 on B&H Photo.
Is there a setting you love on the Canon R8? Let me know in the comments below!

Thanks a lot, very helpful as I´m new to this camera, even if I wont follow all edvices 🙂
Hi Andy: thanks for your hard work and excellent information. Is there a way to lock the focus point at the center on the R8? J
Hey Jay, glad the guide was handy! Couldn’t you just use point focus and keep it in the center?
Just upgraded from the S2 to the R8 and this was extremely useful Andy. I’m an experienced beginner and the additional complexity with the R8 has been daunting. My favorite feature is the built-in level!
Full disclosure: I have never shot in RAW and as I am not making any money from this hobby and typically never print (just posting online) I’ve never felt the need to shoot in RAW. (Besides, Ken Rockwell says that’s okay 😉
I recently did some shooting during a Sierra backpacking trip and discovered that the R8 in JPEG mode is producing images that default to a measure of 2496 x 3744 with a resolution of 350 px per inch. Images on my old S2 defaulted to 4000 x 6000 with a resolution of 72 px/inch.
How do I get the R8 JPEG images to 24 megapixels? What do I not understand here? Shooting landscapes I would like to get the sharpest images possible.
Thanks!
Dave
Hey Dave I spend a lot of time making these guides so this has me so pumped! and wow what an upgrade! congratulations on the new camera (it’s seriously awesome).
So the R8 shoots 4000 x 6000 as well but the resolution you mentioned you likely have a cropped lens on it (or are using a cropped mode). This means yours lens could be designed for a cropped cameras and the R8 knows this so it “zooms” in and uses less of the sensor. RF lenses that are cropped are called “RF-S” so if that is on your lens likely that is the issue.
For more about RF-S lenses: https://ihitthebutton.com/canon-rf-s-lenses-explained/
Feel free to let me know your lens or other info about your setup and I am happy to help! I wish you luck shooting, take it day by day.
Hi Andy, thanks for the super prompt reply that I saw this morning. You’ve put in an amazing amount of work here.
I kind of figure out what was going on last night by looking at page 917 [!] of the User Guide. I wish this had been explained better at the time I purchased the camera as I did not realize that the crop factor still applied to my old lenses on a full frame camera. Now I know.
I also bought the adaptor so that I could use the lenses from my SL2. Fortunately I also bought a used 24-105 lens at the time so that I could compare the performance of various lenses. I am considering downloading the DPP so that I can shoot some RAW for a deeper comparison of the image quality.
So which would be the better image? My SL2 with APS images at 4000×6000 [a document size of 83″x55″ and a resolution at 72 dpi] or the R8 with full-frame images at 4000×6000 [a document size of approx 11″x17″ and a resolution of 350 dpi]. Doing the math my inclination would be that the SL2 image would have more data. Or am I looking at this all wrong?
Cheers
Dave
PS: Flickr page added for context.
The 24-105 is an RF lens
You are welcome! You will build out full frame RF lenses in no time I am sure of it. That 14-35mm f/4 is also a great addition to your camera bag. (I shoot with the 15-35mm f/2.8 but it’s much more expensive.)
Just remember also DPI doesn’t matter when you are talking about resolution. While the resolution is the same keep in mind that the R8 will be using a full frame sensor so it will be bringing in a lot more data. So things like highlights, shadows, color will all likely excel plus it should be sharper since it’s full frame (not to mention the R8 is much newer). People often prefer cropped sensors (like the R7) when shooting wildlife or anything telephoto since they need to be more “zoomed” in + have faster sensor read outs. It looks like you mostly shoot landscape, I’d likely stop using the SL2 completely if I were you since the R8 is a much superior camera.
Do you have access to Lightroom? For $10/m you get LR and Photoshop and it makes editing RAW images pretty easy. That being said if you aren’t comfortable with RAW yet I wouldn’t say you need to use it!
Followed you on Flickr!
Is there a setting for the codec of movie recording? The spec says R8 supports both H.264 and H.265, but in the settings I cannot find any. Does that mean the camera selects the codec automatically depending on the video resolution?
There sadly isn’t a setting but when you enable C-Log it’ll shoot in H.265. That’s basically how you enable it. Hopefully they add a setting in the future!