Just picked up a Canon EOS R7? This post covers the best settings for the Canon EOS R7 for both photo and video.
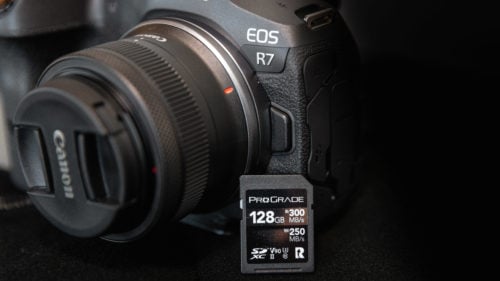
About the R7: The R7 is Canon’s enthusiast APS-C body. It pairs the highest-resolution APS-C sensor in Canon’s lineup (32.5MP) with 5-axis in-body image stabilization, a 15 fps mechanical and 30 fps electronic shutter, a rear joystick, and (unusually for an APS-C body) dual UHS-II SD card slots. That spec set is why the R7 has become Canon’s go-to APS-C body for wildlife, sports, and birding. The settings below assume that’s your use case but apply equally well to general photography.
Now there are a few things I initially recommend doing before using your new camera:
Write down the serial number: You never know when you’ll need the serial number of your camera, from theft to repairs it’s important to have the number off hand.
Charge the R7 battery: To ensure optimal performance I suggest charging the camera battery fully before use, then you won’t have to worry about the camera dying on first use.
Update the firmware: You can find the latest EOS R7 firmware updates on Canon’s website.
Once the battery is charged and you use a SD card to update the firmware we’re finally ready to configure our photo and video settings.

My recommended settings for the Canon EOS R7:
Canon R7 Photo Shooting Settings
First we’re going to turn the camera on into photo mode (the power button provides a switch to video/photo mode).
Before making any changes you’ll want to ensure your R7 is in camera mode P, Av, Tv, or Manual. When shooting with Auto the camera won’t provide all menu options.
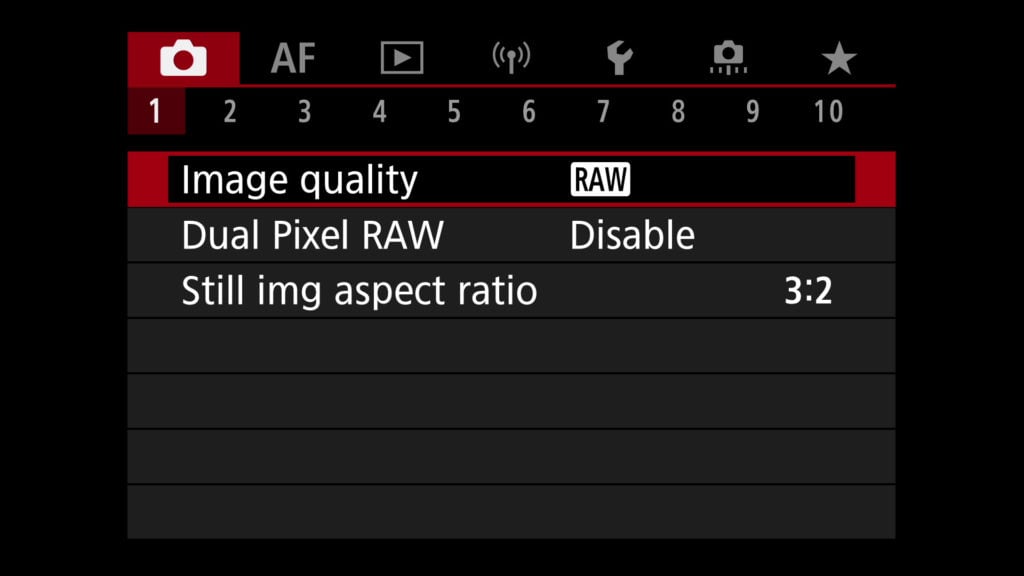
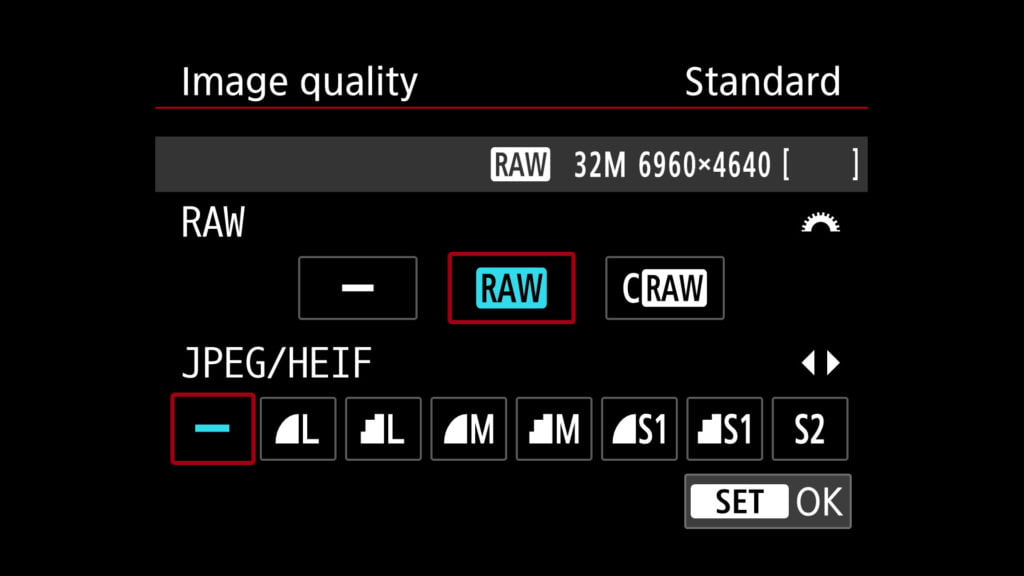
Shooting Menu 1: Image Quality: Set image capture quality to RAW and disable JPEG shooting. Using RAW capture will provide you with the most data when editing photos.
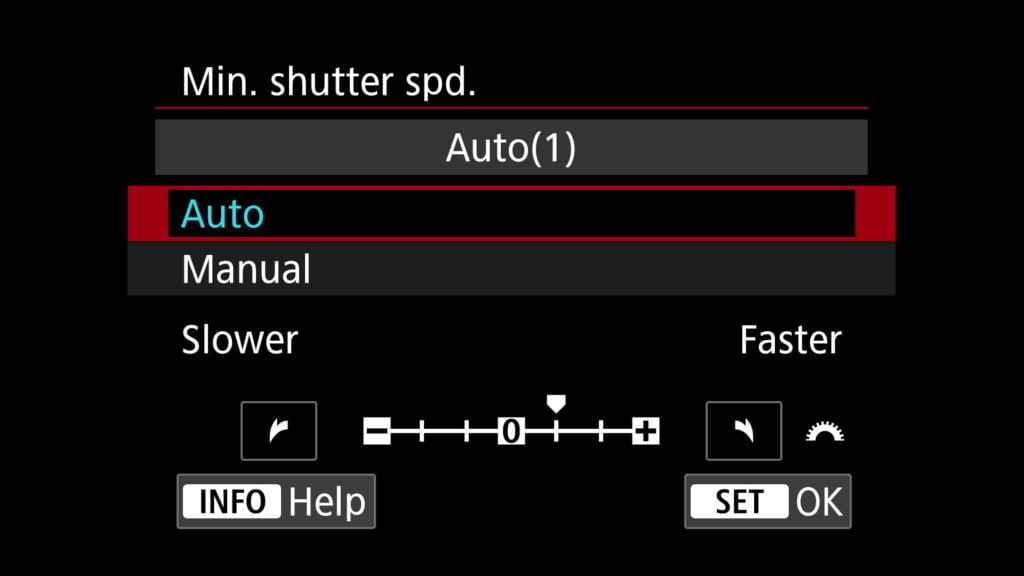
Shooting Menu 2: ISO speed settings: Change Min. shutter spd. to auto(1). I love this options since it’ll result in sharper images while handheld shooting making the camera prefer a faster shutter speed and higher ISO. You can also increase the default 6400 auto ISO maximum to 12800 here. This is up to your preference, but it’s nice to know this area exists!
Shooting Menu 2: Auto Lighting Optimizer: If shooting RAW Auto Lighting Optimizer will not affect your RAW files but modifies the preview images on your camera. It’s best to disable this feature so you’ll know exactly what photo you’re getting. If you’re shooting JPG the mode can be helpful to balance the light/dark areas of a photo.
Shooting Menu 5: High ISO speed NR: I recommend changing this to low since you can always apply more noise reduction in post processing.
Shooting Menu 7: Release shutter without card: I recommend turning this off since it can only lead to you accidentally forgetting a memory card in my opinion.
Shooting Menu, Tab 8: Auto Level: Here is a unique option that automatically levels your photo using IBIS. Keep in mind if you enable this it’ll disable electronic 1st-curtain and H/H+ shooting mode. If you’re shooting landscapes this can be a helpful option to have the camera automatically level your photos.
Shooting Menu 8: Image review: Review duration: Here you can change the amount of time images pop up on screen after shooting them for previewing. This defaults to 2 seconds but can be increased or disabled.
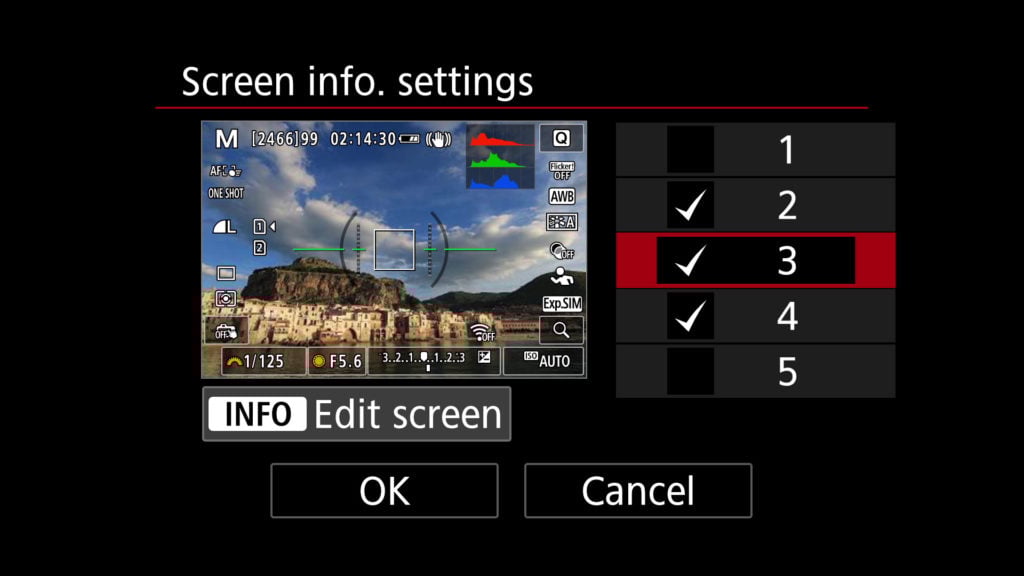
Shooting Menu 9: Shooting info. disp.: Screen info. settings: I prefer to disable a few of these so you don’t have to cycle through so many when changing views. I keep on 2, 3, and 4, you can modify 3 to show the level and histogram, while 4 gives you a clean view.
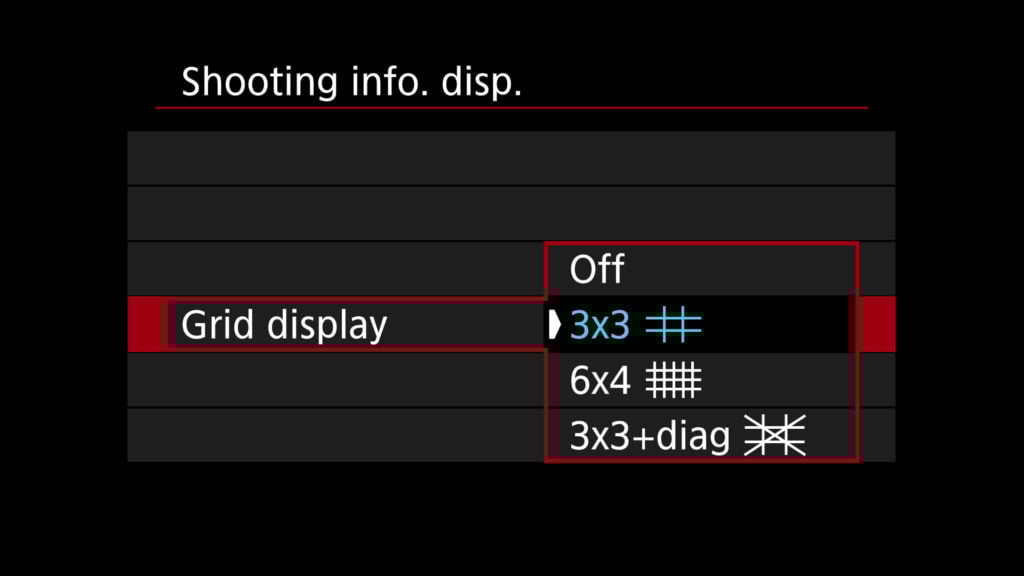
Shooting Menu 9: Shooting info. disp.: Grid display: Typically having a grid overlay can be helpful for shooting, the 3×3 grid is one of the best.
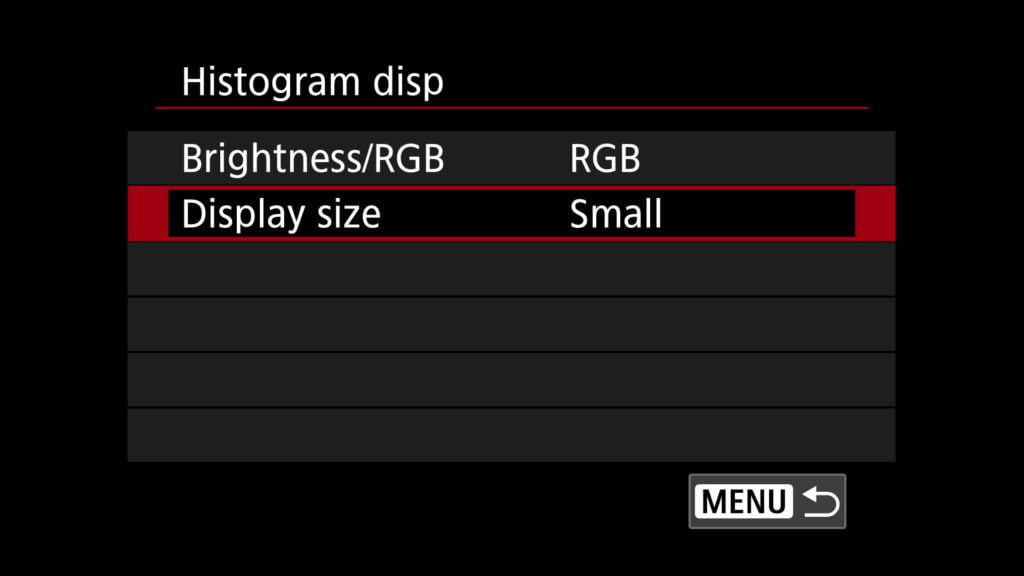
Shooting Menu 9: Shooting info. disp.: Histogram disp: Change the display to RGB and the size to small so it takes up a lot less space in the viewfinder and screen. The RGB mode will allow you to see brightness level of all color channels.
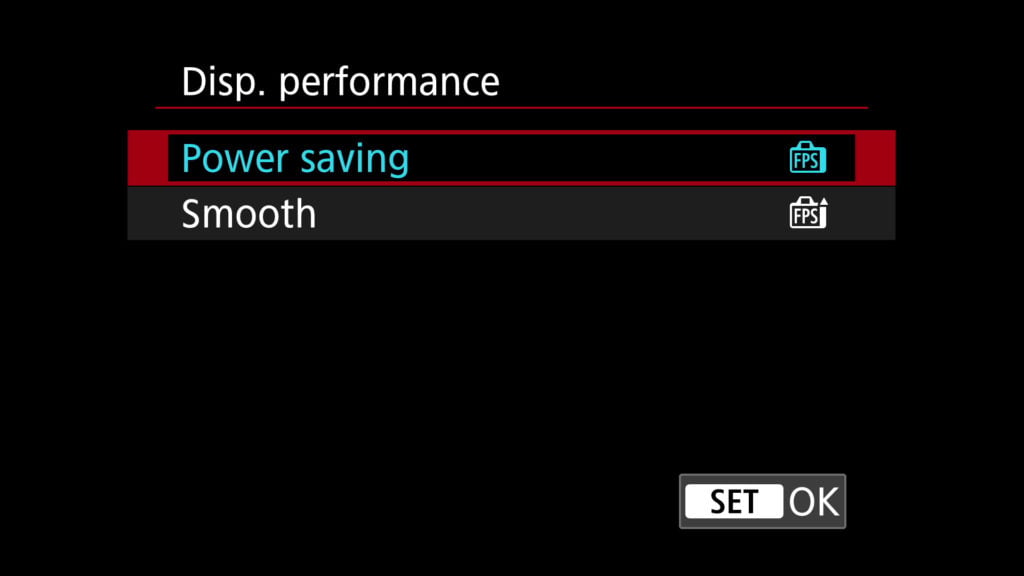
Shooting Menu 9: Disp performance: If you’re shooting action you’ll want to change this to smooth but power saver is great for travel photographers and most shooters.
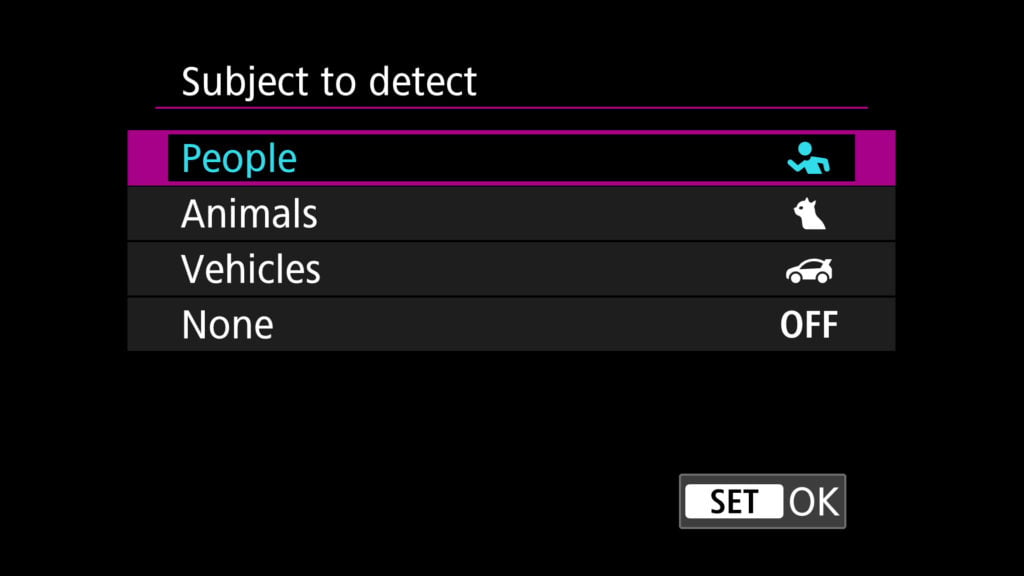
Autofocus Menu 1: Subject to detect: Important to know about this option. It lets you select what subject type the autofocus system prioritizes (people, animals, vehicles, or none) on the Canon R7. For wildlife or birding, set this to Animals. The R7’s subject detection for birds and animals is one of its standout features.
Autofocus Menu 3: AF-assist beam firing: Disable, this removes the red light when trying to focus in a low light situation.
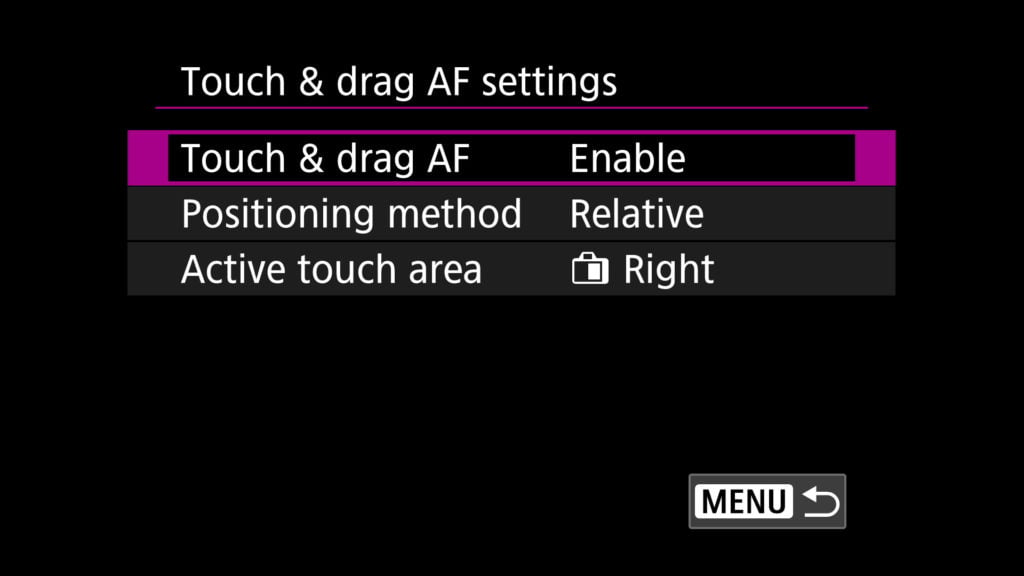
Autofocus Menu 4: Touch & drag AF settings: Touch & drag AF: Enabling this will allow you to drag your thumb on the screen while using the viewfinder to move the autofocus point. Of course you can use the joystick but it can be a bit high for your thumb to reach.
Autofocus Menu 4: Limit AF methods: This is great for disabling the large amount of AF selection options, I recommend only keeping on Spot AF, 1-point AF, Whole area AF.
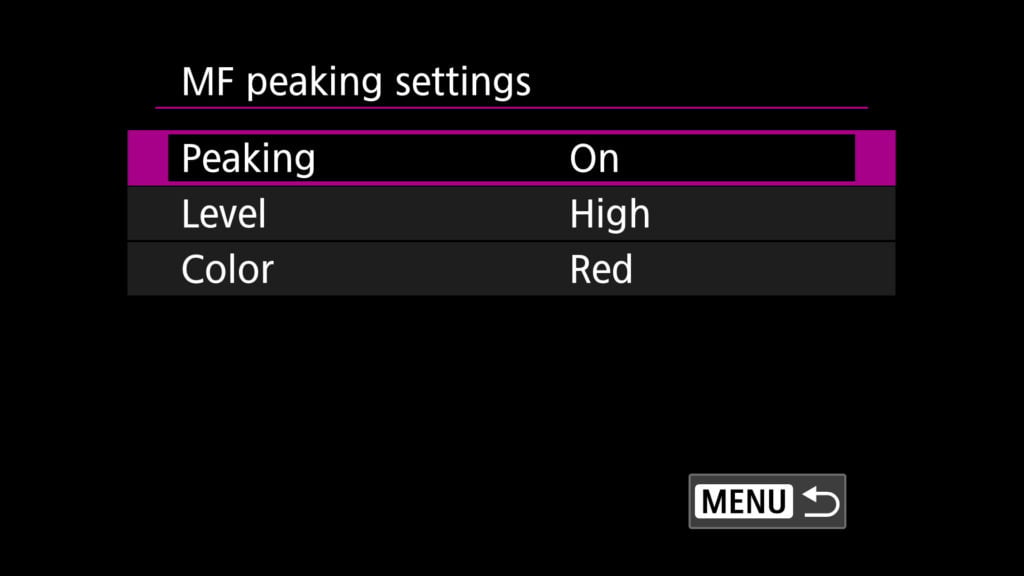
Autofocus Menu 5: MF peaking settings: Peaking: Enable this setting to have an area highlighted with a color when it’s in focus while using manual focus.
Playback Menu 5: Magnify (apx): Set this to actual size to have the magnification button instantly go to full size on the image to make sure you nailed focus on the image.
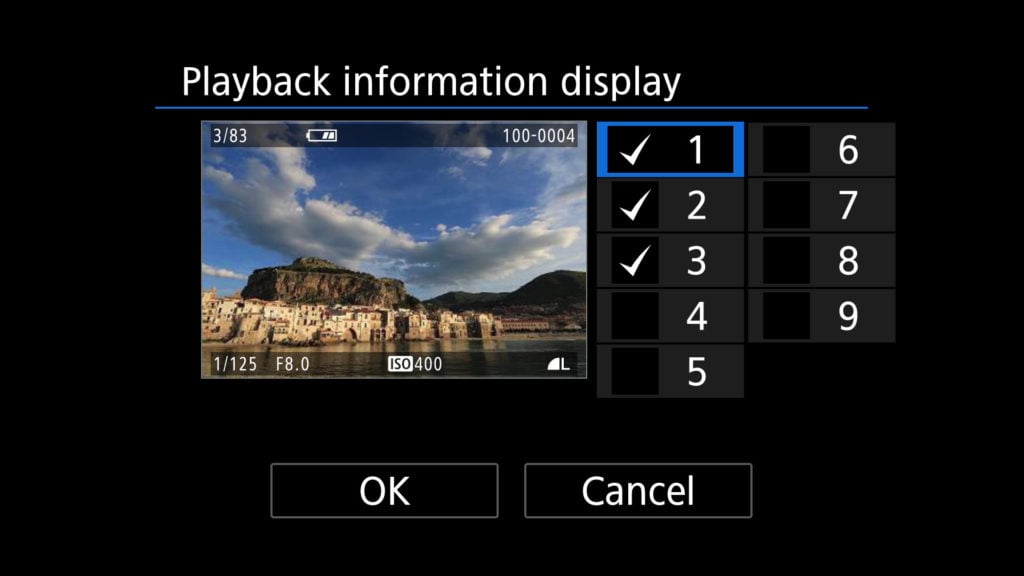
Playback Menu 6: Playback information display: Enable 1, 2, and 3 only, otherwise it’s too many menus to cycle through.
Playback Menu 6: Highlight Alert: Enable, this will make over-exposed areas of your image blink so it’s easy to tell what is over-exposed.
Wireless Menu 1: Airplane mode: On, when not using WIFI I recommend leaving airplane mode on to save battery.
Setup Menu 1: Format card, important option to know the location of, I always use the camera to format my card rather than a computer (note: formatting will erase all content of your card).
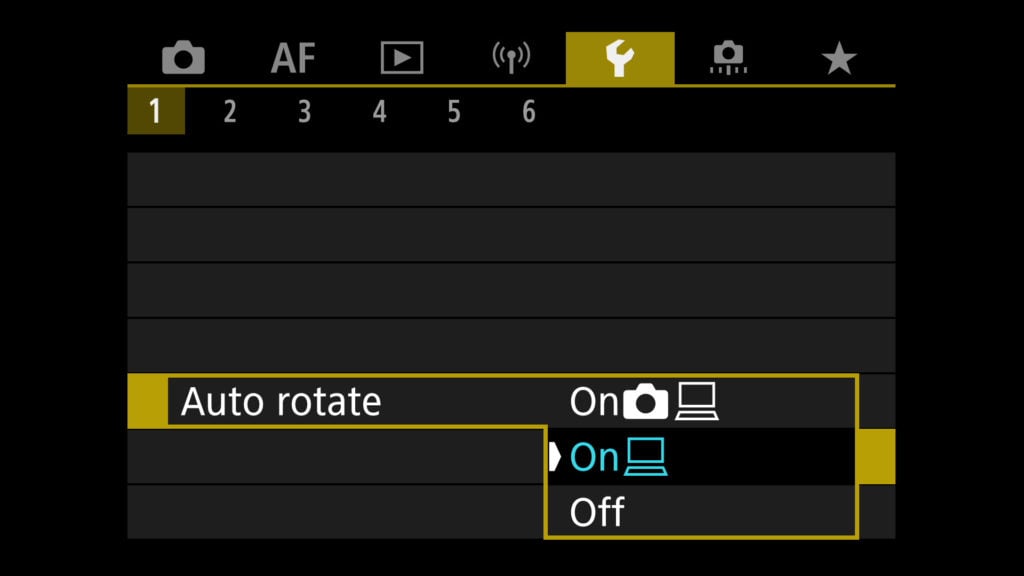
Setup Menu 1: Auto Rotate: On computer, this will disable the image rotating on the back of the screen when reviewing.
Setup Menu 2: Mode Guide: Disable mode guide, this option makes a popup every time you select a mode on the camera, for example when you switch from P to Av it’ll have an information popup about the mode. Most users who know what each mode is will not need this.
Setup Menu 3: Beep: Here you can disable the beep every time your camera focuses.
Setup Menu 6: Copyright information: enter your desired information.
After changing these settings you’ll want to make sure your camera is setup to connect to your phone’s WIFI as well so you can use the app if needed.
I also recommend setting up your favorite functions using the custom menu option. For example on mine I include format card and auto exposure bracket options.
Canon R7 Video Shooting Settings
Make sure to flick the power switch to video mode to see the video settings on the R7. Here are some of my favorite settings for shooting video on the Canon EOS R7.
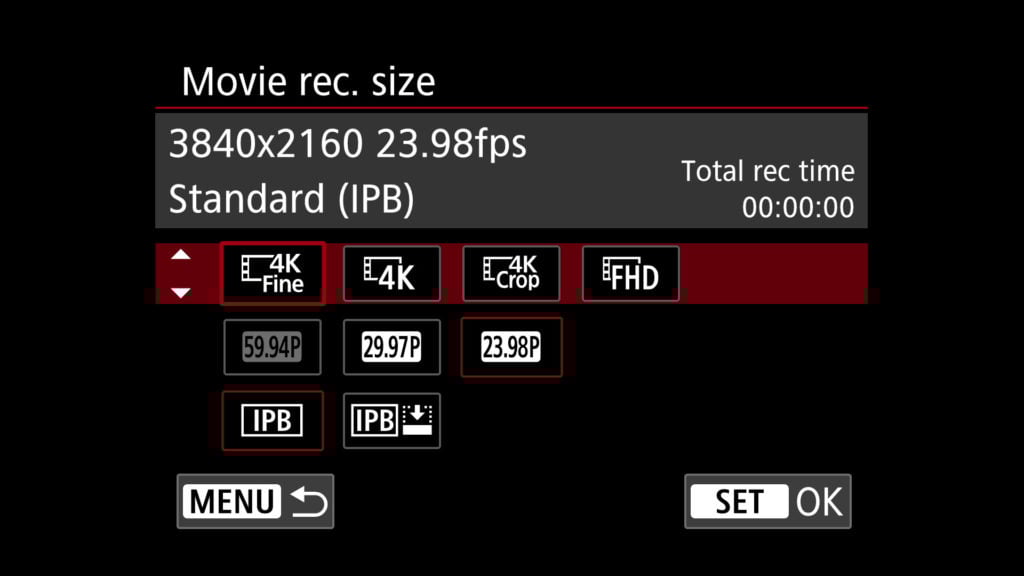
Shooting Menu 1: Movie rec. size: Set video mode to 4K fine, 23.98P, IPB. This is my favorite for sharp cinematic footage. Using the 4K fine setting makes the camera oversample the entire sensor for extra sharp footage. To shoot 120fps or 60fps slow motion you’ll have to disable 4K fine.
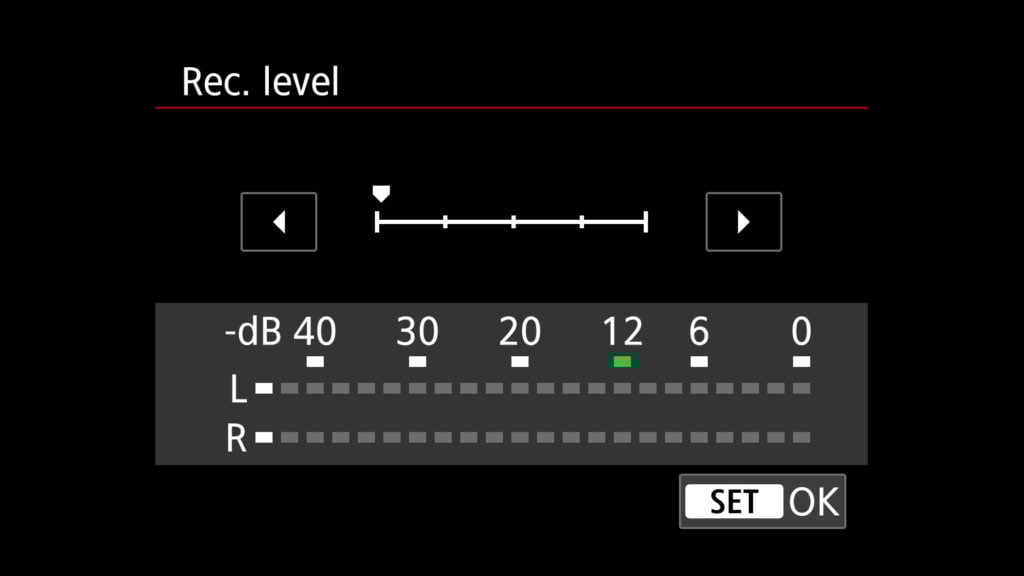
Shooting Menu 1: Sound recording: you’ll want to change this to manual if you are using an external microphone. This takes some tinkering but the quality of your audio will be a lot better using manual for this setting when using a microphone. I typically put mine one notch from the bottom setting and try to make my external microphone output as loud as possible since the pre-amp in the camera can cause hissing/noise.
Shooting Menu 2: ISO speed settings: Timelapse max for Auto: Here can set the max ISO used in time-lapse movie recording. I recommend changing this to ISO 800 or 400, since you’re likely using a tripod for your time-lapse you won’t want the frames going to the default ISO 6400.

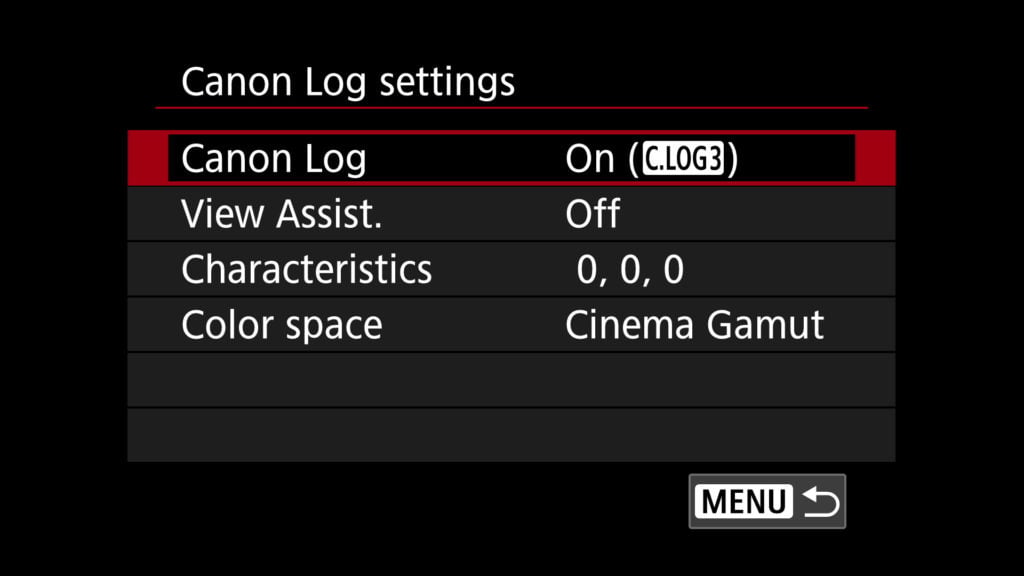
Shooting Menu 2: Canon Log settings: (for advanced video shooters) If you plan on color grading I highly recommend using C.LOG3 here and the Cinema Gamut Color space. You can find luts online that will convert your C.LOG3 Cinema Gamut footage to Rec.709 (You can also set the sharpness to 3 in the characteristic panel for sharper output but of course that’s up to your preference).
Shooting Menu 6: Zebra settings: If you’re shooting C.LOG3 it’s important to know what areas of your frame are overexposed and that’s where Zebra’s come in handy. I recommend turning this on, setting the Zebra pattern to 2, and setting Zebra 2 level to 95%. This will make a Zebra effect display when highlights are nearly blown out.

R7 Settings for Bird and Wildlife Photography
The R7 is widely considered Canon’s best APS-C body for birding and wildlife, mainly thanks to the 32.5MP sensor (the extra reach is useful with telephoto lenses), animal/bird subject detection, and the 30 fps electronic shutter. If wildlife is your main use case, layer these settings on top of the photo settings above:
- Drive mode: Set to High-speed continuous+ for the full 30 fps electronic shutter, or High-speed continuous for 15 fps mechanical when you want to avoid rolling shutter on fast subjects (e.g., birds in flight against a clean sky).
- Subject to detect: Set to Animals. The R7’s bird and animal eye/face detection is one of its standout features.
- AF method: Whole area AF combined with subject detection works well for most birds in flight. Use 1-point or Spot AF when you want to lock onto a specific eye on a perched subject.
- Back button focus: Many wildlife shooters separate focus from the shutter button. In Customize buttons (Operation menu), assign Metering and AF start to the AF-ON button (or to the * button), and remove AF from the shutter button. You can then hold AF-ON to track a subject and tap the shutter as much as you want without re-focusing.
- Pre-shooting (Pre-shot): The R7’s RAW Burst mode with Pre-shooting captures up to half a second of buffer frames before you fully press the shutter, which is useful for unpredictable action (perched birds taking off). Enable it from the drive mode menu when you need it.
- Tracking sensitivity: In the AF tracking menu, leave Tracking sensitivity at the default for most subjects, or push it more toward “Locked on” for birds in flight against busy backgrounds.
Canon R7 Settings FAQ
Does the Canon EOS R7 have IBIS?
Yes. The Canon EOS R7 has 5-axis in-body image stabilization rated for up to 8 stops of shake reduction when paired with a compatible RF lens that has its own optical IS (Coordinated Control IS). Even with non-IS lenses you’ll get several stops of stabilization from the body alone, which is why the R7 handles handheld low-light and long telephoto work well.
What is the Canon R7’s burst rate?
The R7 shoots at up to 15 frames per second with the mechanical shutter and up to 30 frames per second with the electronic shutter, both with continuous autofocus tracking. The electronic shutter has some rolling shutter distortion on very fast subjects, so it’s not always the right pick. Mechanical is the safer default outside of high-speed action.
Does the Canon R7 have dual card slots?
Yes. The R7 has two SD card slots (both UHS-II). You can set them up to record to one card, to split JPEG and RAW between slots, or to record the same files to both slots for instant backup.
What is the latest firmware for the Canon R7?
Version 1.8.0 is the most recent firmware update for the EOS R7. It added 3:2 and 1:1 aspect ratio options for stills, fixed a few stability issues during high-speed continuous shooting and Bluetooth communication, and improved compatibility with the RF-S 7.8mm F4 STM Dual lens.
What battery does the Canon R7 use?
The R7 uses the LP-E6NH battery, the same higher-capacity battery as the EOS R5, R6, R6 Mark II, and several other Canon bodies. Canon rates it at about 660 shots per charge using the LCD, or 380 through the viewfinder.
Canon R7 vs R10: what’s the difference?
Both are APS-C, but the R7 is the enthusiast body and the R10 is the entry-level body in the same generation. The R7 has a 32.5MP sensor (vs 24.2MP on the R10), in-body image stabilization (the R10 has none), the larger LP-E6NH battery (the R10 uses the smaller LP-E17), dual SD card slots (R10 has one), a rear joystick, and weather sealing. The R10 is lighter, smaller, and cheaper. If wildlife, sports, or low-light handheld work is the goal, the R7 is worth the upgrade.
That wraps up my list of the best Canon R7 settings. The R7 has been a fun camera to shoot with, and thanks to B&H Photo for lending me the body. If you’re interested in buying an R7 I recommend shopping for a Canon R7 at B&H Photo.
What are your favorite settings to change on the Canon EOS R7? Let everyone know in the comments below.

I’ve found that some of these settings that he suggested worked perfectly and others, not so much. When I initially watched this, I changed each and everything on my camera to what was mentioned. The first time I went to use the camera afterwards, the camera was on delay mode and would take a picture with a 10 second delay. I had a helluva time searching how to change this setting back to auto mode. Best of luck everyone!
Glad it was helpful Ace, I will note I don’t recommend changing the drive mode to a timed shutter anywhere so you likely hit it by mistake!
Did you have any problems playing eos r7 videos downloaded on a Windows computer? Or, have you heard of this from anyone else when using C.LOG3? Any suggestions?
I think you need HEVC codecs, also if the footage struggles to render you can convert the file to a different format.
Helpful review.
Happy to hear this Scott! Enjoy the camera.
Very Easy to follow as it is even with manu on screen step by step. It had far better if it were downloading facility. TQ a lot.
Glad it was helpful Mohan!